Understanding Radon in Real Estate: Detection, Mitigation, and Disclosure
Introduction: The Silent Threat of Radon in Real Estate
Radon is an invisible, odorless radioactive gas that can seep into homes and buildings from the ground. While it rarely draws the same attention as asbestos or lead paint, radon poses a significant health risk and is a critical factor in real estate transactions across the United States and many other countries. Elevated radon levels are the second leading cause of lung cancer after smoking, making awareness and management essential for homeowners, buyers, sellers, and real estate professionals alike.
Despite its dangers, radon often goes undetected because it cannot be seen, smelled, or tasted. The Environmental Protection Agency (EPA) estimates that nearly one in fifteen homes in the U.S. has radon levels above the recommended action level. Increasingly, buyers demand radon testing and expect mitigation in homes with elevated levels. At the same time, many states have disclosure laws requiring sellers to share known radon test results and mitigation history.
This comprehensive guide will walk you through everything you need to know about radon in real estate: what it is, how it enters properties, detection methods, the costs and process of mitigation, legal disclosure requirements, and practical tips for buyers and sellers. Whether you’re a real estate investor, homeowner, or agent, understanding radon’s implications can help you make informed decisions, protect property value, and ensure the safety of occupants.
What Is Radon and Why Does It Matter in Real Estate?
Understanding Radon Gas
Radon is a naturally occurring radioactive gas produced by the decay of uranium in soil, rock, and water. It moves through the ground and can enter buildings through cracks and openings in foundations, sumps, drains, and construction joints. Once inside, radon can accumulate to hazardous levels, especially in lower areas like basements and crawl spaces.
Health Risks for Occupants
Long-term exposure to elevated radon levels increases the risk of lung cancer. According to the EPA, radon is responsible for about 21,000 lung cancer deaths in the U.S. every year. Smokers exposed to high radon levels face an even higher risk. The EPA recommends action if indoor air levels reach or exceed 4 picocuries per liter (pCi/L), but even lower levels can be harmful over time.
Impact on Real Estate Transactions
Radon’s presence can influence property values, negotiation leverage, and transaction timelines. Buyers may require radon testing as part of due diligence, and properties with known high levels may need mitigation before closing. State and local laws increasingly require sellers to disclose any known radon issues, test results, or mitigation systems, making compliance a legal and ethical imperative.
How Radon Enters Properties: The Science and Entry Points
Common Entry Points
- Cracks in solid floors and walls
- Construction joints
- Gaps in suspended floors
- Gaps around service pipes
- Sump pits and floor drains
- Crawlspaces with exposed soil
Factors That Influence Indoor Radon Levels
- Soil composition: Properties built on granite, shale, or uranium-rich soils are at higher risk.
- Foundation design: Basements and slab-on-grade homes tend to accumulate more radon than homes on pilings.
- Home ventilation: Poor ventilation can trap radon inside, increasing concentrations.
- Weather and pressure: Differences in air pressure between a building’s interior and the ground draw radon in, especially during colder months.
Radon Detection: Testing Methods and Best Practices
Short-Term vs. Long-Term Testing
There are two primary approaches to radon testing:
- Short-term tests: Typically last 2–7 days. Ideal for quick screening, often used during real estate transactions.
- Long-term tests: Last 90 days to a year. Provide a more accurate picture of year-round average radon levels.
Types of Radon Test Devices
- Charcoal canisters and liquid scintillation detectors: Absorb radon for later lab analysis. Inexpensive and widely used.
- Alpha track detectors: Used for long-term testing and provide cumulative exposure data.
- Continuous radon monitors (CRMs): Provide hour-by-hour readings. Often used by certified professionals for real estate transactions.
Best Practices for Accurate Testing
- Test the lowest lived-in level of the home (typically the basement).
- Keep windows and exterior doors closed for at least 12 hours before and during the test.
- Avoid running fans or systems that bring in outside air.
- Place test kits away from drafts, direct sunlight, and high humidity.
Professional vs. DIY Testing
While do-it-yourself kits are available at hardware stores and online (typically $15–$40), many buyers and sellers opt for professional testing (costing $150–$250) for added credibility, especially during negotiations. Professional testers are certified by organizations such as the National Radon Proficiency Program (NRPP) or the National Radon Safety Board (NRSB).
Radon Mitigation: Costs, Methods, and Effectiveness
When Is Mitigation Needed?
The EPA recommends mitigation for any property with radon levels at or above 4 pCi/L. However, some buyers and health-conscious owners choose to mitigate at lower levels, particularly if there are children or smokers in the household.
Common Mitigation Techniques
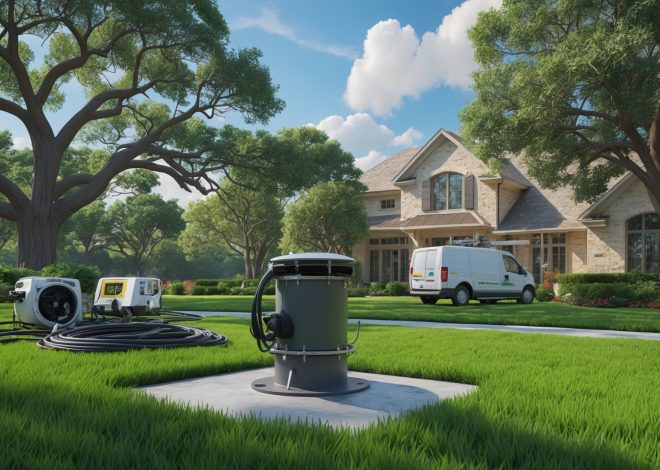
- Sub-slab depressurization: The most common and effective method. A PVC pipe is inserted through the foundation slab into the soil beneath, connected to a fan that vents radon gas safely above the roofline.
- Sump pit depressurization: If the property has a sump pit, it can be sealed and used as part of the venting system.
- Crawlspace ventilation: For homes with crawlspaces, either installing a vapor barrier with venting or using mechanical ventilation can reduce radon entry.
- Sealing cracks and openings: While not sufficient alone, sealing foundation cracks and gaps helps enhance other mitigation methods.
Cost Breakdown of Radon Mitigation
- Professional mitigation system: $800–$2,500, depending on foundation type, home size, and system complexity.
- Annual maintenance and monitoring: $100–$200. This includes fan inspection, replacement filters, and periodic re-testing.
- DIY sealing and minor improvements: $50–$200, though these are generally supplemental to a full system.
Effectiveness and Maintenance
When professionally installed, radon mitigation systems can reduce indoor radon levels by up to 99%. Most systems last 5–10 years before fans require replacement. Annual or biennial testing is recommended to ensure ongoing effectiveness. Mitigation systems should be clearly labeled and documented for disclosure to future buyers.
Legal Compliance: Radon Disclosure and Real Estate Laws
Seller Disclosure Requirements
Laws regarding radon disclosure vary by state. Some states require sellers to disclose known radon test results or mitigation systems, while others recommend but do not mandate disclosure. Failing to comply can leave sellers liable for future legal claims if buyers discover high radon levels post-sale.
- Illinois, Minnesota, and Florida: Require explicit disclosure of known radon presence, testing, or mitigation.
- New Jersey and Pennsylvania: Mandate providing buyers with EPA radon awareness brochures.
- Other states: Disclosure may be included in general property condition forms or left to buyer inquiry.
Best Practices for Sellers
- Test your property before listing, especially if it has not been tested in the past two years.
- Disclose all test results—regardless of outcome—as well as any mitigation system details.
- Provide documentation of mitigation installation, maintenance, and retesting.
Best Practices for Buyers
- Request recent radon testing records and mitigation documentation as part of due diligence.
- Include radon testing and mitigation as contingencies in the purchase agreement.
- If radon levels are high, negotiate for mitigation installation or a seller credit before closing.
Radon Myths and Misconceptions
- Myth: Newer homes don’t have radon problems.
Fact: New construction can actually increase risk due to tighter building envelopes that trap radon inside. - Myth: Radon is a concern only in certain regions.
Fact: Elevated radon levels have been found in every state and in homes with no apparent risk factors. - Myth: Radon testing is expensive and complicated.
Fact: DIY test kits are affordable and simple to use, and professional testing is widely available. - Myth: Once mitigated, there’s nothing more to do.
Fact: Regular maintenance and retesting are crucial to ensure ongoing protection.
Case Studies: Radon Management in Real Estate Transactions
Case Study 1: Successful Negotiation After High Radon Discovery
A family buying a 1980s home in Pennsylvania requested radon testing during their inspection period. The results showed 8 pCi/L, double the EPA action level. The buyers negotiated with the sellers to install a sub-slab depressurization system prior to closing, with the sellers covering the $1,400 cost. After installation, a follow-up test confirmed levels dropped to 0.8 pCi/L, allowing the transaction to proceed smoothly and the buyers to move in with peace of mind.
Case Study 2: Disclosure Failure Leads to Legal Dispute
In Illinois, a seller failed to disclose a previous radon test showing elevated levels, believing it unnecessary because they had not completed mitigation. The buyers discovered the issue after moving in and requested remediation. When the seller refused, the buyers pursued legal action and were awarded $5,000 for mitigation costs and damages. This case underscores the importance of transparent disclosure and compliance with state laws.
Case Study 3: Proactive Mitigation Adds Value
An investor in Colorado proactively installed a radon mitigation system in a rental property, marketing the home as “radon-safe.” This feature attracted health-conscious tenants and allowed for a slight rent premium, offsetting the $1,200 investment within two years. The system’s presence became a selling point in subsequent real estate listings, demonstrating how addressing radon can enhance both safety and property value.
Step-by-Step: Setting Up a Radon Mitigation System
- Test the property: Use a certified professional or a reliable DIY test kit to determine baseline radon levels.
- Consult a mitigation professional: If levels are 4 pCi/L or higher, get quotes from certified radon mitigation contractors.
- Choose the appropriate system: The contractor will recommend the best method based on your foundation type and home layout.
- Install the system: Most sub-slab systems can be installed in a day. The contractor will drill a hole in the basement slab, insert a PVC pipe, and connect it to an exterior fan vented above the roofline.
- Seal cracks and openings: Supplement the system by sealing foundation cracks and joints.
- Post-installation testing: Re-test the property within 30 days to confirm radon levels have dropped below 4 pCi/L.
- Document the system: Keep records of installation, test results, and maintenance for future disclosure.
Maintenance Best Practices for Radon Systems
- Test radon levels every 1–2 years, or after major renovations.
- Inspect the mitigation fan annually for noise or failure.
- Check visible piping for cracks or loose joints.
- Clean or replace system filters as needed (if applicable).
- Ensure exterior vent remains unobstructed and above snow or debris.
- Keep documentation updated for future buyers, tenants, or inspections.
Practical Tips for Buyers, Sellers, and Real Estate Professionals
- Buyers: Always request radon testing and ensure results are current. Factor mitigation costs into your offer if needed.
- Sellers: Proactively test and, if necessary, mitigate before listing. Transparent disclosure builds trust and prevents deal delays.
- Agents: Stay up-to-date on local radon disclosure laws and educate clients about the importance of testing and mitigation.
- Landlords: Periodically test rental properties and disclose radon information to tenants as required by law.
Conclusion: Protecting Health, Value, and Compliance
Radon is a critical, though often underestimated, consideration in real estate. Its health risks are well documented, and its impact on property transactions and legal compliance is growing each year. By understanding how radon enters homes, recognizing the importance of accurate testing, and knowing the costs and process of mitigation, both buyers and sellers can navigate transactions with greater confidence and transparency.
For sellers, proactive testing and mitigation not only protect occupants but can also add tangible value and appeal in a competitive market. Buyers benefit by ensuring the long-term safety of their investment and gaining leverage in negotiations if mitigation is required. Real estate professionals who stay informed about radon laws and best practices are better equipped to guide their clients, avoid legal pitfalls, and foster trust throughout the buying or selling process.
Ultimately, addressing radon is not just a matter of regulatory compliance—it’s a smart investment in health, property value, and peace of mind. Regular testing, clear documentation, and a willingness to mitigate when needed ensure that everyone in the real estate ecosystem is protected from this silent hazard. Whether you’re considering your first home, managing a rental portfolio, or representing clients, make radon awareness and action a standard part of your real estate strategy.