
How to Prepare a Real Estate Property for Sale: A Comprehensive Pre-Listing Checklist
Introduction: Why Pre-Listing Preparation Matters
Selling a real estate property is a major financial transaction, and the difference between a quick, profitable sale and a sluggish, disappointing one often lies in the preparation. Buyers today are well-informed and have high expectations. Properties that look neglected, need repairs, or lack curb appeal tend to linger on the market or receive lowball offers. On the other hand, a well-prepared property not only attracts more interest but also commands a stronger price and smoother negotiations.
Pre-listing preparation involves more than just tidying up. It’s a systematic process that covers repairs, cleaning, decluttering, staging, compliance checks, and documentation. Each step can impact both your timeline and your bottom line. Whether you’re an owner selling your home, an investor offloading a rental, or an agent advising clients, having a comprehensive checklist ensures nothing crucial is overlooked. In this guide, we’ll break down every aspect of pre-listing property preparation, from strategic fixes to legal requirements, so you can approach your sale with confidence and maximize results.
Step 1: Assess the Property Objectively
Conduct a Walkthrough with a Critical Eye
Start by walking through the property as if you were a first-time visitor. Take notes on anything that stands out as outdated, damaged, or unappealing. Look for:
- Peeling paint, scuffed walls, or damaged trim
- Loose handles, squeaky doors, or sticking windows
- Stained carpets, scratched floors, or cracked tiles
- Evidence of leaks, water stains, or mold
- Unpleasant odors from pets, smoke, or mildew
Consider a Professional Pre-Inspection
Hiring a licensed home inspector for a pre-listing inspection can uncover hidden issues before buyers do. This step enables you to fix problems in advance and provides documentation that can reassure buyers, potentially speeding up negotiations. Typical costs range from $300–$600, depending on property size and location.
Step 2: Address Repairs and Maintenance
Prioritize High-Impact Fixes
Not all repairs are equal. Focus on those that impact safety, functionality, and first impressions:
- Electrical: Replace faulty switches, update old outlets, and ensure all fixtures work.
- Plumbing: Fix leaks, drips, slow drains, and running toilets.
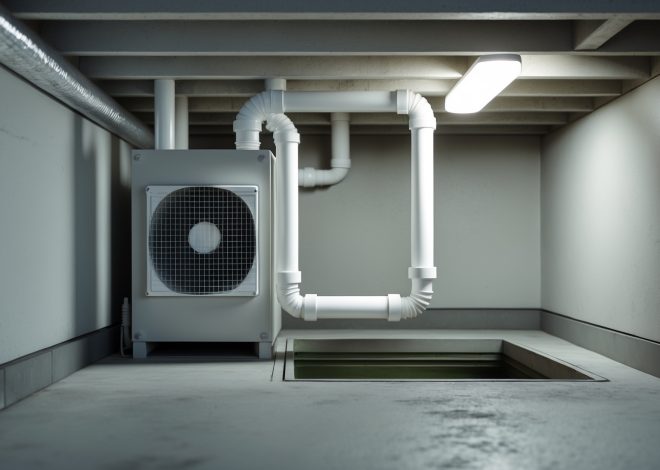
- HVAC: Service heating and cooling systems; replace filters.
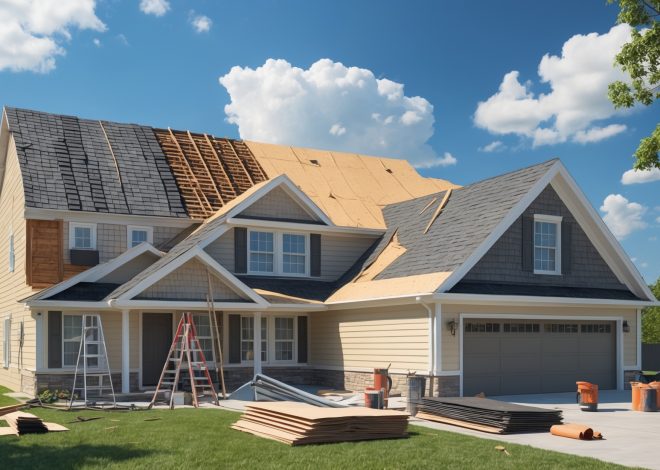
- Roof & Gutters: Repair damaged shingles, clear gutters, check for leaks.
- Windows & Doors: Replace cracked glass, ensure smooth operation, add weatherstripping if needed.
Cosmetic Updates
Fresh paint in neutral colors, updated hardware (such as cabinet pulls and doorknobs), and new light fixtures can modernize a space with minimal investment. Budget $300–$2,000, depending on the extent of cosmetic improvements.
Step 3: Deep Clean Every Area
Interior Cleaning Checklist
- Shampoo carpets and steam-clean rugs
- Wash windows inside and out
- Clean baseboards, moldings, and vents
- Scrub kitchens and bathrooms, including grout and caulking
- Dust ceiling fans, blinds, and light fixtures
Consider hiring professional cleaners for a thorough job, especially if the property has been vacant or heavily lived in. Professional cleaning typically costs $200–$500, based on property size.
Exterior Cleaning
- Power wash siding, walkways, and driveways
- Clean out garages and sheds
- Remove cobwebs and debris from entryways and porches
Step 4: Declutter and Depersonalize
Eliminate Distractions
Buyers need to visualize themselves living in the space. Remove personal items such as family photos, collections, and children’s artwork. Clear surfaces of mail, toiletries, and excess decor. Rent a storage unit if necessary to store bulky furniture or seasonal items.
Organize Closets and Storage Areas
Overstuffed closets signal a lack of storage. Neatly organize or partially empty them to create the impression of abundant space. Do the same with kitchen cabinets and bathroom vanities.
Step 5: Boost Curb Appeal
Landscaping Essentials
- Mow the lawn and edge borders
- Trim shrubs, trees, and hedges
- Weed flowerbeds and add fresh mulch
- Plant seasonal flowers near the entryway
- Remove dead plants and debris
Exterior Touch-Ups
- Paint or replace the front door for a welcoming entrance
- Replace outdated house numbers and mailbox
- Ensure exterior lighting works and is attractive
- Repair cracked walkways or loose steps
First impressions are formed in seconds, and minor investments in curb appeal can yield significant returns.
Step 6: Stage the Property for Maximum Impact
Why Staging Matters
Staged homes consistently sell faster and for higher prices. Staging highlights the property’s strengths, downplays weaknesses, and helps buyers emotionally connect with the space. Options range from DIY staging to hiring professionals (cost: $500–$2,500+ depending on services and square footage).
Key Staging Tips
- Arrange furniture to maximize space and flow
- Use neutral colors and minimal decor
- Add fresh flowers or plants for vibrancy
- Set the dining table and add plush towels to bathrooms
- Ensure every room has a clear purpose
Don’t Forget Outdoor Spaces
Stage patios, decks, or balconies with seating to extend the living area and showcase outdoor potential.
Step 7: Ensure Compliance and Gather Documentation
Check Permits and Upgrades
Buyers and lenders may request proof of permits for past renovations or additions. Gather documentation for:
- Roof replacements
- Major electrical or plumbing work
- Finished basements or attic conversions
- Structural changes (e.g., wall removals, additions)
If you discover unpermitted work, consult a contractor or local building department to resolve issues before listing.
Disclosures and Reports
Prepare legally required disclosures, such as known property defects, lead paint, or flood zone status. If you’ve completed a pre-listing inspection, share the report with potential buyers to build trust and transparency.
Step 8: Enhance Safety and Security
- Check that smoke and carbon monoxide detectors are present and functional
- Ensure handrails and steps are secure
- Replace broken locks and test all keys
- Remove trip hazards inside and out
Buyers notice signs of neglect, especially when it comes to safety. A secure, well-maintained property inspires confidence and reduces liability risks during showings.
Step 9: Prepare for Professional Photography and Showings
Scheduling and Timing
Book a professional real estate photographer after cleaning, repairs, and staging are complete. Quality photos are crucial for online listings and marketing materials. Coordinate appointment times for optimal natural light.
Day of Photography Checklist
- Open curtains and blinds for maximum light
- Turn on all lights, replace burnt-out bulbs
- Remove vehicles from the driveway
- Hide trash bins, pet bowls, and personal items
- Fluff pillows, straighten bed linens, and clear counters
Apply the same checklist before each showing or open house to keep the property in top condition.
Step 10: Final Pre-Listing Tasks
Set the Right Price
Work with your real estate agent or use recent comparable sales to determine a competitive asking price. Overpricing can deter buyers, while underpricing leaves money on the table.
Marketing Preparation
- Compile all property details, features, and upgrades
- Write a compelling listing description emphasizing key selling points
- Gather HOA documents, utility bills, and warranty info for appliances or systems
Coordinate Access and Security
Decide on access for showings—lockbox, appointment-only, or open house schedules—and communicate with your agent or team. Secure valuables and confidential documents before listing goes live.
Budgeting for Pre-Listing Preparation
Estimated Cost Breakdown
- Pre-inspection: $300–$600
- Repairs and maintenance: $500–$3,000 (varies)
- Cosmetic updates: $300–$2,000+
- Cleaning: $200–$500
- Landscaping and curb appeal: $200–$1,000+
- Staging: $500–$2,500+
- Professional photography: $150–$500
The total budget will depend on property size, condition, and your local market. Prioritize spending on areas that deliver the highest return on investment.
Common Mistakes to Avoid
- Skipping repairs: Small issues can become negotiating leverage for buyers.
- Neglecting curb appeal: Online photos and drive-bys are make-or-break moments.
- Overpersonalizing: Bold colors or unique decor can limit your buyer pool.
- Underestimating cleaning: Cleanliness signals care and quality.
- Ignoring compliance: Missing permits or incomplete disclosures can delay or derail a sale.
Conclusion: Set the Stage for a Successful Sale
Preparing a real estate property for sale is a multifaceted process, but the effort is well worth it. A thorough pre-listing checklist ensures that you address both cosmetic and functional issues, eliminate buyer objections, and present your property in the best possible light. By investing in repairs, cleaning, decluttering, and staging, you create a space that resonates with more potential buyers and stands out in a crowded market.
Don’t underestimate the value of documentation, compliance, and safety. These steps not only protect you legally but also streamline the transaction for all parties involved. Partnering with professionals—whether inspectors, cleaners, stagers, or real estate agents—can provide expert guidance and relieve stress during what can be a complex process.
Ultimately, your goal is to maximize appeal, minimize time on the market, and achieve the best possible sale price. With this comprehensive pre-listing checklist, you’re equipped to approach your property sale strategically and confidently. Take the time to prepare thoroughly, and you’ll reap the rewards in both buyer interest and final sales results.
12 thoughts on “How to Prepare a Real Estate Property for Sale: A Comprehensive Pre-Listing Checklist”
Leave a Reply
Related Posts
Understanding Real Estate Roof Replacement: Cost Planning, Permit Steps, and Maintenance Tips

Spring Exterior Maintenance Checklist for Real Estate Owners: Protecting Curb Appeal and Property Value
The article mentions that a pre-listing inspection typically costs between $300 and $600. If unexpected major repairs are discovered during this inspection, is it usually worth making those repairs, or could it be better to disclose them and price the property accordingly?
If major repairs are found during a pre-listing inspection, both approaches—making repairs or disclosing and adjusting the price—can work, depending on your goals and local market conditions. Repairing issues can attract more buyers and possibly higher offers, while disclosure with an adjusted price may appeal to buyers looking for a project. Consider how urgent the repairs are and consult your agent for advice tailored to your situation.
You mention decluttering and staging as part of the pre-listing process. If I’m on a tight budget, are there simple staging tips that make the biggest difference without hiring a staging company?
Absolutely, you can make a big impact without spending much. Start by thoroughly cleaning and decluttering each room—clear off countertops and put away personal items. Rearranging your existing furniture to create open, inviting spaces works wonders. Add a few fresh touches like a bowl of fruit in the kitchen or neatly folded towels in the bathroom. Opening curtains for natural light and using neutral bedding and pillows can also help your home feel fresh and welcoming to buyers.
Once the initial walkthrough and repairs are done, what are the next steps to prepare documentation and disclosures, and does providing a pre-inspection report really make buyers more confident during negotiations?
After completing the walkthrough and repairs, gather all necessary documents such as the property deed, past utility bills, HOA documents, and any warranties for appliances or recent upgrades. Prepare required seller disclosures detailing the property’s condition and any known issues. Providing a pre-inspection report can help reassure buyers by showing transparency, often reducing negotiation hurdles and building trust, as buyers know upfront what to expect regarding the property’s condition.
When you talk about decluttering, is there a guideline for how much to remove? Should I aim for a totally empty look or keep some furniture to help buyers visualize living in the space?
When decluttering, you don’t need to go for a totally empty look. It’s best to keep essential furniture and a few well-placed decorative items, so buyers can visualize how the space is used. Aim to remove personal items and excess belongings, creating a clean, open feel while still making the home look inviting and livable.
Is it better to do a full professional pre-inspection or just tackle the visible issues myself first? I’m a bit worried about the $300–$600 cost range you mentioned, especially if I end up discovering a lot more problems.
If you’re concerned about costs, starting with the visible issues yourself is a practical approach. This lets you address obvious problems and improve your property’s appearance without a big upfront expense. A professional pre-inspection can uncover hidden issues, but it’s optional. Consider it if you want extra peace of mind or if your home is older. Otherwise, focus on what you can easily fix first.
When conducting that initial walkthrough, is it better to do it alone or invite a friend or third party for a more objective perspective before calling in a professional inspector?
Bringing a friend or third party along for the initial walkthrough can be very helpful. They may notice issues or details you might overlook due to familiarity with your property. This fresh, objective perspective can help you identify areas needing attention before you hire a professional inspector, making your preparations more thorough.