
Real Estate Plumbing System Upgrades: Compliance, Budgeting, and Long-Term Value
Introduction: Why Plumbing Upgrades Matter in Real Estate
When most property owners and investors think about value-adding improvements, kitchens, bathrooms, and curb appeal often top the list. But beneath the surface, your plumbing system quietly determines a property’s habitability, long-term costs, and even its legal compliance. Whether you’re managing a single-family rental, preparing a home for sale, or maintaining a multifamily investment, strategic plumbing upgrades can protect your investment, improve tenant satisfaction, and boost resale value. Yet, these upgrades come with unique compliance, budgeting, and planning challenges. This guide digs deep into the practical aspects of real estate plumbing system upgrades—covering what to upgrade, how to budget, compliance obligations, and how to maximize your property’s long-term value. Avoid costly mistakes and learn how to turn this essential system into a strategic asset for your real estate portfolio.
Understanding the Scope: What Constitutes a Plumbing System Upgrade?
Key Plumbing Components
A plumbing system consists of several critical elements, each of which may require upgrades over time:
- Water supply lines: Main pipes (copper, PEX, or older galvanized steel) delivering water throughout the property.
- Drainage and vent pipes: Remove wastewater and prevent sewer gases from entering the building.
- Fixtures and appliances: Sinks, faucets, toilets, showers, water heaters, dishwashers, and washing machines.
- Shutoff valves and backflow preventers: Essential for safety and isolating sections of the system during maintenance.
Common Reasons for Upgrading
- Replacing aging or corroded pipes (e.g., galvanized steel or polybutylene).
- Improving water pressure or flow.
- Upgrading for energy efficiency (e.g., tankless water heaters, low-flow fixtures).
- Bringing the system up to code for legal compliance or insurance requirements.
- Remodeling kitchens, bathrooms, or adding new fixtures.
Budgeting for Plumbing Upgrades: What to Expect
Cost Factors
Plumbing upgrade costs vary significantly depending on property size, system complexity, material choices, and local labor rates. Key factors to consider:
- Pipe material: Copper is durable but expensive; PEX is flexible and affordable; CPVC is cost-effective but less robust.
- Accessibility: Pipes behind walls or under slabs cost more to replace due to demolition and repairs.
- Fixture quality: Premium fixtures last longer but cost more upfront.
- Labor rates: Urban areas and unionized markets tend to have higher rates.
- Permit and inspection fees: Required by most municipalities for substantial work.
Typical Cost Ranges
- Whole-house repiping: $4,000–$15,000+ (single-family home, depending on size and material)
- Water heater replacement: $800–$3,500 (standard vs. tankless, capacity, installation complexity)
- Fixture upgrades: $150–$1,200 per unit (faucets, toilets, etc.)
- Minor pipe repairs: $300–$1,500 (localized leaks or section replacements)
Always budget a 10–20% contingency for unforeseen issues (hidden leaks, code violations, etc.).
Compliance and Permitting: Avoiding Legal and Insurance Pitfalls
When Are Permits Required?
Most jurisdictions require permits for any work that involves:
- Replacing supply or drain pipes (beyond simple repairs)
- Installing or replacing water heaters
- Adding new plumbing fixtures or rerouting lines
Failure to obtain permits can result in fines, forced removal of non-compliant work, and insurance claim denials. Always consult your local building department before starting major upgrades.
Key Compliance Considerations
- Materials must meet code: Some older materials (lead, polybutylene) are now prohibited.
- Pressure regulation: Excessive water pressure can damage appliances and pipes.
- Backflow prevention: Required to prevent contamination of potable water.
- Fixture efficiency: Many areas now mandate low-flow toilets, faucets, and showerheads.
Step-by-Step Plumbing Upgrade Process for Real Estate Owners
1. Assessment and Planning
- Hire a licensed plumber to inspect the entire system.
- Identify code violations, leaks, corrosion, low pressure, or outdated materials.
- Develop a scope of work: full repipe, partial upgrades, fixture replacements, etc.
2. Budgeting and Bidding
- Request detailed quotes from at least three licensed contractors.
- Include labor, materials, permit fees, and wall/ceiling repair costs.
- Compare warranties and timelines.
3. Permitting and Scheduling
- Submit permit applications with scope, plans, and contractor info.
- Schedule work during tenant vacancies, if possible, to minimize disruption.
4. Upgrade Execution
- Contractor performs demolition, pipe replacement, fixture installation, and system testing.
- Inspections by local authorities at rough-in and completion stages.
- Final cleanup and wall/ceiling repairs as needed.
5. Documentation and Insurance Updates
- Keep all permits, inspection reports, and warranties on file for future sales or insurance claims.
- Notify your insurer of upgrades to ensure continued coverage and possibly lower premiums.
Maximizing Long-Term Value: Strategic Plumbing Upgrades
Which Upgrades Provide the Best ROI?
- Whole-house repipe (if original pipes are failing): Prevents catastrophic leaks, reduces maintenance calls, and assures buyers/tenants.
- Tankless water heaters: Energy efficient, space-saving, and attractive to eco-conscious buyers.
- Low-flow fixtures: Lower utility bills and meet code requirements, especially valuable in drought-prone regions.
- Smart leak detection: Systems that alert owners to leaks can prevent major water damage and insurance claims.
Special Considerations for Rental Properties
- Durability: Choose commercial-grade fixtures and PEX piping for longevity.
- Tenant communication: Provide advance notice, minimize downtime, and offer alternative facilities if water service will be interrupted.
- Documentation: Maintain records to demonstrate code compliance and protect against liability claims.
Common Plumbing Upgrade Mistakes to Avoid
- DIY without permits: Unpermitted work often fails insurance or sales inspections.
- Partial fixes on failing systems: Replacing only sections of old pipe can lead to future leaks and higher long-term costs.
- Ignoring water pressure problems: This can damage new appliances and fixtures.
- Choosing the cheapest materials: Low-cost fixtures or pipes may fail sooner, increasing future repair costs.
- Poor scheduling: Upgrades during peak occupancy can result in unhappy tenants or buyers.
Maintenance Best Practices After Upgrades
- Schedule annual inspections for leaks, corrosion, and water pressure.
- Flush water heaters and test pressure relief valves annually.
- Educate tenants or occupants on what not to flush or pour down drains.
- Install and monitor leak detection devices, especially in basements and under sinks.
- Maintain clear access to shutoff valves and educate building occupants on their locations.
Case Study: Repiping a Mid-Century Duplex
Background
A real estate investor acquired a 1960s duplex with original galvanized steel pipes. Tenants experienced rusty water, low pressure, and frequent leaks. The local code had changed, requiring copper or PEX for any major work.
Upgrade Approach
- Full repipe with PEX tubing for both units.
- Installation of new water-efficient fixtures and a tankless water heater in each unit.
- Permits obtained; completed in phases to allow tenants continued access to at least one bathroom during the process.
Results
- Water pressure and quality dramatically improved.
- Tenant satisfaction increased, leading to longer lease renewals.
- The property’s appraised value increased by $20,000, more than covering the $13,000 investment.
- Insurance premiums decreased due to reduced risk of water damage claims.
Conclusion: Turning Plumbing Upgrades Into a Real Estate Asset
For many property owners, plumbing upgrades are viewed as a necessary evil—costly, disruptive, and easily deferred until a problem arises. However, approaching these upgrades strategically can transform what seems like a headache into a genuine asset for your real estate portfolio. By budgeting accurately, understanding compliance obligations, and prioritizing high-ROI improvements, you can reduce ongoing maintenance costs, minimize legal and insurance risks, and make your property more attractive to both tenants and buyers. The key is not to wait for a catastrophic failure or a failed inspection to act. Instead, schedule periodic assessments, plan upgrades in line with tenancy cycles, and document every step to protect your investment. Plumbing system upgrades may be invisible, but their impact on comfort, property value, and peace of mind is anything but. With the right approach, you’ll not only avoid costly mistakes—you’ll unlock long-term value and resilience for your real estate investments.
78 thoughts on “Real Estate Plumbing System Upgrades: Compliance, Budgeting, and Long-Term Value”
Leave a Reply
Related Posts
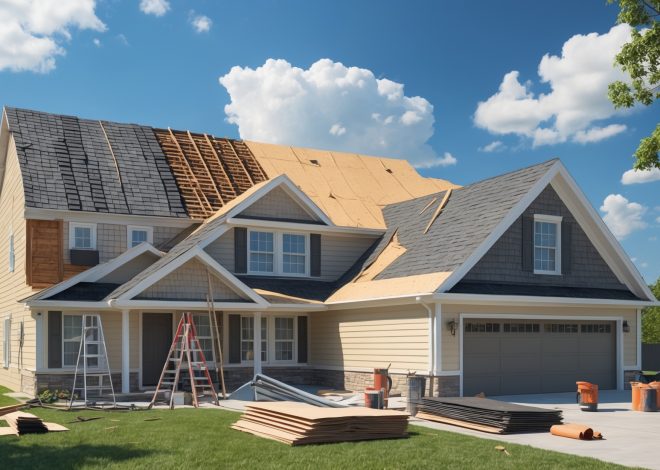
Understanding Real Estate Roof Replacement: Cost Planning, Permit Steps, and Maintenance Tips

Spring Exterior Maintenance Checklist for Real Estate Owners: Protecting Curb Appeal and Property Value
I’m planning a bathroom remodel and adding a new washing machine, but I’m worried about the impact on my existing drainage and vent pipes. What’s the best way to ensure my system can handle the extra load without unexpected plumbing issues down the road?
To make sure your drainage and vent system can handle new fixtures like a remodeled bathroom and washing machine, have a licensed plumber assess your current pipe sizes and venting. They can determine if upgrades are needed for proper flow and code compliance. It’s important not to overload existing drains, as this can lead to slow drainage or backups. Planning and possible pipe resizing or additional venting now will help you avoid costly problems later.
For older homes that still have galvanized steel pipes, how can I tell if it’s time to upgrade them, and are there warning signs I should look out for before I start budgeting for a replacement?
With older homes featuring galvanized steel pipes, common warning signs that it’s time to upgrade include low water pressure, discolored or rusty-looking water, frequent leaks, and visible corrosion on exposed pipes. If you notice any of these issues, it’s a strong indicator that replacement may be needed soon. Before budgeting, consider having a professional inspection to assess the extent of deterioration so you can prioritize your spending and plan the upgrade efficiently.
How disruptive is it to replace drainage and vent pipes in a lived-in house, and what kind of planning should families expect to minimize inconvenience for daily routines?
Replacing drainage and vent pipes in an occupied home can be quite disruptive, as it often involves opening walls or floors and shutting off water in affected areas. Families should plan for temporary loss of bathroom or kitchen use, dust and noise. To minimize inconvenience, discuss the schedule with your plumber in advance, relocate essential activities if possible, and protect living spaces with coverings. Staging work in sections can also help maintain access to at least one bathroom or kitchen area throughout the project.
I manage an older multifamily property with a mix of copper and some remaining galvanized steel pipes. How do I determine which sections need urgent replacement to maintain compliance and avoid unexpected costs down the line?
To identify which pipe sections need urgent replacement, start by inspecting for visible corrosion, leaks, or signs of reduced water pressure—these often indicate problematic galvanized pipes. Prioritize replacing any remaining galvanized steel, as they’re more prone to failure and may not meet current codes. Consider consulting a licensed plumber for a full assessment and to ensure your upgrades meet local compliance standards. This proactive approach helps you budget effectively and prevent expensive emergency repairs later.
About bringing plumbing systems up to code—how do I find out what the latest legal compliance or insurance requirements are in my area? Is this something I should ask the local building department before hiring a plumber?
Yes, checking with your local building department is a smart move before starting any plumbing upgrades. They can provide the most up-to-date information on compliance, permits, and any local variations in code. It’s also wise to ask your insurance provider if there are specific requirements to maintain coverage. This way, both legal and insurance standards are covered before you hire a plumber.
When budgeting for plumbing system upgrades in a multifamily property, how should I factor in the costs of replacing shutoff valves and backflow preventers compared to upgrading fixtures? Are there typical price ranges in the US for these specific components?
When budgeting, shutoff valves and backflow preventers are often less expensive per unit than upgrading fixtures like faucets or toilets, but the overall cost depends on quantity and accessibility. In the US, replacing a shutoff valve might range from $100–$300 each, while backflow preventers can range from $150–$1,000 depending on size and type. Fixtures can vary widely, from $150–$700 each installed. It’s a good idea to get quotes based on your building’s specifics for more accurate estimates.
With all the talk about legal compliance, how do I find out which local codes or insurance requirements apply when upgrading plumbing, especially if my property is a bit older? Does the compliance process tend to hold up projects much?
To identify the local codes and insurance requirements for your plumbing upgrade, start by contacting your city or county’s building department—they can provide the specific regulations for your area. If your property is older, you might have additional rules to follow, especially regarding materials and safety. Insurance companies can also advise on their requirements. The compliance process can cause some delays, particularly if permits or inspections are needed, but working with a licensed plumber familiar with local codes helps keep things on track.
Can you give some tips on how to balance upgrading fixtures for energy efficiency, like tankless water heaters, without blowing the budget? I’m worried about the upfront cost compared to long-term savings.
Balancing energy-efficient upgrades with your budget is all about prioritizing and timing. Start by selecting high-impact upgrades—like low-flow faucets or showerheads—that are affordable and quickly reduce water and energy use. For bigger investments, such as tankless water heaters, consider phased upgrades or look for rebates from utility companies. Always compare projected long-term savings to upfront costs, and factor in potential increases in property value when making decisions.
Could you explain how upgrading to energy-efficient plumbing fixtures, like tankless water heaters or low-flow toilets, adds to the long-term value of a property? Do these changes impact resale value or just reduce ongoing costs?
Upgrading to energy-efficient plumbing fixtures like tankless water heaters or low-flow toilets brings two main benefits: lower utility bills from reduced water and energy use, and an increase in property appeal. Many buyers value homes with modern, eco-friendly systems, which can boost resale value. So, these upgrades help with ongoing savings and can make your property more attractive and competitive in the market.
When budgeting for a plumbing upgrade in a multifamily property, how do you factor in possible code compliance issues that might surface once walls or old pipes are exposed during the project?
When budgeting for a plumbing upgrade in a multifamily property, it’s wise to set aside a contingency fund, typically 10–20% of your total project budget, to cover unexpected code compliance issues. Once walls or old pipes are exposed, hidden problems like outdated materials or improper installations may require updates to meet current codes. Consulting with your plumber and reviewing local code requirements beforehand can help you estimate potential extra costs more accurately.
For investors managing multifamily buildings, how do you estimate the payback period for installing energy-efficient fixtures like low-flow toilets or tankless water heaters? Are there common mistakes people make when budgeting for these plumbing upgrades?
To estimate the payback period, calculate the upfront cost of the fixtures and installation, then estimate annual savings on water and energy bills from the upgrades. Divide the total investment by annual savings for a rough payback time. Common mistakes include underestimating installation costs, ignoring potential rebates, and not accounting for maintenance or tenant usage patterns, which can affect actual savings.
The article mentions budgeting for plumbing upgrades. Can you give examples of what a typical upgrade, like switching to PEX pipes or installing a tankless water heater, might cost for an average single-family rental?
Switching to PEX pipes for an average single-family rental typically costs between $4,000 and $8,000, depending on the home’s size and local labor rates. Installing a tankless water heater usually ranges from $1,200 to $3,500, including equipment and installation. Final prices can vary, so it’s smart to get detailed estimates from local plumbers before planning your budget.
If I’m preparing a home for sale and want to upgrade some fixtures for better energy efficiency, do I need to bring the whole plumbing system up to current code, or just the parts I’m replacing?
You only need to bring the parts of the plumbing system that you’re replacing or upgrading up to current code. It’s not required to update the entire system unless you’re doing a major renovation. However, making sure new fixtures meet local code and efficiency standards is important, and it can boost your home’s appeal to buyers.
How do plumbing upgrade timelines usually line up with larger remodel projects like kitchens or bathrooms? Should I schedule plumbing work first, or can it be done at the same time as the other upgrades?
Plumbing upgrades are typically scheduled early in larger remodel projects, especially for kitchens and bathrooms. It’s best to complete plumbing rough-ins before installing walls, cabinets, or fixtures. While some work can overlap, having plumbing done first helps avoid delays or extra costs if things need to be redone. Coordinating closely with your contractor ensures the timeline is efficient and avoids disruption to other aspects of the remodel.
The article mentions water supply lines made of copper, PEX, and older galvanized steel. How do you determine which material is best for an upgrade, especially when balancing cost, longevity, and compliance requirements?
When choosing between copper, PEX, and galvanized steel for water supply line upgrades, consider your local plumbing codes first, as some areas restrict certain materials. PEX is usually the most cost-effective and easy to install, while copper lasts longer and resists bacteria but is more expensive. Avoid galvanized steel for new projects since it corrodes and often doesn’t meet current codes. Weigh initial costs, expected lifespan, and compliance to make your final decision.
I noticed you mentioned bringing plumbing systems up to code for legal compliance or insurance purposes. How can I find out what the latest code requirements are for my area, and are there common code violations I should watch out for during a DIY upgrade?
To find the latest plumbing code requirements in your area, contact your local building or permitting office, as codes can vary by city or county. You can also check their website for published guidelines. Common code violations in DIY upgrades include improper pipe sizing, inadequate venting, use of non-approved materials, and missing backflow prevention. Before starting any project, it’s wise to consult local authorities or a licensed plumber to ensure compliance.
When budgeting for plumbing system upgrades, are there any unexpected expenses that property owners often overlook, like city permits or hidden pipe damage? How can you plan for those surprises?
Property owners often overlook expenses like city permit fees, costs for code compliance, and discovering hidden issues such as corroded or damaged pipes during upgrades. To plan for these surprises, include a contingency buffer in your budget—typically 10-20% extra—and ask your plumber for a thorough inspection before starting. This helps identify potential problems early and gives you a more accurate estimate.
If we’re planning to remodel a bathroom but also know our house has older shutoff valves and backflow preventers, should those be replaced at the same time? Are there any cost advantages or risks to doing all the upgrades together versus separately?
Upgrading old shutoff valves and backflow preventers during a bathroom remodel is often more efficient and cost-effective than handling them separately. Doing the work all at once means less labor overlap, fewer disruptions, and potentially lower total costs. It also allows plumbers to spot any related issues early on. If you wait, you might face additional service charges and inconvenience later, and older components could fail unexpectedly. Coordinating all upgrades now usually offers better long-term value and peace of mind.
For those looking to bring their system up to current code requirements, especially in multifamily buildings, what are some common compliance pitfalls or overlooked updates that can surprise owners during inspections?
Owners of multifamily buildings often overlook items like outdated pipe materials (such as lead or galvanized steel), insufficient backflow prevention devices, and improper venting. Another common pitfall is not meeting current water efficiency standards or accessibility codes for plumbing fixtures. Inspections can also flag hidden leaks, inadequate water pressure, or missing shut-off valves. It’s wise to have a professional review local code updates before starting work to avoid these surprises.
If my rental property still has galvanized steel pipes, are there specific signs or tests I should look for to determine whether it’s time for a full replacement rather than small repairs?
If your rental property still has galvanized steel pipes, watch for signs like low water pressure, discolored or rusty water, frequent leaks, or visible corrosion on the pipes. You can also have a plumber perform a pipe inspection or water quality test to check for hidden corrosion, buildup, or restricted flow. If these issues are present, it’s usually more cost-effective and reliable to plan for a full pipe replacement rather than ongoing small repairs.
When budgeting for plumbing upgrades in multifamily buildings, what are some hidden costs that owners should watch out for during the planning phase? Are fixture and appliance updates usually the main expense, or do supply and vent lines add up quickly?
When planning plumbing upgrades in multifamily buildings, hidden costs often include opening walls or ceilings for pipe access, addressing outdated or damaged supply and vent lines, and necessary code compliance upgrades. While fixtures and appliances can be significant expenses, replacing supply and vent lines—especially in older properties—can add up quickly due to labor and material costs. Also, don’t overlook permit fees and possible water service interruptions when budgeting.
How do you estimate a realistic timeline for completing a full plumbing system upgrade in a single-family rental home? I want to avoid extended vacancies and would appreciate tips for keeping the project on schedule and within budget.
To estimate a realistic timeline for a full plumbing upgrade, first consult a licensed plumber for a detailed assessment of your property. Most single-family home upgrades take 3 to 7 days, assuming no major complications. To prevent delays and stay on budget, order all materials in advance, schedule inspections early, and maintain clear communication with your contractor. Consider starting work immediately after a tenant moves out or coordinate with them for partial access if possible.
When replacing old galvanized steel pipes in a single-family rental, how can I tell if I should upgrade just certain sections or the entire system for compliance and long-term value?
To decide whether to replace sections or the entire galvanized steel piping, start with a professional inspection to assess the pipe’s age, corrosion, and leaks. If corrosion is widespread or pipes are nearing the end of their lifespan, a full replacement is usually better for compliance and long-term reliability. Upgrading the whole system also adds value and avoids future disruptions. If only isolated areas are affected, section replacement may be sufficient, but check local codes to ensure partial upgrades meet compliance.
The article talks about energy efficient plumbing upgrades like tankless water heaters and low-flow fixtures. Are these types of improvements typically expensive up front, and do they actually lower water or utility bills enough to make the investment worthwhile?
Upfront costs for energy-efficient upgrades like tankless water heaters and low-flow fixtures can be higher than standard options. However, they often pay for themselves over time through reduced water and energy bills. Tankless heaters use less energy by heating water on demand, and low-flow fixtures significantly cut water usage. Many property owners find the long-term savings and improved efficiency make the investment worthwhile, especially for larger buildings or high-usage households.
Could you clarify how often plumbing system components like water supply lines or shutoff valves typically need to be upgraded to stay compliant with code, especially in older multifamily properties?
For older multifamily properties, water supply lines and shutoff valves should generally be inspected every 5 to 10 years, but upgrades are often needed when local codes change or during renovations. Some codes require non-compliant materials, like old galvanized pipes, to be replaced with approved alternatives. It’s wise to consult your local building department for current requirements, as timelines can vary depending on location and pipe materials.
Could you elaborate on budgeting strategies for plumbing upgrades? For example, what unexpected costs tend to come up when replacing drainage and vent pipes or installing backflow preventers, and how can investors prepare for those?
When budgeting for plumbing upgrades like drainage and vent pipe replacements or backflow preventer installation, investors should plan for hidden issues such as discovering corroded pipes behind walls, code-required upgrades, or the need for additional permits. Preparing a 10-20% contingency in your budget can help cover these surprises. It’s also wise to have a licensed plumber perform a thorough inspection beforehand so you can identify potential problem areas early.
When budgeting for a major plumbing upgrade, what are some hidden costs that people often overlook, especially when remodeling kitchens or bathrooms?
When budgeting for major plumbing upgrades in kitchens or bathrooms, people often overlook costs like repairing or relocating walls, upgrading old pipes to meet code, fees for permits and inspections, and addressing water damage or mold found during demolition. You may also need to update electrical systems near new plumbing, or pay extra for custom fixtures or unexpected structural repairs. Setting aside a contingency fund is wise to cover these surprises.
If I’m considering replacing old galvanized steel pipes in a multifamily property, what should I expect in terms of disruption for tenants, and are there ways to minimize downtime during a plumbing system upgrade?
When replacing old galvanized steel pipes in a multifamily property, tenants may experience temporary water shutoffs, noise, and limited access to certain areas. To minimize disruption, consider upgrading one section at a time, scheduling work during off-peak hours, and giving tenants advance notice. Working with experienced contractors who can coordinate efficient phasing of the project will also help reduce downtime and inconvenience.
If I’m looking to upgrade to more energy-efficient fixtures like tankless water heaters and low-flow toilets, how do I balance upfront costs with the potential savings over time?
When considering energy-efficient upgrades like tankless water heaters and low-flow toilets, calculate the estimated annual savings on utility bills and compare them to the higher upfront costs. Many products include efficiency ratings to help estimate savings. Also, check for local rebates or tax incentives, which can offset initial expenses. Prioritize upgrades with the quickest return on investment, and consider phasing improvements to manage your budget.
For those looking to boost both energy efficiency and property value, do you recommend prioritizing tankless water heaters over upgrading to low-flow fixtures, or is it more impactful to address both at once?
Addressing both tankless water heaters and low-flow fixtures together is the most impactful approach for boosting energy efficiency and property value. Tankless water heaters provide significant savings by heating water only when needed, while low-flow fixtures cut water usage and utility costs. If your budget allows, upgrading both at once maximizes benefits and may increase your property’s appeal to buyers looking for eco-friendly features.
When budgeting for plumbing upgrades, do you have tips on estimating costs for things like backflow preventers or shutoff valves? Are there unexpected expenses new landlords should watch for?
When estimating costs for items like backflow preventers or shutoff valves, get quotes from at least two licensed plumbers and ask for itemized pricing, including labor and permits. Costs can vary depending on building size and local code requirements. New landlords should also budget for potential surprises, such as pipe access issues, old valves needing replacement, or required inspections. Always allow a 10-20% buffer for these unexpected expenses.
For someone planning to add new fixtures during a bathroom remodel, how can you make sure the existing drainage and vent system will handle the update without costly surprises down the line?
Before adding new fixtures, have a licensed plumber inspect your current drainage and vent systems. They can assess pipe sizes, slope, and venting to ensure capacity matches your plans. Reviewing local building codes is also essential, as upgrades may be needed to stay compliant. This proactive approach helps avoid unexpected costs or code violations after your remodel.
If my property still has galvanized steel pipes, what are the main compliance or insurance issues I might run into if I delay upgrading them? Are there any immediate legal risks for landlords?
If your property still has galvanized steel pipes, you could face insurance challenges since many providers see these pipes as a higher risk for leaks and water damage. This might lead to higher premiums or even denial of coverage. While immediate legal risks for landlords are rare unless there’s a local ordinance mandating upgrades, you could be liable if pipe failure results in tenant property damage or health issues. Regular inspections and proactive plans are wise to avoid compliance and liability problems.
If I’m looking at updating the plumbing in an older rental property that still has galvanized steel pipes, how do I determine if I need to upgrade just the visible sections or the entire supply line system? Are there signs I should look out for before budgeting?
When dealing with galvanized steel pipes, it’s wise to assess the overall condition, not just the visible parts. Look for signs such as low water pressure, discoloration of water, frequent leaks, or rust on pipe interiors. These may indicate widespread corrosion. Sometimes, hidden sections are in worse shape than what’s exposed. For a thorough assessment, consider hiring a plumber to check the entire supply line system, including behind walls, before finalizing your budget.
You mention energy-efficient upgrades like tankless water heaters and low-flow fixtures. Are there any tax credits or rebates available for these plumbing improvements, or is it mainly about long-term savings on utility bills?
There are often tax credits and rebates available for energy-efficient plumbing upgrades, but availability depends on your location and the specific product. Many states and utilities offer incentives for things like tankless water heaters and low-flow fixtures. It’s a good idea to check federal programs, your state’s energy office, and local utility companies for current offers. Besides those savings, the main benefit will be lower utility bills over time.
When aiming for energy efficiency, like installing tankless water heaters or low-flow fixtures, how significant are the long-term savings and are there any compliance incentives available for these types of upgrades?
Long-term savings from energy-efficient upgrades like tankless water heaters and low-flow fixtures can be quite substantial. These upgrades generally reduce water and energy bills, sometimes by 20% or more, depending on usage patterns and local utility rates. Additionally, many areas offer rebates or tax incentives to encourage these improvements—it’s worth checking with your local government or utility provider to see what compliance incentives are currently available in your location.
When budgeting for plumbing upgrades in a multifamily property, do you recommend replacing old galvanized pipes all at once, or is it more practical to phase the work by building section? How does this impact compliance and tenant disruption?
Phasing pipe replacement by building section is often more practical for multifamily properties, as it spreads out costs and allows tenants in unaffected areas to remain undisturbed. However, if the galvanized pipes are causing compliance issues or frequent leaks, replacing everything at once may be necessary to meet code requirements and avoid repeated disruptions. Consider consulting with a licensed plumber to assess pipe conditions and determine the best approach for both compliance and minimizing tenant inconvenience.
I’m planning a bathroom remodel and trying to make sure everything stays up to code. How do I check what local plumbing compliance requirements I need to watch out for before starting the upgrades?
To make sure your bathroom remodel is up to code, contact your local building or permitting office—they can provide the latest plumbing codes and requirements for your area. You can also review your city or county’s official website for published guidelines. Don’t forget, most areas require a plumbing permit before work begins, and inspections after upgrades are completed.
When budgeting for plumbing upgrades, what kinds of unexpected costs should I plan for, especially in an older home? I want to avoid blowing up our household budget with surprise expenses.
When upgrading plumbing in an older home, it’s wise to set aside extra funds for surprises like hidden water damage, outdated or noncompliant pipes, and the need for additional permits. Sometimes, opening walls reveals issues like mold or corroded lines that aren’t obvious at first. Also, older homes may need upgrades to meet current codes. A contingency budget of 10-20% on top of estimates can help manage these surprises.