
Real Estate Photography Staging: Budget Strategies That Boost Listings
Introduction: The Power of Staging for Real Estate Photos
In today’s competitive real estate market, online visuals can make or break a sale. With over 90% of property searches starting online, high-quality photography is essential. But even the best camera can’t compensate for a poorly staged home. Buyers form opinions within seconds, and a cluttered, dark, or dated space will quickly be scrolled past. While professional staging services deliver impressive results, their costs can be prohibitive for many sellers or agents, especially for entry-level listings. The good news? Strategic, budget-friendly staging tailored to real estate photography can deliver outsized returns. This guide dives deep into affordable, effective staging techniques that maximize your listing’s online impact, attract more buyers, and help properties sell faster—and often for more. You’ll find step-by-step advice on prepping every key area, cost-saving tricks, and essential staging principles, all focused on making your property shine in photos, not just in person.
Understanding the Role of Staging in Real Estate Photography
Why Staging Matters for Photos (Not Just Showings)
Staging isn’t just about impressing buyers during an open house. In the digital age, your listing photos are the first—and sometimes only—chance to capture a buyer’s interest. Effective staging:
- Highlights a property’s best features and minimizes flaws
- Makes rooms appear brighter, larger, and more inviting
- Creates a neutral, aspirational environment buyers can envision themselves in
- Reduces the visual “clutter” that distracts from architectural details
Well-staged photos can increase click-through rates, drive more showings, and ultimately influence sale price and time on market.
Budget vs. Professional Staging: What’s Possible?
Professional staging costs can range from $800 to $2,500 or more for a standard home, with luxury properties demanding even higher fees. For many sellers and smaller-scale agents, this investment may not be feasible. However, with careful planning, a modest budget (even under $300) and a bit of elbow grease can transform any space into a photo-ready showstopper.
Step-by-Step: Affordable Staging for Real Estate Photos
1. Decluttering: The Most Cost-Effective Step
Decluttering is the single most important—and free—step for impactful staging.
- Remove personal items: Family photos, kids’ artwork, and personalized decor distract buyers. Pack them away.
- Edit surfaces: Kitchen counters, bathroom vanities, coffee tables, and desks should be clear except for one or two attractive items.
- Streamline furniture: Remove unnecessary chairs, side tables, or bulky pieces that make a space feel crowded.
2. Deep Cleaning: The Essential Foundation
Clean homes photograph better. Even high-end cameras can’t hide dust, grime, or streaky windows.
- Focus on: Windows, mirrors, floors, baseboards, kitchen appliances, and bathroom fixtures.
- Budget tip: If hiring a cleaning service isn’t possible, divide tasks over several days to avoid burnout.
3. Lighting: Maximizing Natural and Artificial Light
Bright, well-lit rooms always attract more attention in photos.
- Open all curtains and blinds: Clean windows let in more light.
- Replace dim bulbs: Use LED bulbs with a color temperature of 3000K–4000K for a warm, inviting glow.
- Add inexpensive lamps: Target dark corners with floor or table lamps. Thrift stores are a great source.
4. Neutralizing and Depersonalizing
Bold colors and unique decor reflect personal taste, not universal appeal. For photos, aim for a neutral, soft palette.
- Use neutral throw pillows and blankets: Cover bold furniture or bedding inexpensively.
- Remove loud artwork or posters: Replace with simple, calming pieces or mirrors.
5. Minor Repairs and Touch-Ups
Small fixes can make a big visual difference in photos.
- Patch holes and touch up paint: Focus on high-traffic areas and walls visible in key photos.
- Repair leaky faucets and squeaky doors: Attention to detail signals a well-maintained home.
Staging Room by Room: Practical, Low-Cost Strategies
Living Room
- Arrange furniture to open walkways and create a conversation area.
- Add a couple of neutral, textured throw pillows and a folded blanket on the sofa.
- Place a plant or a stack of books on the coffee table for visual interest.
Kitchen
- Clear countertops completely—leave only one or two decorative items, like a bowl of fresh fruit or a small potted herb.
- Remove magnets, notes, and clutter from the fridge and cabinets.
- Set the dining table with simple place settings or a vase of flowers.
Bedrooms
- Make beds with crisp, clean bedding in neutral colors.
- Remove excess furniture or exercise equipment.
- Add a single decorative pillow or a small plant on the nightstand.
Bathrooms
- Replace worn towels with new, neutral-colored ones.
- Clear all personal hygiene items from counters and the shower.
- Place a small plant or a candle for a spa-like touch.
Outdoor Spaces
- Sweep walkways, porches, and decks.
- Arrange patio furniture neatly; add a couple of outdoor cushions for color.
- Place potted plants by the entry for a welcoming look.
Cost-Saving Hacks for DIY Staging
Shop Your Own Home
Before buying anything, see what you can repurpose from other rooms. That throw pillow or lamp might work perfectly in another space.
Thrift, Borrow, and Rent
- Thrift stores and discount outlets: Great sources for decorative items, mirrors, and lighting.
- Borrow from friends or family: Temporarily use extra chairs, rugs, or artwork.
- Rent select pieces: Many furniture rental companies offer short-term packages for key rooms.
Use Greenery and Simple Decor
- Fresh greenery or faux plants instantly brighten photos and are low-cost.
- A bowl of lemons, a loaf of bread, or a clean teapot on the counter adds warmth.
Budget Breakdown: Sample Staging on $300 or Less
- Fresh bedding (2 sets): $80
- Throw pillows and blankets: $50
- Plants/greenery (mix real and faux): $40
- Lamps and light bulbs: $60
- Towels and small bathroom decor: $30
- Paint and repair supplies: $40
Total: $300
Photography Day: Final Staging Touches
Timing for the Best Light
Shoot when natural light is at its peak—typically mid-morning or late afternoon. Turn on all lights and open curtains wide.
Fine-Tuning Each Room
- Fluff pillows, straighten bedding, and smooth curtains.
- Remove pet items, trash cans, and laundry baskets.
- Hide power cords and remotes.
Details That Pop in Photos
- Add a tray with coffee cups on a bed or a kitchen island for lifestyle appeal.
- Place a single book and reading glasses on a side table.
- Ensure mirrors and windows are streak-free—they will reflect light back into the room.
Common Staging Mistakes to Avoid
- Overfilling spaces: Too much furniture or decor clutters the photo and makes rooms look small.
- Ignoring scale: Tiny rugs or oversized couches look awkward in images—use appropriately sized pieces.
- Neglecting curb appeal: The first photo is often the exterior. Sweep, mow, and add a potted plant near the door.
- Forgetting the little things: Open toilet lids, messy beds, and visible cleaning supplies detract from a polished look.
When to Invest: Knowing When Professional Staging Makes Sense
While DIY staging is effective for most properties, certain situations call for professional help:
- Vacant homes (empty rooms photograph poorly and feel cold)
- Luxury or high-value properties where ROI justifies the expense
- Unusual layouts that require expert design solutions
If your budget allows, consider a “consultation only” package from a stager for $150–$300. You’ll receive a detailed action plan to execute yourself.
Measuring ROI: The Impact of Staging on Listing Success
Numerous studies show staged homes sell faster and for higher prices. According to the National Association of Realtors, staged homes spend 73% less time on market, and over 80% of buyers’ agents say staging makes it easier for clients to visualize properties as future homes. Even on a tight budget, strategic staging can yield a strong return in both time and money.
Conclusion: Staging Smarter, Not Harder—The Budget Advantage
Effective real estate photography staging doesn’t have to strain your budget. By focusing on decluttering, deep cleaning, maximizing light, and applying a few key styling tricks, any space can be transformed into an inviting, photogenic home that stands out online. The strategies in this guide are designed for sellers and agents who want to maximize impact without overspending. Remember, first impressions matter most in the digital marketplace. Investing just a few hours and a modest sum can yield dramatic results—more clicks, more showings, and ultimately, a faster and more profitable sale. Start with what you have, supplement with budget finds, and always view your space through a buyer’s lens. With a little creativity and attention to detail, your listing photos will capture attention and spark imagination, proving that smart staging is within reach for every property.
4 thoughts on “Real Estate Photography Staging: Budget Strategies That Boost Listings”
Leave a Reply
Related Posts
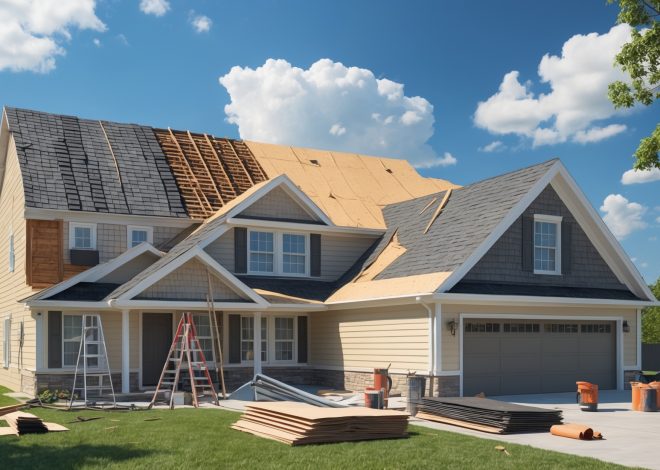
Understanding Real Estate Roof Replacement: Cost Planning, Permit Steps, and Maintenance Tips

Spring Exterior Maintenance Checklist for Real Estate Owners: Protecting Curb Appeal and Property Value
I’m curious about specific cost-saving tricks mentioned for staging a home before photography. Are there particular steps that make the biggest impact visually but don’t require a big budget?
Absolutely, the article highlights several budget-friendly staging tricks that make a strong visual impact. Decluttering and deep cleaning are emphasized as the most effective steps that cost little or nothing. Rearranging existing furniture to maximize space and using natural light by opening curtains can dramatically improve photos. Adding inexpensive touches like fresh pillows, neutral bedding, or a bowl of fruit in the kitchen can also make rooms feel more inviting without stretching your budget.
You mention that buyers form opinions within seconds when viewing online photos. Do you have any advice for making darker or smaller spaces feel brighter and larger in photos without resorting to expensive professional staging services?
Absolutely! For darker or smaller spaces, use natural light as much as possible—open curtains and shoot during the daytime. Mirrors can help reflect light and make rooms feel bigger. Use light-colored bedding, cushions, or rugs to brighten up the look. Declutter and remove bulky furniture to create an open feel. Even small touches like fresh flowers or light lamps can make a big difference in photos.