
How to Conduct a Thorough Walkthrough Before Closing on a Property: Step-by-Step Checklist
Introduction: Why the Final Walkthrough Matters in Real Estate
The final walkthrough is a critical, yet often underestimated, phase in real estate transactions. Whether you’re a first-time homebuyer, a seasoned investor, or a real estate agent overseeing a closing, the walkthrough is your last chance to ensure the property’s condition matches your expectations and all contractual agreements have been honored. Unlike inspections earlier in the buying process, the final walkthrough is not about renegotiating terms or requesting repairs—it’s about verifying that the property is in the agreed-upon state and that no new issues have developed since your last visit.
Skipping or rushing through this step can result in unexpected expenses, legal complications, or even buyer’s remorse. From confirming that agreed repairs were completed to checking for damage caused during the seller’s move-out, a thorough walkthrough can save you significant time, money, and stress. This guide provides a detailed, step-by-step approach to conducting a comprehensive walkthrough before closing, including a printable checklist, expert tips on what to look for, and a breakdown of common issues buyers encounter at this crucial stage.
Understanding the Purpose of the Final Walkthrough
Timing and Legal Context
The final walkthrough typically occurs 24 to 48 hours before closing. Its purpose is not to open new negotiations but to confirm that the property’s condition matches the sales contract. This includes verifying repairs, ensuring agreed-upon items remain, and checking that the property is free of damage or debris.
Common Misconceptions
- It’s not another home inspection: You cannot use this opportunity to demand cosmetic fixes or new repairs unless new damage is discovered.
- It’s not optional: Skipping the walkthrough can leave you liable for post-closing issues that could have been easily identified.
Essential Tools for a Successful Walkthrough
- Purchase Agreement: Bring a copy to reference which items should remain and what repairs were agreed upon.
- Inspection Report: To verify completion of repairs.
- Walkthrough Checklist: Preferably printed for note-taking.
- Camera or Smartphone: For documenting any issues.
- Flashlight: For checking dark spaces like attics, basements, and under sinks.
- Notepad and Pen: For additional notes.
- Phone Charger: To test electrical outlets.
Step-by-Step Walkthrough Checklist
1. Exterior Inspection
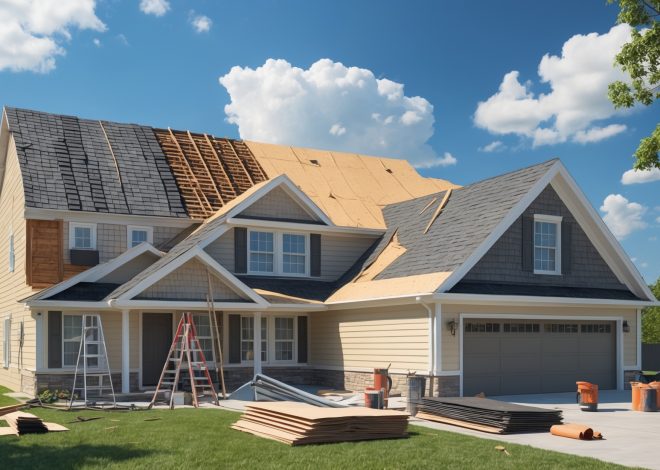
- Roof and Gutters: Look for missing shingles, obvious leaks, or clogged gutters.
- Yard and Landscaping: Ensure the property is free of trash or debris. Check sprinkler systems if included.
- Driveway, Walkways, and Garage: Inspect for new cracks, stains, or damages.
- Exterior Doors and Windows: Test locks, check for broken seals or panes.
- Fencing and Gates: Ensure all are intact and functional.
2. Entryway and Security
- Front Door: Test the doorbell, lock, handle, and any security systems. All keys, fobs, and remotes should be present.
- Alarm System: If applicable, verify functionality and request codes.
- Mailboxes and Exterior Lighting: Check for any missing keys and functioning lights.
3. Interior Rooms
- Walls, Ceilings, and Floors: Look for fresh damage, stains, or unreported repairs.
- Windows and Doors: Open and close each to ensure smooth operation. Check for missing screens or hardware.
- Outlets and Light Switches: Test every outlet with a charger and every switch for functionality.
- Smoke and Carbon Monoxide Detectors: Confirm presence and test alarms.
- Closets and Storage: Open all to check for left-behind items or damage.
4. Kitchen and Appliances
- Appliances: Confirm all appliances included in the sale (refrigerator, oven, dishwasher, microwave, etc.) are present and operational.
- Cabinets and Drawers: Open each for cleanliness, damage, and leftover items.
- Water: Run taps to check for leaks, hot water, and drainage speed.
- Garbage Disposal: Test operation and listen for unusual noises.
5. Bathrooms
- Plumbing: Flush toilets, run showers and sinks. Look for leaks, water pressure issues, and hot water availability.
- Ventilation: Test fans and windows for proper airflow.
- Cabinetry and Mirrors: Check for damage and leftover personal items.
6. Laundry and Utility Areas
- Washer and Dryer: If included, test cycles and inspect for leaks or electrical issues.
- Water Heater: Inspect for leaks and confirm functionality.
- Electrical Panel: Ensure access and check for proper labeling.
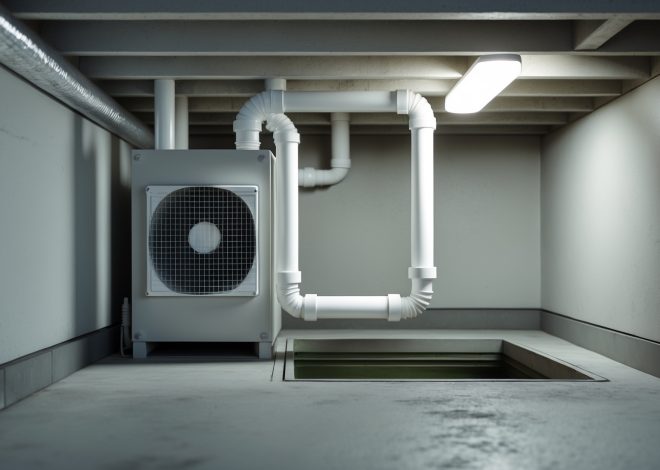
7. HVAC and Mechanical Systems
- Heating and Cooling: Test both systems for function and odd noises or odors.
- Thermostats: Check for accuracy and ease of use.
- Filters: Ensure recent change or cleanliness.
8. Attic, Basement, and Crawl Spaces
- Access: Open doors and hatches to check for signs of pests, leaks, or mold.
- Sump Pumps: Test operation if present.
- Stored Items: Note any belongings left behind by the seller.
9. Garage and Outbuildings
- Garage Door Openers: Test all openers and remotes.
- Lighting and Outlets: Check for operation and safety.
- Storage Areas: Inspect for unwanted items or damage.
10. Cleanliness and Debris
- Trash Removal: The property should be swept clean and free of personal belongings or garbage.
- Hazardous Materials: Ensure no chemicals or hazardous items remain.
Verifying Repairs and Contractual Obligations
Reference the inspection report and sales contract to confirm all agreed-upon repairs are complete. Request receipts or work orders if repairs are recent or significant. Physically verify each repair rather than relying solely on documentation. If something was missed, raise the issue with your agent immediately—delaying may complicate resolution post-closing.
Red Flags: Common Issues Discovered During Walkthroughs
- Missing Appliances or Fixtures: Items removed by the seller that were contractually included.
- New Water Damage: Stains, warping, or pooling after heavy rain or recent cleaning.
- Unfinished Repairs: Sloppy or incomplete work that doesn’t match documentation.
- Leftover Trash or Debris: Sellers sometimes leave behind unwanted items, especially in attics or basements.
- Pest Infestations: Signs of rodents, insects, or other pests that appeared after prior inspections.
- Non-functioning Major Systems: HVAC, water heater, or electrical issues that developed during vacancy.
What to Do If You Find a Problem
If you encounter a significant issue during your walkthrough, document it with photos and detailed notes. Contact your real estate agent immediately. Depending on the severity, you may:
- Delay closing until repairs or cleanup are completed.
- Negotiate a credit or escrow holdback for the estimated repair cost.
- In rare cases, withdraw from the purchase if the issue represents a material breach.
Minor issues (such as a missing lightbulb) are usually accepted, but anything that affects safety, function, or was contractually promised should be addressed before closing.
Expert Tips for a Smooth Walkthrough
- Schedule During Daylight: Natural light reveals issues artificial lighting can hide.
- Take Your Time: Don’t rush—set aside at least an hour for a thorough check.
- Bring a Friend or Agent: A second set of eyes can spot what you miss.
- Test Everything: Don’t assume anything works—flip every switch, open every door.
- Confirm Utilities Are On: Ensure power, gas, and water are active for testing.
- Double-Check Items Included in Sale: Use your contract as a reference to verify everything remains.
Printable Final Walkthrough Checklist
- Roof and gutters inspected
- Yard free of debris
- Driveways and walkways inspected
- All exterior doors and windows lock and open
- All included appliances present and functioning
- Plumbing (sinks, toilets, showers) tested, no leaks
- HVAC systems tested
- Water heater checked for leaks and operation
- All light switches and outlets tested
- Smoke/CO detectors present and working
- No trash or personal property left behind
- All repairs verified as completed
- All keys, remotes, and codes received
Conclusion: Protecting Your Investment with Diligence
The final walkthrough is your last safeguard against inheriting unexpected expenses or contractual breaches at closing. By approaching this step methodically and equipped with a detailed checklist, you empower yourself to spot issues that, left unchecked, could sour your real estate investment or homeownership experience. Remember, this walkthrough is not about nitpicking but about accountability—ensuring that what you agreed to buy is precisely what you receive.
If you find problems, act promptly and document everything. Most sellers and agents are keen to resolve issues quickly to avoid delays. However, your leverage is greatest before closing, so be thorough and resolute in your expectations. Bring your agent, take your time, and don’t hesitate to ask questions or request clarification on anything that seems amiss.
Ultimately, a successful final walkthrough isn’t just about avoiding unpleasant surprises; it’s a cornerstone of smart, confident real estate investing and home buying. By following the steps and strategies outlined in this guide, you can close on your new property with peace of mind, knowing you’ve protected your interests and maximized your investment.
2 thoughts on “How to Conduct a Thorough Walkthrough Before Closing on a Property: Step-by-Step Checklist”
Leave a Reply
Related Posts
Understanding Real Estate Roof Replacement: Cost Planning, Permit Steps, and Maintenance Tips

Spring Exterior Maintenance Checklist for Real Estate Owners: Protecting Curb Appeal and Property Value
If repairs were agreed upon after the inspection but I notice during the final walkthrough that some work wasn’t completed as specified in the purchase agreement, what steps should I take before closing?
If you discover that agreed-upon repairs weren’t completed during your final walkthrough, immediately notify your real estate agent and the seller. Request documentation or proof of completion for the repairs. You can ask to delay closing until the work is finished, or negotiate a credit or escrow holdback to cover the repairs. Make sure any agreement is put in writing before proceeding with closing.