
How to Audit and Upgrade Real Estate Lighting: Compliance, Cost, and Energy Savings
Introduction: Why Lighting Audits Matter in Real Estate
Lighting is more than a cosmetic feature in real estate—it’s a fundamental aspect that affects property value, tenant satisfaction, compliance with regulations, and ongoing energy expenses. Whether you own residential rentals, manage commercial space, or are prepping a property for sale, auditing and upgrading your lighting can yield significant benefits. Yet, many property owners overlook outdated fixtures, inefficient bulbs, and code noncompliance. These oversights can lead to higher utility bills, safety hazards, and even legal repercussions.
This comprehensive guide will walk you through the process of conducting a lighting audit, understanding compliance requirements, planning a cost-effective upgrade, and maximizing energy savings. We’ll also cover essential tools, common pitfalls, and actionable steps to ensure your real estate lighting meets modern standards and enhances your property’s appeal. By the end, you’ll know exactly how to approach your next lighting project for optimal results.
Understanding Lighting Audits: What, Why, and When
What Is a Lighting Audit?
A lighting audit is a systematic evaluation of all lighting systems within a property. It identifies the types, placement, condition, and efficiency of existing fixtures and bulbs, and assesses compliance with local codes and energy standards. The audit provides a roadmap for upgrades and maintenance, tailored to your property’s unique needs.
Why Conduct a Lighting Audit?
- Energy Efficiency: Outdated lighting can account for up to 40% of a building’s electricity use. Audits reveal opportunities to cut costs through upgrades.
- Compliance: Many municipalities require properties to meet specific lighting codes, especially for safety (e.g., emergency exits, exterior security).
- Tenant Satisfaction: Proper lighting improves comfort, productivity, and security—factors that boost tenant retention and property value.
- Maintenance Planning: Early detection of failing fixtures or wiring prevents costly emergencies.
When Is a Lighting Audit Needed?
- Before listing a property for sale or lease
- During annual property inspections
- After major renovations or code updates
- When utility bills spike unexpectedly
Pre-Audit Preparation: Tools and Documentation
Essential Tools
- Lux meter (for measuring light levels)
- Voltage tester
- Notebook or digital audit template
- Camera (to document fixture types and issues)
- Ladder and basic hand tools (for visual inspection)
- Manufacturer’s specs for existing fixtures and bulbs
Gathering Documentation
- Property blueprints or floor plans
- Past utility bills (12–24 months for baseline comparison)
- Previous inspection or maintenance reports
- Local building and energy codes
Step-by-Step Lighting Audit Process
1. Inventory All Existing Fixtures
Walk through each area of the property, recording the location, type (incandescent, fluorescent, LED, etc.), wattage, and condition of each fixture and bulb. Note any flickering, dimness, or discoloration. Use your camera for reference photos.
2. Measure Light Levels
Using a lux meter, check the light intensity in key areas (living spaces, hallways, stairwells, parking lots, emergency exits). Compare readings to recommended standards (e.g., 300–500 lux for offices, 100 lux for hallways).
3. Identify Inefficient or Non-Compliant Lighting
- Outdated technologies (incandescent, T12 fluorescent)
- Broken or missing fixtures
- Non-LED exit signs or emergency lights
- Improper placement or coverage (e.g., dark corners, overlit areas)
4. Assess Controls and Automation
Check for the presence and functionality of lighting controls such as:
- Occupancy sensors
- Daylight harvesting systems
- Timers and dimmers
- Centralized building management systems
Note areas where automation could reduce unnecessary usage.
5. Evaluate Exterior and Security Lighting
Inspect all outdoor lighting for coverage, fixture condition, and compliance with local ordinances (e.g., shielding to prevent light pollution, motion activation for security). Ensure all pathways, entrances, and parking areas are adequately lit.
6. Compile Your Findings
Organize your data into a spreadsheet or audit report. Prioritize upgrades based on safety, compliance, and energy savings potential.
Compliance: Navigating Codes and Permits
Key Compliance Areas
- Building Codes: Minimum lighting levels, emergency lighting, and fixture placement.
- Energy Codes: Requirements for fixture efficiency (e.g., mandatory use of LEDs in new construction or renovations).
- Accessibility: Proper illumination for ADA-compliant routes and entrances.
- Exterior Lighting Ordinances: Restrictions on brightness, shielding, and light trespass.
Permitting Requirements
Most lighting upgrades that involve rewiring, adding new circuits, or significant fixture replacement require a permit. Check with your local building department for:
- Electrical permits (for wiring and fixture changes)
- Energy compliance (documentation for code officials)
- Historic property restrictions (if applicable)
Common Compliance Pitfalls
- Ignoring emergency egress lighting requirements
- Using non-listed fixtures in damp or exterior locations
- Failure to provide lighting controls as mandated by code
Planning Your Upgrade: Budgeting and Cost Breakdown
Typical Upgrade Costs
- LED retrofit bulbs: $3–$15 per bulb
- New fixtures: $30–$300+ each, depending on style and quality
- Occupancy sensors/timers: $20–$100 per unit
- Professional installation: $50–$150 per hour (varies by region and complexity)
- Permits/inspections: $75–$500 depending on scope
Budgeting Tips
- Prioritize high-use areas for immediate upgrades (common areas, exterior, hallways)
- Phase your project if budget is limited—start with fixtures that offer the largest energy savings
- Factor in available rebates and incentives for energy-efficient lighting (check utility and state programs)
- Include contingency (10–15%) for unexpected wiring or code issues
Example Cost Breakdown
For a 10-unit apartment building:
- 50 interior fixtures upgraded to LED: $3,000
- Outdoor security lighting (6 fixtures): $1,200
- Occupancy sensors (10 common areas): $500
- Permits and inspections: $350
- Labor: $2,000
- Total Estimated Cost: $7,050
Maximizing Energy Savings: Practical Strategies
Switch to LEDs and High-Efficiency Fixtures
LEDs use up to 80% less energy than incandescent and last 10–25 times longer. Replace all screw-in bulbs and fluorescent tubes with ENERGY STAR-rated LEDs. For commercial properties, consider integrated LED panels for even greater efficiency and reduced maintenance.
Install Smart Controls
- Occupancy Sensors: Automatically turn lights off when rooms are vacant—ideal for restrooms, offices, and storage areas.
- Dimmers: Allow users to adjust light levels according to need, reducing energy use and extending bulb life.
- Timers: Schedule outdoor or common area lighting to operate only during required hours.
- Daylight Harvesting: Use sensors to dim artificial lighting when natural light is sufficient, especially in lobbies or offices with large windows.
Optimize Fixture Placement and Layout
Reassess the placement of fixtures to avoid over-lighting or dark spots. For example, wall-mounted sconces in hallways provide even illumination with fewer fixtures than overhead lights. In parking lots, use pole-mounted LEDs with directional optics to maximize coverage with minimal energy.
Regular Maintenance for Peak Performance
- Clean lenses, covers, and reflectors regularly to maintain brightness
- Replace failed bulbs promptly to avoid uneven lighting and safety hazards
- Inspect wiring and controls annually—faulty wiring can undermine efficiency and pose fire risks
Case Study: Lighting Upgrade in a Mixed-Use Property
Background: A 30,000-square-foot mixed-use building (retail and residential) struggled with high utility bills and tenant complaints about dim hallways and parking areas.
- Audit Findings: 60% of fixtures were outdated T12 fluorescents; no occupancy sensors; exterior lights were on all night regardless of use.
- Action Plan: Full LED retrofit; install occupancy sensors in hallways and restrooms; upgrade exterior lighting with motion-activated LEDs; adjust fixture placement to eliminate dark zones.
- Results: Annual electricity costs dropped by 38%. Maintenance calls for lighting failures decreased by 70%. Tenants reported improved satisfaction and safety.
Lesson: Even partial upgrades can yield measurable benefits, but a holistic approach maximizes savings and compliance.
Common Mistakes to Avoid During Lighting Upgrades
- Specifying incompatible bulbs for existing fixtures (e.g., wrong base type or wattage)
- Skipping permit applications for major electrical changes
- Neglecting to update exit and emergency lights to LED
- Overlooking the need for weatherproof fixtures outdoors
- Failing to consult local codes, resulting in failed inspections
Safety Checklist: Ensuring Secure Installations
- Always turn off power at the breaker before working on fixtures
- Use only UL-listed (or equivalent) fixtures and bulbs
- Hire a licensed electrician for rewiring or panel upgrades
- Test GFCI outlets and emergency systems after installation
- Label panels and circuits clearly for future maintenance
- Keep documentation of all upgrades for insurance and compliance
Maintenance Best Practices: Keeping Lighting Efficient
Schedule Routine Inspections
- Inspect all lighting systems quarterly
- Check controls and sensors for responsiveness
- Monitor energy use on utility bills for unexpected changes
Set Up a Lighting Maintenance Log
Record all repairs, bulb changes, and upgrades. Use the log to track fixture lifespans and plan proactive replacements, reducing downtime and costs.
Conclusion: Lighting Upgrades as a Smart Real Estate Investment
Upgrading your property’s lighting isn’t just about aesthetics—it’s a strategic move that enhances value, ensures legal compliance, and delivers long-term financial savings. A thorough lighting audit gives you a clear starting point, while understanding codes and budgeting helps you avoid costly missteps. By prioritizing high-impact areas and leveraging today’s efficient technologies, property owners can achieve significant reductions in energy use, improve safety, and boost tenant satisfaction. Remember, compliance is ongoing: as lighting standards evolve, regular audits and proactive upgrades will keep your property ahead of the curve.
Approach your next lighting project with a plan: inventory and assess, research compliance, budget realistically, and maintain your new lighting systems for lasting performance. The rewards—lower bills, happier occupants, and a safer, brighter property—are well worth the investment. If you’re unsure where to begin, consider consulting an experienced lighting professional or energy auditor. Their expertise can help you navigate local codes, maximize incentives, and deliver a lighting upgrade that pays for itself many times over.
14 thoughts on “How to Audit and Upgrade Real Estate Lighting: Compliance, Cost, and Energy Savings”
Leave a Reply
Related Posts
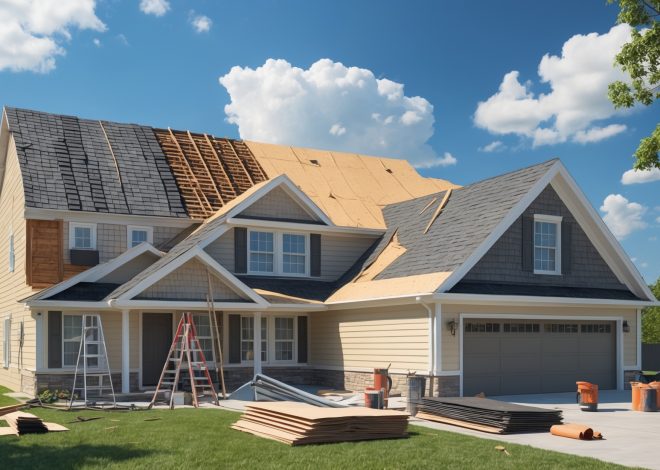
Understanding Real Estate Roof Replacement: Cost Planning, Permit Steps, and Maintenance Tips

Spring Exterior Maintenance Checklist for Real Estate Owners: Protecting Curb Appeal and Property Value
How often would you suggest conducting a lighting audit in a building, especially if I already did one a few years ago but some tenants have since changed the fixtures themselves?
It’s a good idea to conduct a lighting audit every 2 to 3 years, or sooner if there have been changes like tenants replacing fixtures. When tenants make their own changes, it’s important to revisit the audit to ensure ongoing compliance, safety, and efficiency. Regular audits help catch issues early and maintain consistent standards throughout the building.
For a commercial property owner with older fluorescent fixtures, which compliance issues are most commonly overlooked during a lighting audit, especially regarding emergency exits and exterior security lighting?
For commercial properties with older fluorescent fixtures, two commonly overlooked compliance issues are inadequate illumination levels for emergency exit routes and outdated or malfunctioning backup power for exit signs and emergency lighting. Exterior security lighting is often missed if it doesn’t provide sufficient coverage or doesn’t meet local codes for brightness and motion activation. During an audit, double-check that all emergency and exterior lights work properly, meet up-to-date code requirements, and have reliable backup power in case of an outage.
If I start a lighting audit now, about how long should I expect the entire process—including identifying issues and completing upgrades—to take for a medium-sized commercial property? Is there a typical timeline owners should plan for?
For a medium-sized commercial property, the full lighting audit and upgrade process usually takes between 4 to 8 weeks. The audit and assessment phase often takes 1 to 2 weeks, depending on property size and access. Once issues are identified, planning and sourcing can take another week or two, and the actual upgrade installation typically spans 2 to 4 weeks. Timelines can vary depending on building complexity and contractor availability, so it’s wise to plan for some flexibility.
After reading about the cost-saving potential of lighting upgrades, I’m wondering, about how long does it usually take for a property owner to recoup their upfront investment through lower utility bills and maintenance costs?
The payback period for lighting upgrades in real estate typically ranges from 1 to 3 years, depending on factors like the size of the property, local utility rates, and the specific technologies installed. Many property owners start seeing noticeable savings on their utility bills and reduced maintenance costs within the first year. Larger projects or higher-efficiency upgrades can sometimes shorten the payback time even further.
Could you give a rough estimate of how much an average lighting upgrade might lower utility bills in a small commercial space? I’m trying to figure out what kind of return I should expect based on energy savings.
For a small commercial space, upgrading to energy-efficient lighting like LEDs can reduce lighting-related energy costs by about 30% to 50%. This often translates to a 10% to 20% drop in total utility bills, depending on how much of your usage is lighting. Many businesses see payback on their investment within 1 to 3 years, especially if combined with rebates or incentives.
You discussed that lighting upgrades can cut up to 40% of a building’s electricity use. Are there certain types of fixtures or bulbs that offer the best return on investment for energy savings in a typical commercial space?
In most commercial spaces, LED fixtures and bulbs usually provide the best return on investment for energy savings. LEDs are much more efficient than traditional fluorescent or incandescent options, have longer lifespans, and require less maintenance. Retrofitting high-use areas with LED panels, tubes, or downlights can noticeably reduce energy costs while qualifying for rebates and incentives in many regions.
When planning for a lighting upgrade, how can I avoid the pitfall of overspending, especially if I need to meet both energy efficiency and safety compliance for my building?
To avoid overspending, begin with a thorough lighting audit to understand your building’s current needs and compliance requirements. Set a clear budget and prioritize upgrades that deliver the most energy savings while satisfying safety codes. Request multiple quotes from reputable vendors, and consider phased upgrades if needed. Always verify that proposed solutions are certified for both energy efficiency and safety compliance before making any purchases.