
Avoiding Common Real Estate Photography Mistakes: A Practical Guide for Sellers and Agents
Introduction: Why Real Estate Photography Matters More Than Ever
In today’s digital-first real estate market, your property’s first impression is almost always made online. According to the National Association of Realtors, over 95% of homebuyers begin their search on the internet, scrolling through hundreds of listings before deciding which homes to visit in person. The quality of your listing photos can make or break a potential buyer’s interest. Poor photography not only fails to showcase a property’s best features but can actively deter showing requests. Despite this, common mistakes plague even seasoned sellers and agents, from improper lighting to cluttered rooms and awkward angles. This guide dives deep into the most frequent real estate photography pitfalls, providing practical, step-by-step solutions for both homeowners and real estate professionals looking to maximize visual appeal, increase click-through rates, and ultimately drive faster, higher-value sales. Whether you’re DIY-ing your property photos or hiring a pro, understanding these mistakes—and how to avoid them—will set your listings apart in a crowded market.
Understanding the Impact of Bad Real Estate Photography
First Impressions Are Digital
With the majority of buyers forming their first impressions online, subpar photos can instantly disqualify a property before a showing is ever scheduled. Grainy, poorly lit, or misleading images may suggest neglect or even hide defects, causing suspicion and reducing trust in both the listing and the agent.
Data on Listing Performance
- Homes listed with professional-quality photos sell 32% faster than those with low-quality images.
- Listings with high-quality photos receive 61% more views than their counterparts.
- Properties with 20+ professional photos net higher sale prices on average.
Clearly, the stakes are high. Understanding exactly what mistakes to avoid is crucial to leveraging this advantage.
Top Real Estate Photography Mistakes (and How to Avoid Them)
1. Poor Lighting and Exposure
Lighting is the backbone of any great photograph. The most common mistake is shooting in low light, resulting in dark, uninviting images. Harsh direct sunlight can also cause glare and uneven exposure.
- Fix: Always shoot during the day when natural light is abundant. Open curtains and blinds. Supplement with lamps or overhead lighting if necessary. Avoid using a camera’s built-in flash, which causes harsh shadows.
- Tip: Schedule shoots for late morning or early afternoon for optimal ambient light.
2. Cluttered or Dirty Spaces
Buyers want to imagine themselves in the space. Clutter, personal items, and visible messes distract from the home’s features and shrink the perceived size of rooms.
- Fix: Declutter relentlessly. Remove personal photos, excess furniture, kitchen counter items, pet toys, and bathroom products. Clean every surface before shooting.
- Tip: Less is more. Empty countertops and open floor space make rooms look larger.
3. Awkward Angles and Composition
Shooting from the wrong perspective can distort room size or fail to capture the layout. Many novices shoot from standing height, which creates unnatural angles.
- Fix: Shoot from a corner at about chest height (typically 4–5 feet from the floor). This gives a sense of space and flow.
- Tip: Use a tripod to keep shots level and consistent.
4. Using the Wrong Equipment
Smartphones have improved, but most can’t compete with a dedicated camera and a wide-angle lens when it comes to real estate photos. Poor lenses can create blurry, narrow, or distorted images.
- Fix: Invest in or rent a DSLR or mirrorless camera with a wide-angle lens (16–24mm for full frame, 10–18mm for crop sensor).
- Tip: If using a phone, consider an attachable wide-angle lens and always use the highest resolution settings.
5. Overediting and Unnatural Effects
While editing can enhance photos, overdoing it with excessive brightness, saturation, or HDR effects makes images look fake and can create unrealistic expectations.
- Fix: Edit lightly: adjust brightness and contrast for realism, straighten lines, and crop as needed. Avoid filters or heavy HDR.
- Tip: Aim for natural, true-to-life colors and lighting.
6. Ignoring Key Selling Features
Photos that skip over major selling points—like updated kitchens, scenic views, or unique architectural elements—leave buyers uninformed and uninterested.
- Fix: Make a list of the property’s best features before the shoot. Ensure at least one clear photo of each highlight.
- Tip: Use a shot list to avoid missing critical spaces, such as closets, storage areas, or outdoor amenities.
7. Not Shooting Enough Photos
Listings with too few images look suspicious and fail to provide a complete sense of the space. Conversely, too many redundant or low-quality shots can overwhelm and bore buyers.
- Fix: Aim for 20–30 high-quality, non-repetitive images showing all rooms, exteriors, and key features.
- Tip: Sequence photos logically to mimic a walkthrough (entrance, living areas, kitchen, bedrooms, baths, outdoor spaces).
8. Skipping Exterior and Curb Appeal Shots
The first photo buyers see is often the exterior. Failing to capture curb appeal—or photographing on a gloomy day or with cars in the driveway—can lessen initial interest.
- Fix: Tidy the yard, remove vehicles, mow the lawn, and shoot when the weather is clear. Highlight landscaping and entryways.
- Tip: Consider twilight shots to create a warm, inviting glow.
Essential Pre-Photography Checklist
Room Preparation
- Declutter all surfaces and floors.
- Vacuum, dust, and mop every room.
- Hide cords, remotes, and trash bins.
- Open blinds and clean windows for maximum light.
- Remove pet bowls and litter boxes.
- Stage with neutral decor and minimal accessories.
Exterior Preparation
- Mow lawns and trim bushes.
- Sweep walkways and porches.
- Remove vehicles, toys, and garden tools from view.
- Wash windows and exterior surfaces.
- Add a fresh doormat or seasonal flowers if possible.
Lighting and Timing
- Schedule the photo shoot for late morning or early afternoon.
- Turn on all lights, including lamps and under-cabinet fixtures.
- Avoid shooting in harsh midday sun or after dusk (unless doing twilight photography).
Tools and Equipment Guide for DIY Real Estate Photography
Camera and Lenses
- DSLR or mirrorless camera with manual controls.
- Wide-angle lens (16–24mm full frame/10–18mm crop sensor).
- Smartphone with a high-res camera (as a backup), preferably with a wide-angle accessory lens.
Support and Stability
- Sturdy tripod for level, shake-free images.
- Remote shutter release or self-timer to prevent camera shake.
Lighting Accessories
- Portable LED lights or reflectors for dark rooms.
- Light stands for even illumination.
Editing Software
- Adobe Lightroom or free alternatives like GIMP or Snapseed for basic corrections.
- Photo straightening and cropping tools.
Step-by-Step Real Estate Photography Process
1. Plan and Scout the Property
Walk through the space ahead of the shoot to identify the best angles, lighting conditions, and any areas needing extra staging or cleaning.
2. Stage and Prepare Each Room
Follow your pre-photography checklist. Remove clutter, open blinds, and turn on all lights. Arrange furniture to maximize space and highlight flow.
3. Set Up Equipment
Position your tripod at chest height in a corner or doorway to capture the widest perspective. Adjust the camera’s white balance to match room lighting. Use a low ISO (100–400) for crisp, noise-free images.
4. Compose and Shoot
- Shoot each room from multiple angles, but avoid redundant shots.
- Frame images to include the floor and ceiling for depth, but avoid excessive ceiling or floor space.
- Straighten vertical lines (doors, windows) to avoid distortion.
5. Review and Edit
Transfer images to your computer. Review for focus, exposure, and composition. Edit lightly for brightness, contrast, and color correction. Crop and straighten as necessary.
6. Sequence and Upload
Arrange photos to mimic the flow of a property tour, starting with the front exterior, then entry, main living spaces, bedrooms, bathrooms, and finally outdoor areas. Upload in high resolution to your MLS or listing platform.
When to Hire a Professional Real Estate Photographer
Complex Properties
Luxury homes, properties with unique architectural features, or those with challenging lighting conditions benefit enormously from a pro’s expertise and equipment.
Marketing High-Value Listings
For higher-end listings, the return on investment from professional photography can be significant, attracting more qualified buyers and higher offers.
Time and Efficiency
Busy agents and sellers may simply not have time for DIY efforts. Pros can shoot, edit, and deliver listing-ready photos within a day or two.
Frequently Overlooked Areas in Real Estate Photography
- Closets and Storage: Spacious closets and pantries are valuable selling points but are often missed.
- Garages and Basements: Clean, organized utility spaces signal overall property care.
- Outdoor Living Spaces: Decks, patios, gardens, and pools should be shown in their best light.
- Views and Surroundings: If the property has a great view, include it. Show proximity to parks or amenities if applicable.
Best Practices for Consistently Great Real Estate Photos
- Always plan and prepare before shooting—rushing leads to mistakes.
- Emphasize cleanliness and decluttering above all else.
- Use a tripod and wide-angle lens for every room.
- Shoot at the right time of day for optimal light.
- Edit with restraint, aiming for natural, inviting images.
- Highlight every major feature and selling point of the property.
- Sequence photos for a logical, easy-to-follow “tour.”
Conclusion: Elevating Your Listings with Better Photography
In a real estate market where buyers make rapid, image-driven decisions, mastering the art of property photography is a critical skill for both sellers and agents. Avoiding common mistakes—such as poor lighting, cluttered spaces, awkward angles, and underutilized equipment—can transform even modest properties into captivating listings that generate more clicks, calls, and showings. By following the actionable tips and checklists outlined in this guide, you’ll be equipped to present every home at its absolute best, whether you’re handling photography yourself or working with a professional. Remember that every detail, from decluttering to proper sequencing, contributes to a buyer’s positive first impression and emotional connection to the space. The extra time and care invested in photography pay off not just in aesthetics, but in higher sale prices and faster transactions. As the market continues to evolve, the ability to create compelling visual narratives for your listings will remain one of the most effective tools in your real estate arsenal. Don’t let preventable mistakes hold your properties back—start implementing these best practices today and watch your results improve.
18 thoughts on “Avoiding Common Real Estate Photography Mistakes: A Practical Guide for Sellers and Agents”
Leave a Reply
Related Posts
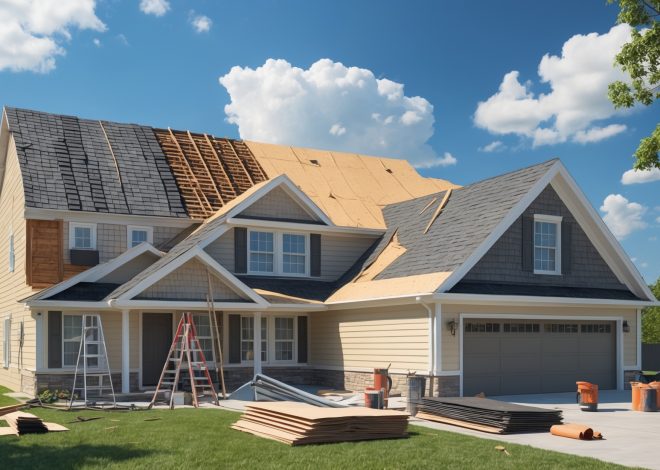
Understanding Real Estate Roof Replacement: Cost Planning, Permit Steps, and Maintenance Tips

Spring Exterior Maintenance Checklist for Real Estate Owners: Protecting Curb Appeal and Property Value
If an agent notices their listing isn’t getting much attention, what’s the first thing you suggest they check in the photos? Is it more about the photo quality, the way rooms are arranged, or something else?
If a listing isn’t getting much attention, the first thing to check is the photo quality—are the images bright, clear, and well-composed? Next, look at how the rooms are staged and arranged; clutter or awkward layouts can turn buyers away. Ideally, both quality and presentation should work together to make the home feel inviting and spacious.
You mentioned that homes with professional photos sell faster and for higher prices. Is there a recommended minimum number of photos I should include in my listing to get the best results?
Including at least 20 to 25 high-quality photos in your listing is generally recommended to attract more interest and achieve better results. This allows buyers to get a comprehensive view of the property, including key rooms, exterior shots, and any unique features. Just make sure every photo adds value and showcases the home’s best aspects.
Given that most buyers’ first impressions are digital, do you have any tips for correcting photos that might look misleading due to wide-angle lenses or heavy editing? Is there a way to avoid turning off buyers without sacrificing visual appeal?
To maintain trust with buyers, aim for photos that accurately represent spaces. When using wide-angle lenses, be careful not to over-stretch rooms—stand at natural entry points and avoid extreme distortions. For editing, focus on correcting lighting and color while keeping the scene realistic. Avoid removing permanent features or altering the layout. Honest, inviting photos build credibility and still attract serious buyers.
I noticed you mentioned that listings with 20 or more professional photos tend to get higher sale prices. If I’m taking the pictures myself, is there a recommended number of photos I should aim for to boost my listing without overwhelming buyers?
If you’re taking your own photos, aiming for around 20 well-composed images is a good target. This typically covers all main rooms, exterior views, and a few detail shots that highlight special features. Make sure each photo adds value and avoid including too many similar angles, as that can be overwhelming for buyers.
Can you give examples of what counts as ‘misleading images’ in real estate listings? I’m worried my efforts to show my place in the best light might accidentally look deceptive to buyers.
Misleading images typically include using overly wide-angle lenses that make rooms look much bigger than they are, editing photos to remove permanent flaws (like cracks or stains), or showing features that aren’t actually part of the property. It’s fine to tidy up and use good lighting, but be sure photos reflect the true condition and layout—buyers appreciate honesty and it builds trust.
When hiring a professional photographer, what questions should sellers or agents ask to ensure the photographer knows how to avoid the common mistakes outlined here, especially regarding awkward angles and misleading images?
When interviewing photographers, ask to see a portfolio of recent real estate work and specifically request before-and-after shots if available. Inquire how they approach capturing true room proportions and natural lighting. Ask what steps they take to avoid distortion and misleading wide angles, and discuss your concern about accurate representation. Clear communication about your expectations will help ensure they avoid the mistakes mentioned in the article.
For agents just starting out, what are some early warning signs in a photo that might indicate the need for a reshoot before posting the listing online?
When reviewing your photos, look out for things like poor lighting (rooms appear too dark or overly bright), visible clutter or personal items, awkward reflections in mirrors or windows, and crooked horizons or walls. Blurry images or photos that make spaces look cramped are also red flags. If you notice these issues, it’s usually best to reshoot before listing to make the strongest first impression.
Since listings with professional photos get so many more views, how do you suggest sellers or agents balance the cost of hiring a pro photographer versus doing it themselves, especially for lower-priced properties?
For lower-priced properties, sellers and agents can consider a hybrid approach. Invest in a professional for key rooms like the kitchen and living area, while photographing less critical spaces themselves. Another option is hiring emerging photographers who may offer quality at lower rates. If doing it yourself, use a good camera, ensure ample lighting, and declutter rooms to make photos as appealing as possible without incurring high costs.
I’m interested in the step-by-step solutions for avoiding common mistakes like clutter and awkward angles mentioned here. Could you provide more detail about how to stage or rearrange rooms to maximize their appeal in photos?
To maximize room appeal in photos, start by removing personal items and excess furniture to reduce clutter. Arrange furniture to highlight open space and natural pathways, making the room feel larger. Use matching, tidy linens and cushions, and ensure decor is minimal yet inviting. For photo angles, shoot from chest height and aim toward corners to show more of the room. Open curtains for natural light and turn on all lights to avoid shadows. These steps create cleaner, more attractive photos that appeal to buyers.