
Real Estate Attic Ventilation: Compliance, Cost, and Maintenance Essentials
Introduction: Why Attic Ventilation Matters in Real Estate
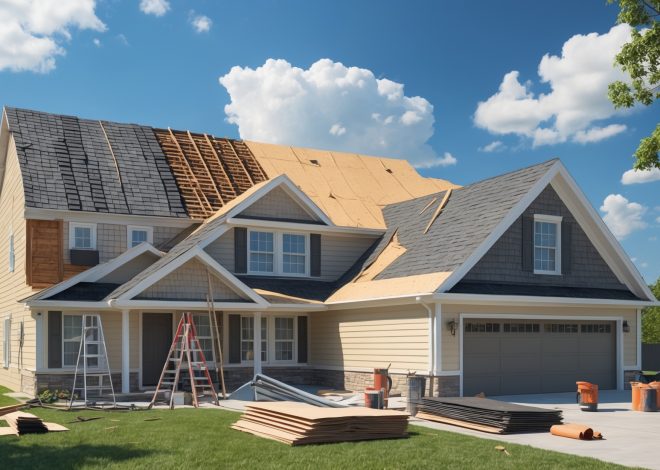
Attic ventilation is an often-overlooked aspect of real estate ownership, yet it plays a critical role in maintaining property health, energy efficiency, and long-term value. Whether you’re a new homeowner, property investor, or managing a rental portfolio, understanding the essentials of attic ventilation can save you from costly repairs, code violations, and tenant complaints. Proper attic airflow helps regulate temperature, controls moisture, prevents mold growth, and extends the lifespan of roofing materials. Conversely, poor ventilation can lead to a host of problems, including excessive energy bills, ice dams, wood rot, and premature roof failure.
In this comprehensive guide, we’ll break down the compliance requirements for attic ventilation, detail the costs involved in upgrades or repairs, and share maintenance best practices tailored for real estate professionals. You’ll learn how to assess existing ventilation, spot common issues, budget for improvements, and avoid regulatory headaches. With actionable tips and expert insights, this post will empower you to make informed decisions, protect your investment, and enhance the comfort and safety of your properties.
Understanding Attic Ventilation: The Basics
What Is Attic Ventilation?
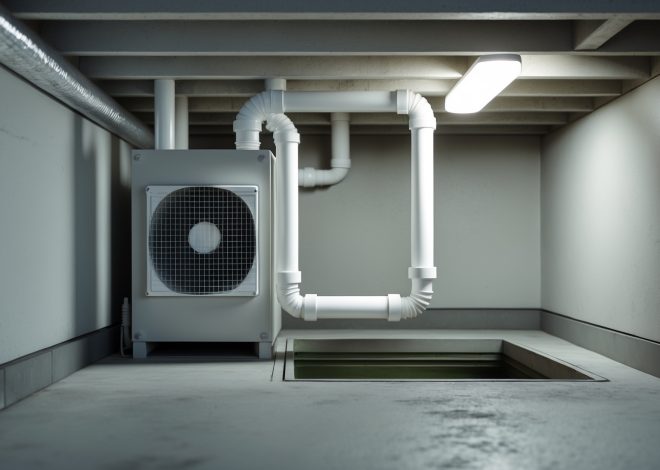
Attic ventilation is the process of allowing fresh outdoor air to enter the attic while enabling stale, moisture-laden air to escape. This airflow is typically achieved through a combination of intake vents (such as soffit or eave vents) and exhaust vents (like ridge, gable, or static vents). The goal is to create a balanced system that maintains consistent temperatures and humidity levels year-round.
Why Is It Important for Real Estate?
- Prevents Moisture Damage: Proper airflow reduces condensation, minimizing the risk of mold, mildew, and wood rot.
- Improves Energy Efficiency: A well-ventilated attic helps keep living spaces cooler in summer and reduces heat buildup, lowering air conditioning costs.
- Extends Roof Life: Reducing trapped heat and moisture protects roofing materials from premature deterioration.
- Enhances Indoor Air Quality: Lower humidity in the attic decreases the likelihood of allergens and pollutants entering living spaces.
- Prevents Ice Dams: In colder climates, ventilation helps maintain a consistent roof temperature, stopping ice dams from forming and damaging shingles.
Compliance and Building Codes: What Property Owners Need to Know
Key Regulations and Standards
Building codes governing attic ventilation vary by region but are generally based on guidelines from the International Residential Code (IRC) and local amendments. These codes specify minimum ventilation requirements to ensure adequate airflow.
- Ventilation Ratio: The most common standard is 1 square foot of ventilation (half intake, half exhaust) for every 300 square feet of attic floor space, assuming a vapor barrier is present. Without a vapor barrier, the ratio is 1:150.
- Vent Types: Codes often require a mix of intake (soffit/eave) and exhaust (ridge/gable/static) vents to ensure proper air circulation.
- Fire and Pest Prevention: Some jurisdictions mandate vent covers or baffles to prevent ember intrusion (in wildfire-prone areas) and animal entry.
Common Compliance Pitfalls
- Blocked Vents: Insulation or debris covering soffit vents is a frequent code violation.
- Improper Vent Placement: Locating intake and exhaust vents too close together reduces effectiveness and may not meet standards.
- Inadequate Vent Area: Failing to provide enough vent space for the attic size is a common oversight.
- Unapproved Products: Using non-certified venting products can result in failed inspections.
How to Check Local Requirements
Before making any upgrades, consult your local building department or a certified home inspector. Many municipalities provide checklists or documentation outlining attic ventilation standards. For investment properties, ensure compliance to avoid delays in sales or leasing and minimize liability exposure.
Cost Breakdown: Budgeting for Attic Ventilation Upgrades
Key Cost Factors
- Vent Type and Quantity: Static, ridge, and powered vents have different price points. More vents and larger attics increase costs.
- Labor: Professional installation is recommended for code compliance and roofing integrity. Labor rates vary by region.
- Roof Complexity: Steep or multi-level roofs may require more effort and safety equipment, raising labor costs.
- Material Quality: High-quality or specialty vents (e.g., wildfire-resistant) cost more upfront but can offer better durability and protection.
Typical Price Ranges
- Intake Vents (Soffit/Eave): $3–$10 per vent for materials; $75–$200 per vent installed.
- Exhaust Vents (Ridge/Static): $10–$40 per vent for materials; $150–$500 per vent installed.
- Powered Attic Fans: $90–$350 for the fan; $200–$600 for installation.
- Full Attic Ventilation System: $350–$1,500+ for a typical single-family home, depending on attic size and roof complexity.
Additional Costs to Consider
- Permits: Some areas require permits for roof penetrations or electrical work, adding $50–$200.
- Inspection Fees: Professional assessments can cost $100–$400.
- Repairs: Addressing water or pest damage before adding vents may increase your budget.
Budgeting Tips for Investors and Owners
- Get multiple quotes from licensed contractors to compare pricing and scope.
- Factor in long-term energy savings and reduced repair costs when evaluating ROI.
- Consider upgrades during other roofing work to minimize labor expenses.
- Plan for regular inspections to avoid surprise repairs.
Step-by-Step Attic Ventilation Assessment
1. Visual Inspection
- Check for existing intake and exhaust vents—count and note their locations.
- Look for signs of moisture: stains, mold, rusted nails, or damp insulation.
- Inspect for blocked or painted-over soffit vents.
- Examine for signs of animal intrusion or debris buildup.
2. Calculate Ventilation Needs
- Measure attic floor area (length × width).
- Apply the 1:300 or 1:150 ratio based on vapor barrier presence.
- Divide required vent area between intake and exhaust sources.
3. Evaluate Airflow Balance
- Ensure similar intake and exhaust vent areas for balanced airflow.
- Check for dead zones where air may stagnate, especially in large or irregular attics.
4. Professional Testing
- Consider using thermal imaging or humidity sensors to detect hidden issues.
- Hire a certified inspector for complex properties or before a sale.
Maintenance Best Practices for Property Owners
Annual Maintenance Checklist
- Clear debris and dust from vent openings, both inside and outside.
- Check for and remove any bird nests, insect hives, or rodent activity.
- Ensure insulation baffles are in place to keep soffit vents unobstructed.
- Inspect for rust or damage on metal vents and replace as needed.
- Repaint or reseal vent covers to prevent corrosion if applicable.
- Monitor attic temperature and humidity, especially after extreme weather.
Seasonal Tips
- Spring: Inspect after winter for ice dam or water intrusion damage.
- Summer: Check for overheating or fan failures (if using powered fans).
- Fall: Remove fallen leaves or debris from vent exteriors.
- Winter: Watch for condensation and ensure vents are not blocked by snow.
Common Maintenance Mistakes to Avoid
- Covering soffit vents with insulation during upgrades or repairs.
- Painting over vent screens, reducing airflow.
- Ignoring minor leaks or stains, which can indicate bigger ventilation issues.
- Forgetting to check attic ventilation when replacing a roof.
Case Study: Attic Ventilation Upgrade ROI
Scenario
A real estate investor purchased a 1980s single-family rental property in a humid region. The attic had minimal venting and showed signs of mold on the rafters and insulation.
Actions Taken
- Professional inspection and moisture testing confirmed poor airflow.
- Added soffit vents and a continuous ridge vent to meet code requirements.
- Replaced damaged insulation and installed insulation baffles.
- Upgraded attic access hatch with weatherstripping to minimize heat loss.
Results
- Mold and odor issues resolved within weeks.
- Tenant complaints about indoor air quality ceased.
- Average summer cooling costs dropped by 15%.
- Property value increased, supported by inspection reports during a refinance.
Tools and Equipment Guide
- Flashlight: For inspecting dark attic corners and vent openings.
- Measuring Tape: To calculate attic floor area and vent sizes.
- Insulation Baffles: Maintain clear airflow from soffit vents.
- Ladder: Access attic and exterior roof vents safely.
- Protective Gear: Gloves, mask, and goggles for dust and insulation particles.
- Humidity Gauge: Monitor attic moisture conditions over time.
- Thermal Camera (optional): Reveal hidden moisture or airflow issues.
Attic Ventilation Myths Debunked
- “More vents are always better.” Too many or poorly placed vents can cause weather infiltration and imbalance. Always follow code and balance intake/exhaust.
- “Powered fans solve all problems.” Fans can help in specific situations but may draw conditioned air from the living space if not properly sealed.
- “Attic ventilation is only for hot climates.” Cold climates also require ventilation to prevent condensation and ice dams.
- “Old homes don’t need updates.” Many older homes lack adequate ventilation by today’s standards and benefit from upgrades.
Insurance and Warranty Considerations
- Policy Requirements: Some insurers require proof of adequate attic ventilation for coverage, especially after claims related to water or mold damage.
- Roof Warranties: Manufacturer warranties may be voided if attic ventilation is insufficient or not up to code.
- Documentation: Keep records of upgrades and inspections for insurance and resale purposes.
Conclusion: Protecting Your Real Estate Investment with Smart Attic Ventilation
Attic ventilation is a deceptively simple yet vital aspect of property management that, when done right, pays dividends in comfort, efficiency, and long-term value. By understanding the science of airflow, staying compliant with building codes, budgeting appropriately, and following a regular maintenance routine, you can prevent a cascade of moisture, energy, and structural problems before they start. Attic ventilation upgrades are a relatively low-cost improvement that can yield significant returns, especially when paired with other energy efficiency measures.
For real estate investors and homeowners alike, proactive attic ventilation management reduces the risk of costly repairs, insurance claims, and tenant turnover. It also enhances your property’s marketability, as savvy buyers and renters increasingly seek homes with strong infrastructure and a track record of preventive maintenance. Don’t overlook your attic—give it the attention it deserves as a cornerstone of property health and value preservation. With the right approach, you’ll enjoy peace of mind, lower operating costs, and the satisfaction of a well-cared-for investment for years to come.
46 thoughts on “Real Estate Attic Ventilation: Compliance, Cost, and Maintenance Essentials”
Leave a Reply
Related Posts
Understanding Real Estate Roof Replacement: Cost Planning, Permit Steps, and Maintenance Tips

Spring Exterior Maintenance Checklist for Real Estate Owners: Protecting Curb Appeal and Property Value
Are there certain types of attic exhaust vents, like ridge versus gable, that offer better long-term performance or require less maintenance in climates with both hot summers and cold winters?
Ridge vents generally provide better long-term performance and require less maintenance than gable vents, especially in climates with hot summers and cold winters. Ridge vents allow for consistent airflow across the entire roof and are less prone to leaks or clogging. Gable vents can be less effective if wind direction changes or insulation blocks airflow. Regular checks are helpful, but ridge vents typically need less attention over time.
Could you elaborate on how to assess whether an attic ventilation system is truly balanced? Are there particular signs or measurements that real estate professionals should look for before scheduling upgrades?
To determine if an attic ventilation system is balanced, real estate professionals should compare the intake and exhaust vent areas—both should be roughly equal for optimal airflow. Look for signs like uneven attic temperatures, moisture buildup, or mold, which suggest imbalance. You can also measure airflow with an anemometer or consult professionals who can check if the net free vent area meets code requirements. These steps help ensure the system is functioning effectively before considering upgrades.
I’m interested in upgrading attic ventilation for a rental property. Could you give an estimate of the typical cost difference between basic repairs and a complete ventilation system overhaul?
For a rental property, basic attic ventilation repairs like replacing vents or patching leaks generally cost between $200 and $700. A complete ventilation system overhaul—which may include adding new ridge vents, soffit vents, and possibly a powered fan—can range from $1,500 to $4,000 depending on the attic size and local labor rates. Getting a few quotes from local contractors will give you a more precise estimate for your specific property.
You touched on avoiding regulatory headaches; can you explain the most common code violations related to attic ventilation and what steps I should take to ensure I stay compliant during upgrades or renovations?
Common attic ventilation code violations include having too few intake or exhaust vents, improper vent placement, or using non-approved vent types. To stay compliant, first check your local building codes for specific ventilation requirements. Measure your attic to calculate the correct amount of venting—usually a set ratio of vent area to attic floor area. Ensure vents are spaced properly, keep insulation from blocking airflow, and always use code-approved materials during upgrades.
As a landlord with several rental properties, I want to make sure I keep my attics well-ventilated to avoid tenant complaints and costly repairs. Can you clarify what signs I should watch for that indicate poor ventilation before it becomes a major problem?
Some early signs of poor attic ventilation include noticeable musty odors, excessive heat in the upper floors during summer, signs of condensation or moisture on rafters, and visible mold or mildew. You might also see warped or rotting wood, or ice dams forming on the roof in winter. Regularly inspect your attic for these issues—catching them early can help prevent bigger repairs and tenant discomfort.
Could you clarify how often attic ventilation systems typically require maintenance or inspection? Is there a recommended schedule to prevent issues like mold or ice dams before they become costly repairs?
Attic ventilation systems should generally be inspected at least once a year, ideally before extreme weather seasons like summer or winter. Regular checks help catch issues such as blocked vents, leaks, or moisture buildup, which can lead to mold or ice dams. If your area is prone to severe weather, consider inspecting every six months to stay ahead of potential problems.
When budgeting for attic ventilation upgrades, what are the primary factors that impact the overall cost? For example, do certain types of vents or roof layouts generally lead to higher expenses?
Several factors can influence the cost of attic ventilation upgrades. The type of vent you choose—such as ridge vents, turbine vents, or powered fans—will affect the price, with powered options usually costing more. Complex roof layouts, like those with multiple peaks or valleys, can require additional labor and materials, increasing expenses. The accessibility of your attic and the need for any structural modifications also play a role in the final cost.
I own a couple of rental properties, and you mention that proper attic ventilation can help reduce tenant complaints and energy bills. Can you explain how often I should have the attic ventilation inspected to avoid problems, and what warning signs I should look out for?
For rental properties, it’s a good idea to inspect attic ventilation at least once a year, ideally before summer or winter when temperature extremes can highlight issues. Look for warning signs like musty odors, visible mold, condensation on rafters, or unusually high energy bills. Also, check for blocked vents caused by insulation, debris, or nests. Regular inspections can help you catch problems early, keeping tenants comfortable and reducing maintenance costs.
I noticed you mentioned both soffit and ridge vents. Is one type better than the other for energy efficiency, or does it depend on the style of the home? Any advice on choosing between them would be helpful.
The effectiveness of soffit versus ridge vents mainly depends on your home’s roof design and attic layout. Both work best when used together, creating a balanced airflow from soffit (intake) to ridge (exhaust). If you have only one option, ridge vents usually provide more consistent ventilation across the roof, but they’re most effective on simple rooflines. Complex or hip roofs may benefit more from a combination or alternative vent types. It’s wise to match your ventilation system to your specific roof structure for optimal energy efficiency.
After improving attic ventilation, how long does it typically take to notice a drop in energy bills or improved comfort inside the house, or is it more of a gradual difference over a season?
Most homeowners will notice improved comfort, such as more consistent indoor temperatures, within a few days to a couple of weeks after enhancing attic ventilation. However, the drop in energy bills is usually more apparent over a longer term—typically after a full billing cycle or across a season, especially during peak heating or cooling months. Gradual improvements are common as your home’s temperature regulation stabilizes.
I’m curious about maintenance best practices you touched on. How often should property owners inspect attic vents for blockages or damage, and are there warning signs to look for before issues get serious?
Property owners should inspect attic vents at least twice a year, ideally in spring and fall. Look for warning signs like uneven attic temperatures, musty odors, visible mold, or damp insulation, which can signal poor ventilation. Also, watch for dust buildup or debris around vent openings. Addressing these signs early helps prevent bigger issues and keeps your attic ventilation system working efficiently.
If I suspect my attic has moisture issues but I’m not seeing visible mold or water damage yet, what are some subtle signs I should look for before it becomes a bigger problem?
Look for subtle signs such as a musty or damp smell in your attic, condensation on windows or rafters, rusted nails or metal fixtures, and insulation that feels damp or clumpy to the touch. Peeling paint or warped wood can also indicate excess moisture. Checking these areas regularly can help you catch problems early before mold or water damage appears.
I’m not sure how to spot problems with attic airflow. Are there any warning signs I can watch for before it turns into a big repair job?
You can watch for a few clear warning signs of attic airflow problems. Look for uneven temperatures in rooms below the attic, musty odors, or signs of mold or mildew in the attic space. Also, check for condensation on rafters, damp insulation, or ice dams on the roof in winter. Catching these early can help you avoid more expensive repairs down the line.
When budgeting for attic ventilation upgrades, what are the main cost factors that can make the price vary a lot? For example, does the type of vent—soffit versus ridge—affect the total cost much?
The cost of attic ventilation upgrades can vary significantly based on several factors. The biggest include the type of vent you choose—ridge vents are often more expensive to install than soffit vents due to labor and materials. Roof complexity, attic size, local labor rates, and whether existing vents need removal or repairs also impact the price. Custom solutions or integrating with your roof’s design can add to the cost as well.
Could you give some guidance on how long a typical attic ventilation upgrade project takes, from assessment to completion, for a standard single-family home?
For a standard single-family home, the entire attic ventilation upgrade process usually takes between 2 to 5 days. This includes the initial assessment, planning, getting any needed permits, and the actual installation. If your attic is easily accessible and the existing structure is in good shape, the work may be done even faster. Delays can happen if repairs or extra modifications are needed.
If a property is experiencing persistent high humidity and mold despite having both soffit and ridge vents, what would you recommend as the first troubleshooting step to identify the underlying problem?
Since the property already has soffit and ridge vents but still faces high humidity and mold, the first troubleshooting step should be to check for blockages or obstructions in the vents. Make sure insulation, debris, or even paint hasn’t covered soffit vents, and that ridge vents are free of clogs. This can reveal if airflow is actually reaching the attic as intended.
You mention moisture control as a key benefit of proper attic ventilation. If a property already has some visible signs of mold in the attic, is improving ventilation enough, or do I need to address the mold separately first?
Improving attic ventilation helps prevent future moisture issues, but it won’t remove existing mold. It’s important to address the mold directly first—this usually means cleaning and treating the affected areas following safety guidelines or hiring a professional if the mold is extensive. Once the mold is removed, upgrading your ventilation will help prevent it from coming back.
You note that attic ventilation can extend the lifespan of roofing materials. For someone considering a new roof soon, is it usually better to address ventilation at the same time as the reroofing, or can those projects be tackled separately without much extra hassle or cost?
It’s usually best to address attic ventilation at the same time as a reroofing project. Coordinating both ensures proper integration of vents with the new materials and can help prevent issues down the road. Doing them together is often more cost-effective and avoids the hassle of disturbing your new roof later to adjust ventilation.
You mention budgeting for ventilation upgrades—are there specific cost ranges for adding or replacing different types of vents, like gable versus powered vents, in a typical single-family home?
For a typical single-family home, adding or replacing gable vents usually costs between $150 and $400 per vent, depending on size and materials. Powered attic vents are more expensive, ranging from $300 to $700 including installation, since they require electrical work. Prices can vary by region and contractor, but these ranges should help you plan your budget.
When it comes to avoiding code violations, are there specific local or national regulations I should be particularly aware of for attic ventilation in rental properties?
You should pay attention to both local building codes and national standards like those from the International Residential Code (IRC) when it comes to attic ventilation in rental properties. Requirements often specify minimum ventilation areas, vent placement, and sometimes even acceptable vent types. Local codes can be stricter, so it’s wise to check with your city or county building department for any additional rules that apply to rentals in your area.
If I am managing several rental properties in different climates, how should I tailor attic ventilation strategies to account for regional variations in temperature and humidity?
When managing rentals in different climates, adjust attic ventilation to local weather. In hot, humid areas, prioritize high airflow to reduce heat and moisture buildup. In colder regions, ensure good insulation and balanced intake and exhaust vents to prevent ice dams and condensation. Regularly inspect vents for blockages and update materials or vent types as needed to suit each region’s specific requirements.
The article mentions that poor ventilation can lead to higher energy bills and even ice dams. If I’m experiencing rising utility costs but haven’t seen visible mold or wood damage, could it still be an attic ventilation issue?
Yes, rising utility costs can be a sign of poor attic ventilation even if you haven’t noticed mold or wood damage. Inefficient ventilation can trap heat in the summer and moisture in the winter, causing your HVAC system to work harder. It’s worth having a professional inspect your attic’s airflow to rule out ventilation issues and help improve your home’s energy efficiency.
For a property in a humid climate, what specific maintenance practices do you recommend to control moisture and prevent mold growth in the attic? Are there seasonal tasks that make a big difference in these situations?
In humid climates, it’s important to regularly inspect attic vents for blockages and ensure they’re clear of debris and insulation. Check for any signs of condensation or leaks after heavy rain and repair them promptly. Use a dehumidifier if needed during especially damp months. Seasonally, clean soffit and ridge vents in spring and fall, and make sure bathroom and kitchen exhaust fans vent fully outside. Regularly monitor attic insulation for dampness or mold and replace any affected sections right away.