
Winterizing Your Investment Property: A Detailed Step-by-Step Guide for Landlords
Introduction
Winter can be a challenging season for landlords and real estate investors. Sub-freezing temperatures, snow, and ice can cause thousands of dollars in property damage—often in ways that are preventable with the right preparation. Whether your rental property is occupied year-round or sits vacant during the cold months, winterizing it is crucial to protect your investment, reduce liability, and ensure your tenants remain comfortable and safe. This comprehensive guide provides a step-by-step approach to winterizing your investment property, offering actionable checklists, expert tips, and practical insights. You’ll learn how to safeguard your building’s exterior and interior, prevent frozen pipes, optimize heating systems, and communicate effectively with tenants—all while staying compliant with local regulations. By the end, you’ll have a clear process to follow each year, helping you avoid costly emergencies, insurance claims, and unhappy tenants. Let’s dive into the details of winterizing your investment property so you can approach the cold season with confidence.
Why Winterizing Matters for Investment Properties
Preventing Expensive Damage
Water damage from burst pipes, roof leaks from ice dams, and foundation cracks from frost heave are common winter hazards. Repairs can run from hundreds to tens of thousands of dollars, often exceeding insurance deductibles. Proactive winterization significantly reduces these risks.
Protecting Tenant Health and Comfort
Cold drafts, malfunctioning heat, and moisture intrusion can make living conditions unpleasant or even dangerous. Landlords have a legal obligation in many jurisdictions to provide habitable, safe housing. Winterization helps you meet these requirements and keeps tenants satisfied, reducing turnover and complaints.
Maintaining Insurance Coverage
Many property insurance policies require landlords to mitigate “foreseeable” risks. Failure to winterize—especially when a property is vacant—can lead to denied claims for freeze-related damage. Proper winterization is a best practice that can also reduce your premiums.
Pre-Winter Inspection: The Foundation of Winterization
Scheduling the Inspection
Begin your inspection at least a month before the first expected frost. Early action allows time for repairs and professional scheduling, especially for HVAC and roofing contractors who book up fast in the fall.
Exterior Inspection Checklist
- Roof: Check for missing, curled, or damaged shingles. Inspect flashing around chimneys and vents for gaps.
- Gutters and Downspouts: Remove leaves and debris. Ensure downspouts direct water at least five feet from the foundation.
- Siding and Trim: Look for cracks, loose boards, or gaps that could let in moisture. Caulk as needed.
- Windows and Doors: Inspect caulking and weatherstripping for deterioration. Replace where necessary.
- Foundation: Check for new cracks or signs of shifting. Seal minor gaps; consult a professional for major issues.
- Walkways and Stairs: Look for uneven surfaces or loose handrails. These become hazardous when icy.
Interior Inspection Checklist
- Attic: Inspect for adequate insulation and ventilation. Look for signs of leaks or animal intrusion.
- Basement/Crawlspace: Check for dampness, exposed pipes, and insulation quality.
- Furnace/Boiler Room: Ensure clear access and check for any signs of leaks or corrosion.
- Windows and Doors (Interior): Feel for drafts with your hand; note any cold spots or rattling panes.
Step 1: Insulate and Seal Your Property
Weatherstripping and Caulking
Even small gaps around doors and windows can let in cold air and allow heated air to escape, increasing energy bills and straining your HVAC system.
- Replace worn weatherstripping on all exterior doors and windows.
- Apply high-quality, paintable caulk to seal gaps around window and door frames.
- Install door sweeps to block drafts at the bottom of exterior doors.
Attic and Wall Insulation
Proper insulation reduces heat loss. Pay special attention to the attic, as heat rises and escapes through the roof.
- Ensure attic insulation meets or exceeds local code (typically R-38 or higher in cold climates).
- Add insulation to exposed basement or crawlspace walls and rim joists.
- Insulate any exposed pipes in unheated areas with foam pipe sleeves or heat tape.
Window Treatments
Install thermal curtains or cellular shades on windows to further reduce heat loss and drafts.
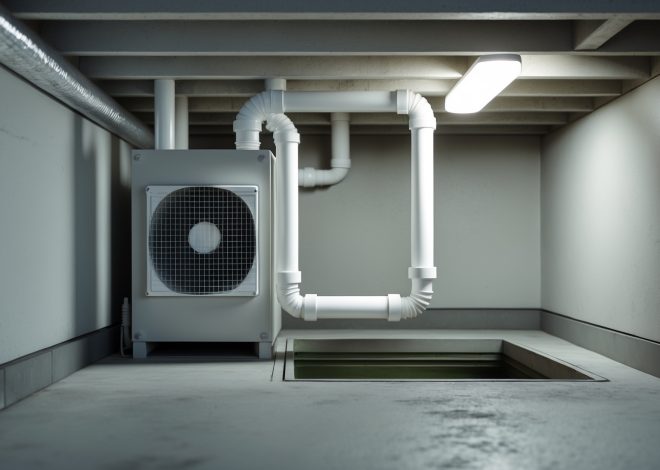
Step 2: Service and Optimize Your Heating System
Professional Furnace or Boiler Maintenance
Annual servicing extends equipment life and reduces the risk of mid-winter breakdowns. Schedule a licensed HVAC technician to:
- Clean and inspect burners, heat exchangers, and blowers.
- Check for gas or carbon monoxide leaks.
- Test thermostat and safety controls.
- Replace filters (or instruct tenants to do so monthly during peak use).
Radiator and Baseboard Heat
- Bleed air from radiators at the start of the season to ensure even heat.
- Vacuum dust from baseboard heaters to prevent fire hazards.
Programmable Thermostats
Install or check programmable thermostats to optimize energy use. For vacant properties, keep thermostats set no lower than 55°F (13°C) to prevent pipe freezing.
Step 3: Water and Plumbing Protection
Insulate and Protect Pipes
- Wrap exposed pipes in basements, crawlspaces, attics, and exterior walls with foam insulation.
- Install heat tape on vulnerable pipes if the property is in an area prone to extreme cold.
- Seal gaps around pipes entering exterior walls with expanding foam or caulk.
Outdoor Plumbing
- Shut off and drain exterior hose bibs and irrigation systems before the first freeze.
- Install insulated faucet covers on all outdoor spigots.
Interior Precautions During Vacancies
- If the property will be vacant, consider draining the entire plumbing system and shutting off the main water supply.
- Add non-toxic RV antifreeze to toilet bowls, tanks, and drain traps.
- Post clear signage for contractors or inspectors not to use the plumbing while winterized.
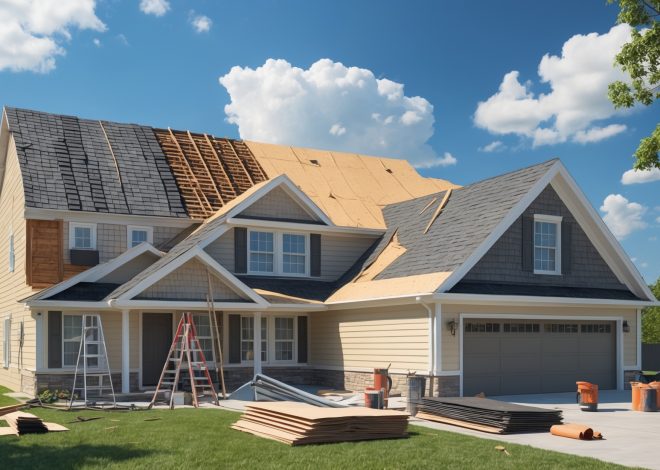
Step 4: Roof, Gutters, and Exterior Drainage
Roof Maintenance
- Repair damaged shingles, flashing, or ridge vents to prevent leaks.
- Trim overhanging branches to minimize ice dam risk and prevent storm damage.
Gutters and Downspouts
- Clear all debris from gutters and downspouts before winter.
- Install gutter guards if recurring clogging is an issue.
- Ensure downspouts discharge water away from the foundation.
Exterior Walkways and Stairs
- Apply non-slip coatings or adhesive strips to exterior stairs and walkways.
- Stock ice melt or sand in accessible locations for tenant use.
Step 5: Interior Humidity and Ventilation
Controlling Moisture
- Install or maintain bathroom and kitchen exhaust fans to prevent condensation and mold growth.
- Ensure attic vents are not blocked by insulation; proper airflow prevents ice damming and moisture buildup.
Dehumidifiers
In basement apartments or humid climates, provide dehumidifiers to keep indoor humidity below 50%.
Step 6: Safety Systems and Emergency Preparedness
Smoke and Carbon Monoxide Detectors
- Test and replace batteries in all detectors before winter.
- Install detectors on every floor, especially near sleeping areas and fuel-burning appliances.
Fire Extinguishers
- Verify that fire extinguishers are present, charged, and accessible in kitchens and utility areas.
Emergency Contacts and Information
- Provide tenants with emergency contact numbers for heating, plumbing, and property management.
- Post instructions for what to do if the heat goes out or pipes freeze.
Step 7: Special Considerations for Vacant Properties
Security
- Use timers for interior lights to give the appearance of occupancy.
- Arrange for regular property checks (by yourself or a trusted local contact).
- Secure all windows, doors, and any outbuildings.
Snow Removal
- Schedule snow removal for driveways and sidewalks to maintain curb appeal and reduce liability.
- Check local ordinances regarding snow removal requirements for vacant properties.
Step 8: Communicating with Tenants
Tenant Information Packet
- Prepare a short winter preparedness guide for tenants, including key actions (like keeping heat on, reporting leaks, and safe use of space heaters).
- Remind tenants of their responsibilities (e.g., keeping walkways clear, not blocking radiators).
Emergency Protocols
Communicate the protocol for reporting heating failures or water leaks. Encourage prompt reporting to prevent small issues from becoming major repairs.
Step 9: Documentation and Compliance
Keep Records
- Document all inspections, repairs, and maintenance activities related to winterization.
- Save receipts and contractor invoices for insurance or tax purposes.
Stay Up to Date with Local Laws
- Check municipal codes for landlord obligations regarding heat, snow removal, and habitability during winter.
- Ensure rental agreements reflect current local and state requirements.
Winterization Checklist for Landlords
- Inspect roof, gutters, siding, and foundation
- Seal gaps and add insulation as needed
- Service heating system and replace filters
- Insulate and protect all plumbing
- Drain and shut off exterior plumbing
- Maintain safe walkways and stairs
- Test smoke and carbon monoxide detectors
- Communicate with tenants about their role
- Document all maintenance and communication
Conclusion
Winterizing your investment property is not just a recommended practice—it’s an essential part of responsible asset management. The steps outlined in this guide are designed to protect your property from common winter hazards, maintain tenant comfort, and reduce your liability as a landlord. By starting early and following a systematic approach, you can minimize the risk of costly damage, preserve the long-term value of your real estate investment, and avoid the headaches that come with emergency repairs or insurance disputes.
Remember, each property is unique; adapt the checklist to your building’s age, location, and systems. Keep thorough documentation of all winterization measures to demonstrate due diligence to insurers and local authorities. Most importantly, maintain open communication with your tenants—clear instructions and timely responses build trust and encourage prompt reporting of issues.
Don’t treat winterization as a one-time event. Review and update your process each year as building codes, climate patterns, and property conditions evolve. A well-winterized property not only survives harsh weather but stands out as a safe, well-maintained, and desirable rental. Take these steps now, and you’ll enjoy peace of mind all winter long—knowing your investment is secure, your tenants are comfortable, and your bottom line is protected.
8 thoughts on “Winterizing Your Investment Property: A Detailed Step-by-Step Guide for Landlords”
Leave a Reply
Related Posts
Understanding Real Estate Roof Replacement: Cost Planning, Permit Steps, and Maintenance Tips

Spring Exterior Maintenance Checklist for Real Estate Owners: Protecting Curb Appeal and Property Value
Some of the repairs you mentioned, like roof leaks from ice dams and foundation cracks, sound expensive. For someone on a tight budget, which winterization steps have the most impact without costing a lot up front?
Focusing on affordable tasks can still make a big difference. Sealing gaps around doors and windows with weatherstripping or caulk helps prevent drafts and heat loss. Adding insulation to pipes reduces the risk of freezing. Cleaning gutters to prevent ice dams is also low-cost but effective. These steps are inexpensive, DIY-friendly, and help protect your property during winter.
You mention communicating with tenants as part of the winterization process. Could you give examples of what information I should share and how to encourage tenants to notify me early if they notice potential cold-weather issues?
Let your tenants know about any upcoming winterization work, like when maintenance teams will be on the property or if their access to certain amenities might be temporarily affected. Remind them to keep windows closed, set thermostats to a minimum safe temperature, and keep an eye out for issues like drafts, leaks, or unusual noises from heating systems. Encourage early reporting by reassuring them that prompt notifications help prevent bigger problems, and explain the best way to reach you if they notice anything unusual during cold weather.
Do you have any recommendations for dealing with older properties that have aging heating systems? I worry about compliance and tenant comfort, but full replacement isn’t always in the budget, so I’m curious about incremental steps that would help during winter.
With older heating systems, there are several incremental steps you can take before considering a full replacement. Schedule a professional inspection and regular maintenance to catch issues early. Add programmable thermostats to help regulate temperature efficiently. Seal drafts and insulate exposed pipes to keep heat in. Providing tenants with portable heaters as a backup can also help. Finally, check local codes to ensure your system still meets minimum safety and compliance standards.
If a landlord is new to owning property in a colder climate and unsure where to start, what would be the most urgent winterization steps to do in the first week before a cold snap hits?
In the first week, prioritize shutting off and draining outdoor water lines and sprinklers to prevent frozen pipes. Make sure all windows and doors are sealed to keep out drafts. Check that the heating system is working properly, replace furnace filters if needed, and set the thermostat to a safe minimum temperature. Insulate any exposed pipes, especially in basements or attics, to reduce the risk of freezing.