
Unlocking Real Estate Value: How to Conduct a Thorough Property Walkthrough Before Buying
Introduction: Why a Thorough Property Walkthrough Matters
Buying real estate is one of the most significant financial decisions you’ll make. Whether you’re a first-time homebuyer or a seasoned investor, a detailed property walkthrough is critical to avoiding costly surprises and ensuring you understand exactly what you’re buying. Many buyers focus on curb appeal or renovations, but neglect the systematic, room-by-room inspection that uncovers hidden issues and accurately evaluates a property’s true value. This comprehensive guide will teach you how to conduct a methodical walkthrough, what to look for in each area, and how to document your findings for effective negotiations. By mastering this skill, you’ll gain confidence, spot red flags before they become crises, and become a more informed, empowered real estate buyer.
Before You Arrive: Preparation Steps
Gather Essential Tools
- Notebook or mobile device: For taking notes and photos.
- Flashlight: To inspect dark corners, basements, and attics.
- Measuring tape: For checking room dimensions and verifying listing accuracy.
- Moisture meter (optional): To detect hidden water damage.
- Level (optional): For checking sloping floors or settling issues.
Review the Listing and Disclosures
Carefully read the property listing and any seller disclosures. Note any recent upgrades, known issues, or unique features to verify during your walkthrough. Prepare a list of specific questions for the seller or listing agent.
Set Your Priorities
Know your non-negotiables, such as number of bedrooms, structural integrity, or specific amenities. This helps keep your walkthrough focused and prevents distractions from cosmetic details.
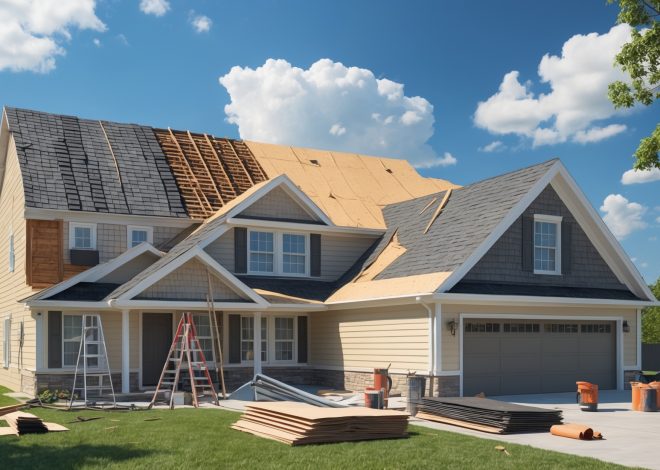
Exterior Inspection: First Line of Defense
Roof and Gutters
- Look for missing or damaged shingles, sagging, moss, or debris.
- Check gutters and downspouts for clogs, rust, or improper drainage away from the foundation.
Siding and Windows
- Inspect all siding for cracks, rot, bulging, or insect damage.
- Examine window frames for peeling paint, broken seals, or condensation between panes.
Foundation and Grading
- Walk the perimeter to spot cracks, bulges, or signs of water pooling near the foundation.
- Check that the ground slopes away from the house to prevent water intrusion.
Driveways, Walkways, and Landscaping
- Look for large cracks, uneven surfaces, or standing water.
- Assess trees and shrubs for proximity to the foundation and potential root issues.
Interior Walkthrough: Room-by-Room Assessment
Entryway and Common Areas
- Check for sticky doors, scuffed floors, water stains, or musty odors.
- Test light switches, electrical outlets, and examine ceiling fixtures for damage or flickering.
Living Room
- Look for uneven flooring or creaking boards.
- Inspect walls for cracks, settling, or fresh paint that might conceal repairs.
- Assess windows for smooth operation and intact locks.
Kitchen
- Test faucets for water pressure and leaks under the sink.
- Check appliances for age, functionality, and visible wear.
- Open cabinets and drawers to ensure they operate smoothly.
- Look for signs of pests in dark corners or behind appliances.
Bathrooms
- Examine caulking and grout for mold or gaps.
- Flush toilets and run showers to test drainage and water flow.
- Check for water damage under sinks and around tubs or showers.
Bedrooms
- Open and close doors, windows, and closet doors.
- Look for stains on ceilings or walls that indicate leaks.
- Test outlets and light fixtures.
Basement and Attic
- Sniff for musty or damp odors, which may signal moisture issues.
- Look for exposed wiring, insulation quality, and any signs of rodent infestation.
- Inspect visible plumbing and foundation walls for cracks, leaks, or efflorescence (white powdery residue).
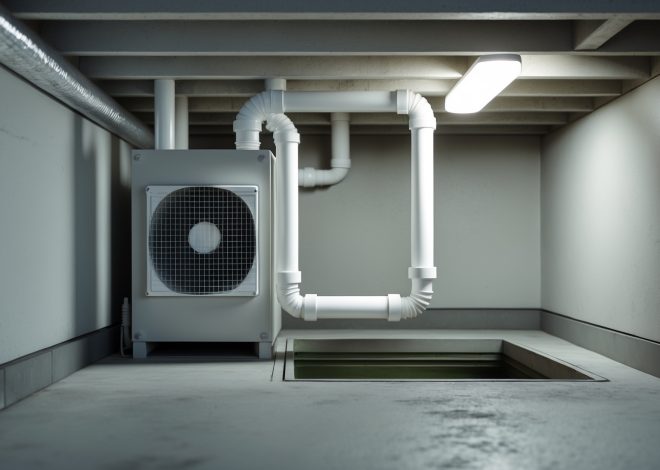
Mechanical Systems: The Heart of the Home
HVAC (Heating, Ventilation, and Air Conditioning)
- Note the age and condition of the furnace, AC unit, and ductwork.
- Check for recent service stickers or maintenance records.
- Listen for unusual noises during operation.
Plumbing
- Run faucets in multiple rooms to test water pressure and temperature consistency.
- Inspect visible pipes for corrosion, leaks, or nonstandard repairs.
- Check the water heater for age, rust, and proper venting.
Electrical
- Open the electrical panel (if accessible) to check for clear labeling and lack of corrosion.
- Test GFCI outlets in kitchens and bathrooms.
- Note any outdated wiring (such as knob-and-tube or aluminum) that could require upgrades.
Documenting Findings: Creating a Useful Record
Take Detailed Notes and Photos
Photograph every room, focusing on problem areas and unique features. Annotate your notes with specific locations and concerns, such as “crack above living room window” or “low water pressure in upstairs bathroom.”
Ask the Right Questions
- “How old is the roof/AC/water heater?”
- “Have there been any water or fire damage incidents?”
- “When were major systems last serviced or replaced?”
- “Are there warranties or manuals for appliances?”
Cross-Reference with Disclosures
Compare your observations with the seller’s disclosures. Any discrepancies should be clarified before you proceed further.
Red Flags to Watch For
- Extensive cracking in foundation or walls
- Persistent musty odors (potential mold)
- Signs of active leaks or water damage
- Windows or doors that don’t open, close, or lock properly
- Evidence of recent cosmetic repairs covering deeper problems
- Unusual hums, buzzes, or flickering lights (electrical issues)
- Pest droppings or gnawed materials
Advanced Tips: Going Beyond the Basics
Check for Energy Efficiency
- Look for double-paned windows and adequate insulation in the attic and walls.
- Ask for recent utility bills to gauge the property’s energy consumption.
Investigate Permits for Major Work
- Ask if major additions or remodels were properly permitted.
- Request documentation to avoid future compliance headaches.
Assess Neighborhood and Lot
- Walk the block to assess noise, traffic, and general upkeep.
- Check proximity to amenities, schools, and public transportation.
When to Bring In Professionals
While a thorough walkthrough is crucial, it doesn’t replace a licensed home inspection. If you spot anything concerning—foundation movement, severe roof wear, or electrical panel issues—hire a qualified inspector or relevant specialty contractor for further evaluation before finalizing your purchase.
Negotiation Leverage: Using Your Walkthrough Wisely
Documented issues from your walkthrough can become powerful tools in negotiation. Use your findings to:
- Request repairs or credits at closing
- Renegotiate the purchase price if major issues are uncovered
- Set realistic expectations for post-purchase improvements
Share your notes and photos with your real estate agent to help build a strong case during the offer process.
Conclusion: Becoming a Savvy Real Estate Buyer
Conducting a systematic property walkthrough is one of the smartest moves you can make as a real estate buyer. By preparing ahead, inspecting every element from roof to basement, and documenting your observations, you reduce the risk of inheriting costly repairs and gain confidence in your investment. Remember, even properties that look flawless at first glance can hide defects that only a careful eye will spot. Use this walkthrough not just as a checklist, but as a learning opportunity to understand how homes are constructed and maintained. Every walkthrough strengthens your ability to spot value, negotiate wisely, and avoid the pitfalls that catch less-prepared buyers by surprise.
When in doubt, always consult a professional inspector for a deeper assessment. But by mastering the basics of property evaluation, you ensure your next real estate purchase is built on a foundation of knowledge, not guesswork. The time you invest in a thorough walkthrough pays off in peace of mind, a stronger negotiating position, and the satisfaction of making a truly informed decision. Happy house hunting!
66 thoughts on “Unlocking Real Estate Value: How to Conduct a Thorough Property Walkthrough Before Buying”
Leave a Reply
Related Posts
Understanding Real Estate Roof Replacement: Cost Planning, Permit Steps, and Maintenance Tips

Spring Exterior Maintenance Checklist for Real Estate Owners: Protecting Curb Appeal and Property Value
The article mentions bringing a moisture meter and a level as optional tools for a property walkthrough. Are there specific signs I should look for before deciding to use these tools, or is it better just to bring them along every time?
It’s wise to bring a moisture meter and a level to every walkthrough, just in case. However, you might especially want to use them if you notice musty odors, water stains, warped floors, uneven doors, or visible cracks in walls and ceilings. These signs could indicate hidden moisture problems or structural issues. Having the tools on hand lets you check areas of concern immediately rather than guessing or making a second trip.
After documenting everything during the walkthrough, what is the best way to use your findings to negotiate a better purchase price or request repairs, especially in a competitive market?
Once you’ve documented issues during your walkthrough, review your list to identify significant repairs or concerns that affect the property’s value or safety. Present these findings to the seller, along with estimates if possible, and request either specific repairs or a price reduction. In a competitive market, focus only on major issues to keep your offer attractive, and communicate clearly and respectfully to show you’re serious but reasonable.
I see you mention checking upgrades listed in the disclosures, but what’s the best way to verify that those upgrades were done properly and not just cosmetic fixes?
To verify that upgrades were done properly and not just cosmetic, hire a qualified home inspector to assess the work. You might also ask for permits or receipts related to the upgrades, which can show if licensed professionals were involved. If possible, speak with the seller about the contractors used and request any warranties. This approach helps ensure the upgrades are both safe and up to code.
When reviewing seller disclosures and listings, are there any particular red flags we should look out for that might not be obvious during the walkthrough itself? For example, could certain upgrades actually mask underlying problems?
Absolutely, seller disclosures and listings can sometimes mention upgrades like new paint, flooring, or roofing, which may actually be covering up issues such as water damage, mold, or structural problems. Pay attention to vague statements about ‘recent repairs’ or ‘as-is’ conditions, and look for any history of flooding, pest treatments, or foundation work. If something seems glossed over or not fully explained, it’s wise to ask for more details and consider a professional inspection.
If the listing mentions recent upgrades, how should I verify those improvements during my walkthrough to make sure they were actually done well?
During your walkthrough, closely inspect the areas that were supposedly upgraded. Look for visible signs of quality, like new appliances, fresh paint, or updated fixtures. Test things like faucets, lights, and appliances to ensure they work properly. Don’t hesitate to ask the seller for receipts, warranties, or permits related to the upgrades. If you’re unsure about the quality, consider bringing a professional inspector for a more detailed evaluation.
You mention using a moisture meter and a level during the inspection. Are these tools necessary for a standard walkthrough, or are they more for people with construction knowledge or doing investment properties?
A moisture meter and a level are helpful tools, but they’re not strictly necessary for a typical homebuyer’s walkthrough. Most buyers focus on visible signs of issues like stains or uneven floors. However, if you want deeper insight or are considering an investment property where hidden problems can impact value, these tools can be very useful, even for non-experts, as they help spot issues early.
I noticed you mention taking photos and documenting findings to help with negotiations. Do you have tips on organizing this information so it is most effective when discussing repairs or price with the seller?
Organizing your walkthrough photos and notes effectively can really strengthen your position in negotiations. Try grouping photos and notes by room or issue, such as ‘kitchen appliances’ or ‘roof damage.’ Create a simple checklist or spreadsheet with columns for location, description, needed repairs, and estimated cost. This makes it easier to reference specifics with the seller and provides clear evidence to support your requests for repairs or price adjustments.
You mention the importance of preparing specific questions for the seller or agent. Could you provide examples of particularly useful questions you would ask based on recent upgrades or unique features noted in disclosures?
When a property has recent upgrades or distinctive features, you might ask: What was the reason for each upgrade and who completed the work? Are warranties or receipts available for new appliances, roofs, or HVAC systems? For unique features, such as solar panels or smart home technology, ask about ongoing maintenance, recent repairs, or compatibility with current systems. These questions help clarify the quality and future upkeep of improvements.
You mention using a moisture meter and a level as optional tools. Could you explain how much value those actually add for an average homebuyer, and whether it’s worth buying or borrowing those for a first walkthrough?
A moisture meter can help detect hidden water damage or leaks that might not be visible, which is especially useful in basements or bathrooms. A level allows you to check for sloping floors or misaligned door frames, hinting at structural issues. For a first walkthrough, borrowing these tools is usually enough, as most major problems can still be spotted visually, but they do provide extra peace of mind if you want a more thorough check.
If I’m constrained by time during a walkthrough, what would you consider the absolute must-check items, especially for someone buying an older property where surprises might be more likely?
If your walkthrough time is limited, focus on the essentials: check for signs of water damage (especially on ceilings and around windows), look at the condition of the roof, inspect plumbing under sinks for leaks, test electrical outlets and lights, and note any obvious cracks in walls or foundation. For older homes, these areas are most likely to reveal costly surprises.
I see you recommend documenting findings for negotiation purposes. Do you have suggestions for organizing those notes and photos so they are most persuasive when discussing issues with the seller or agent?
To make your walkthrough findings more persuasive, organize notes and photos room by room or by issue type, such as plumbing, electrical, or cosmetic. Create a simple report listing each concern, its location, and attach clear photos as evidence. Number your items for easy reference during negotiation, and group urgent or costly issues first so their impact is clear to the seller or agent.
When checking the exterior for issues like sagging roofs or clogged gutters as suggested, do you have any tips for distinguishing between normal wear and something that could indicate a bigger structural problem?
When inspecting the roof, look for uneven lines, dips, or areas where shingles are missing or curling—these can point to bigger issues than just age. For gutters, a little debris is normal, but sagging, rust, or water stains on walls below often suggest drainage problems that might affect the structure. If you notice significant cracks, persistent dampness, or visible rot, it’s wise to have a professional evaluate further.
Could you elaborate on what kinds of questions are most important to ask the seller or agent during the walkthrough, especially if the property has had recent upgrades or repairs listed in the disclosures?
During the walkthrough, it’s essential to ask about the specifics of any recent upgrades or repairs. Ask who performed the work (licensed professionals or DIY), whether permits were obtained, and if warranties are transferable. Inquire about the reason for the upgrades—were they routine maintenance or responses to issues like leaks? Request to see receipts or documentation, and check if any repairs are still under warranty. Clarifying these details will help you assess the quality and longevity of the improvements.
You suggest carefully reviewing seller disclosures and preparing specific questions. Can you give an example of a question that could reveal hidden issues, particularly regarding recent upgrades or repairs that might not be obvious during the walkthrough?
One useful question to ask is whether any recent upgrades or repairs were performed by licensed professionals and if warranties or permits are available. You could also ask, ‘Were there any past issues—like water leaks or electrical problems—that were fixed, and can you provide records or details about those repairs?’ This approach can uncover hidden concerns that may not be visible.
The article mentions bringing a moisture meter and a level for the walkthrough, but says they’re optional. In what situations would you say these tools are really necessary, and could I just rely on a home inspector for those checks later?
A moisture meter and a level are especially helpful if you suspect water damage, see staining, or notice uneven floors or walls during your walkthrough. These tools can give you instant insight into potential issues. While a home inspector will check these things in detail, bringing your own tools lets you spot red flags early and decide if the property is worth pursuing further.
After the walkthrough, what is the best way to organize and present your findings to the seller for negotiations? Should buyers rely solely on their notes and photos, or is there a more formal template you’d suggest?
Once you’ve completed your walkthrough, it’s helpful to compile your observations into a clear, organized report. This can be a simple document or spreadsheet listing issues, supported by your notes and photos. While personal notes help, a formal template—such as a checklist or summary with sections for each area of the property—can make your points more persuasive and easier for the seller to address during negotiations.
How do I know when I need to bring in a professional, like a home inspector or contractor, if I find something questionable with the roof or foundation during my walkthrough?
If you notice anything unusual or concerning with the roof or foundation—like visible cracks, sagging, water stains, or missing shingles—it’s wise to consult a professional. A home inspector can assess the issue in detail and let you know if repairs are needed. For visible damage or larger issues, bringing in a specialized contractor ensures you get accurate repair estimates and understand potential costs before making a purchase decision.
You suggested preparing a list of specific questions for the seller before the walkthrough. Could you share examples of the most important or revealing questions to ask that might not be obvious from the listing or disclosures?
Absolutely. Some insightful questions include: Have there been any recent repairs or renovations, and were permits obtained? Are there any past issues with pests, flooding, or foundation settling? How old are the major systems like the roof, HVAC, or electrical? Are there any neighborhood developments or zoning changes planned? Also, ask why the seller is moving, as this can sometimes reveal important context not in the listing.
After documenting my walkthrough findings, what’s the best way to use that information in the negotiation process with the seller or their agent?
Once you’ve documented your walkthrough findings, review them and highlight any issues or needed repairs. Use these points as leverage during negotiations by presenting your list to the seller or their agent. This can help you justify a lower offer or request that certain repairs be completed before closing. Being specific and organized with your findings strengthens your position and shows you’re making an informed offer.
For properties with basements or attics that are hard to access, do you have any tips on what to look for quickly, or tools that can help spot issues like sloping floors or poor drainage without a full inspection?
For hard-to-reach basements or attics, a strong flashlight and a telescoping mirror can help you spot obvious issues like moisture, cracks, or pest activity. For sloping floors, carry a small level or use a ball to see if it rolls on the floor. Look for water stains, musty smells, or any signs of mold to check for poor drainage or leaks, even if you can’t access every area fully.
If a buyer spots minor issues like clogged gutters or peeling siding during the exterior inspection, how do you suggest factoring these into the negotiation process? Should they be dealbreakers or more like bargaining chips?
Minor issues like clogged gutters or peeling siding are generally considered normal maintenance concerns rather than dealbreakers. They can be useful as bargaining chips during negotiation. You might ask the seller to either fix these problems before closing or provide a credit to cover anticipated repair costs. This approach can help you secure a better price or ensure the property is in better condition when you move in.
For someone who’s trying to stick to a budget, are there any lower-cost alternatives to a professional moisture meter or laser level that still give reliable results during a walkthrough?
Absolutely, there are some budget-friendly options. For moisture, you can use your hand to feel for dampness or look for visible signs like stains, peeling paint, or musty odors. For leveling, a simple bubble (spirit) level is inexpensive and can help check if floors or counters are even. While these methods aren’t as precise as professional tools, they can still alert you to obvious issues during your walkthrough.
You mentioned bringing a moisture meter and a level for detecting hidden water damage and sloping floors. Are there specific brands or features you recommend for these tools, especially for buyers who are new to doing their own inspections?
For new buyers, it’s wise to pick a moisture meter that’s easy to use and offers both pin and pinless testing—General Tools and Klein Tools are good beginner-friendly brands. For levels, a basic 24-inch spirit level from Stanley or Empire works well and is simple to read. Look for durability, clear displays, and battery indicators if the tool is digital. No need for advanced models; reliable, straightforward tools are perfect for walkthroughs.
For first-time buyers on a tight budget, what basic substitutes would you recommend if they can’t access optional tools like a moisture meter or a level during their self-guided inspection?
If you don’t have specialized tools, you can still check for key issues. For moisture, look for water stains, musty smells, or warped surfaces, which might suggest leaks. To assess if floors or walls are uneven, roll a small ball or bottle on the floor and see if it moves unexpectedly. For straightness of walls, use a piece of string or even your phone’s edge to eyeball it. These simple checks can help you spot potential problems.
When you talk about setting non-negotiables before the walkthrough, do you have any tips for how to keep track of those during the inspection? I’m worried I’ll get distracted by cosmetic stuff and forget my priorities.
One helpful approach is to make a written checklist of your non-negotiables before the walkthrough—things like structural integrity, plumbing, or neighborhood noise. Bring this list with you and refer to it as you move room to room. You might also jot quick notes or use your phone to snap photos related to your priorities, so you can review and stay focused after the tour.
When you mention using a moisture meter to check for hidden water damage, do you have any tips on specific places in the house where beginners should be sure to test? I always worry about missing something critical during my walkthroughs.
Absolutely, using a moisture meter in the right spots makes a big difference. Be sure to check around windowsills, along the baseboards (especially in basements and bathrooms), behind toilets, under sinks, and near any appliances that use water like dishwashers and washing machines. Don’t forget to test around the water heater and in any area where you notice stains or musty odors, as these can signal hidden moisture issues.
If I notice minor issues like clogged gutters or some cracked siding during the exterior inspection, should I be worried about bigger problems, or are these usually easy to resolve without a big impact on my renovation budget?
Minor issues like clogged gutters or a few cracks in the siding are fairly common and are usually easy and inexpensive to fix. However, it’s important to check if these small problems have led to any hidden damage, such as water infiltration or rot underneath. If the underlying structure is sound, repairs should have little impact on your renovation budget.
The article suggests preparing a list of questions for the seller or listing agent after reading the disclosures. Are there any specific examples of red flags in disclosures that I should definitely ask about during my walkthrough?
Absolutely, disclosures can reveal important red flags. Look out for mentions of past water damage, foundation issues, roof repairs, electrical problems, or evidence of pests. If you see any of these, ask for details and check the affected areas during your walkthrough. Also, ask about permits for renovations, as unpermitted work can lead to future problems.
How much time should I ideally spend on a typical property walkthrough to make sure I don’t miss hidden issues but also don’t overwhelm the seller or agent? Is there a recommended timeframe for a thorough inspection?
For a standard property walkthrough, setting aside about 45 minutes to an hour is usually enough to inspect each room, check systems like plumbing and electrical, and look for potential problems. If the property is larger or has unique features, you might need up to 90 minutes. Letting the seller or agent know in advance how much time you’ll need can help everyone feel comfortable and avoid feeling rushed.
The article suggests preparing a list of questions for the seller or agent based on reading disclosures. Can you give examples of questions that have helped buyers uncover hidden problems during their walkthroughs?
Certainly! Buyers often ask about the age and condition of major systems like the roof, HVAC, and plumbing after reviewing disclosures. Questions like ‘Have you had any recurring plumbing or electrical issues?’ or ‘Can you provide details about past repairs or water damage?’ are useful. It’s also helpful to ask, ‘Are there any areas that have been patched or repainted recently?’ since it might indicate prior issues. These questions encourage honest discussion and can reveal problems not obvious during a walkthrough.
After documenting issues and taking notes during the walkthrough, what steps do you recommend for organizing findings to strengthen negotiating power with the seller or agent?
Create a detailed summary list of all issues you found, grouping them by priority or category—such as safety concerns, structural problems, or cosmetic flaws. Attach photos for each item to provide clear evidence. Estimate repair costs where possible. Present this organized report to the seller or agent; it demonstrates you’re well-informed and gives you solid grounds to request repairs, credits, or a price reduction.
What would be a reasonable budget for purchasing the essential tools you listed, especially for small business owners needing to inspect multiple investment properties?
For small business owners, setting aside $150 to $300 should cover the basics for thorough property walkthroughs. This budget includes a good flashlight, tape measure, moisture meter, outlet tester, notepad, and camera or smartphone. Investing a bit more in higher-quality moisture meters or laser measurers can be worthwhile if you’ll be inspecting properties regularly.
If the listing claims recent upgrades but you notice signs of wear during your walkthrough, what’s the best way to approach this in negotiations or follow-up with the seller?
If you notice wear despite claims of recent upgrades, it’s wise to document specific issues with photos and notes during your walkthrough. Bring these up with your agent or directly to the seller, and ask for clarification or proof of the upgrades. This can provide leverage to request repairs, adjust the offer price, or negotiate credits before proceeding.