
Real Estate Drone Photography: Step-by-Step Setup, Regulations, and ROI Analysis
Introduction: Why Drone Photography is Transforming Real Estate Listings
The way properties are marketed has shifted dramatically in recent years, thanks in large part to the rise of drone photography. Once reserved for luxury listings or commercial sites, aerial imagery is now accessible to real estate professionals and property owners of all scales. These bird’s-eye views provide potential buyers with perspectives that traditional ground photography simply cannot match. From showcasing sprawling backyards to highlighting proximity to parks, schools, or waterfronts, drone photos enhance listings, generate more interest, and can even help properties sell faster and for higher prices.
However, embracing drone photography isn’t as simple as purchasing the latest flying gadget. There are critical steps to ensure your drone shoots are safe, legal, and deliver professional-quality images. Regulations are strict, equipment choices abound, and the return on investment (ROI) needs careful consideration, especially for agents or investors watching their budgets. This guide provides a practical, step-by-step walkthrough—from choosing gear and understanding compliance, to executing flawless flights and analyzing the business impact. Whether you’re a DIY enthusiast or a real estate pro, you’ll learn how to elevate your listings (literally and figuratively) with drone imagery while avoiding costly mistakes.
Understanding the Value: How Drone Photography Impacts Real Estate ROI
What Sets Aerial Imagery Apart?
Traditional property photography captures rooms, finishes, and curb appeal. Drone photos, on the other hand, reveal context: the size of the lot, the home’s relationship to its surroundings, and unique features like landscaping, pools, or outdoor amenities. For buyers, this context is invaluable—especially for larger properties, homes with scenic views, or those located in desirable neighborhoods.
- Showcases property scale and boundaries clearly.
- Highlights features not visible from the ground, such as roof condition or solar panels.
- Emphasizes location advantages—proximity to lakes, parks, or city centers.
Data-Driven Benefits
- Listings with aerial images receive up to 68% more attention online, according to MLS statistics.
- Properties marketed with drone photography can sell up to 32% faster in competitive markets.
- Luxury and acreage listings especially benefit, but even suburban homes see improved engagement.
Calculating the ROI
Drone photography costs range from $150 to $500 per session when hiring a pro, or $600–$1,500 for DIY setup (drone, accessories, software). A single session can help boost a sale price by 1–5% for homes in competitive areas. For agents, even a modest price bump or faster sale can easily offset the investment, especially when spread across multiple listings.
Legal Foundations: FAA Regulations and Local Compliance
Federal Rules for Real Estate Drone Use
In the United States, using drones for commercial purposes—including real estate photography—falls under the purview of the Federal Aviation Administration (FAA). The key requirements are:
- Part 107 Certification: Anyone flying a drone for commercial reasons must pass the FAA’s Part 107 knowledge test and obtain a Remote Pilot Certificate.
- Drone Registration: All drones weighing over 0.55 lbs (250g) must be registered with the FAA. The registration number must be clearly marked on the drone.
- Operational Rules: Fly below 400 feet, keep the drone within visual line-of-sight, no flying over people or moving vehicles, and operate only in daylight or civil twilight hours.
Local and State Restrictions
Municipalities and states can impose additional restrictions, such as bans on flying in certain parks or near airports. Always check local ordinances before planning a shoot. Use the FAA’s B4UFLY app to check for local flight restrictions and airspace maps.
Privacy and Property Rights
- Obtain written permission from property owners before capturing images of private land.
- Avoid capturing images or video of neighboring properties without consent to prevent privacy disputes.
- Be aware of state-specific privacy laws governing aerial surveillance.
Choosing the Right Drone and Equipment for Real Estate
Key Drone Features for Real Estate Photography
- High-resolution camera (at least 12MP).
- 3-axis gimbal stabilization for smooth, blur-free images.
- Automated flight modes (orbit, point of interest, waypoints) for cinematic shots.
- 30+ minute flight time per battery for uninterrupted shooting.
- Obstacle avoidance sensors for safer flights in tight spaces.
Recommended Drones (2024)
- DJI Air 3: Lightweight, excellent camera, robust safety features.
- Autel EVO Lite+: Superb low-light performance, long battery life.
- DJI Mini 4 Pro: Under 250g, easy to transport, no FAA registration required for hobbyists, but still need Part 107 for commercial use.
Essential Accessories
- Extra batteries (2–3 recommended)
- High-speed microSD cards (64GB+)
- ND filters for controlling exposure in bright sunlight
- Hard case for safe transport
- Spare propellers
- Tablet mount (for larger, brighter display)
Step-by-Step Setup: From Pre-Flight to Post-Processing
1. Pre-Flight Planning
- Scout the property in person or via satellite images to identify obstacles (trees, power lines, nearby structures).
- Check the weather forecast: Avoid rain, high winds, or low visibility.
- Confirm FAA airspace permissions and local ordinances.
- Charge all batteries and clear memory cards.
- Prepare a flight plan sketch—decide which angles, elevations, and features to capture.
2. On-Site Setup
- Choose a safe, open area for takeoff and landing.
- Calibrate the drone’s compass and IMU (inertial measurement unit) if prompted.
- Set camera parameters: RAW or high-quality JPEG, appropriate ISO and shutter speed, white balance adjusted to lighting conditions.
- Use ND filters if shooting in bright sunlight to avoid blown-out highlights.
3. Flight Execution
- Take test shots to confirm composition and exposure.
- Fly at varying altitudes (typically 15–120 feet) for different perspectives.
- Capture wide shots to show the full property and tight shots for details (pools, patios, outbuildings).
- Utilize automated flight modes for smooth, repeatable paths—especially for video.
- Always keep the drone within line-of-sight and monitor battery levels closely.
4. Post-Processing and Delivery
- Import photos into Lightroom, Photoshop, or other editing software.
- Adjust white balance, exposure, contrast, and correct lens distortion.
- If shooting video, use editing tools to stabilize footage and enhance colors.
- Export images in high-resolution (at least 3000px on the longest side) for MLS and web use.
- Rename files with property address and date for easy organization.
- Deliver final images and video securely via cloud links or branded client portals.
Drone Photography Safety and Risk Mitigation
Pre-Flight Safety Checklist
- Inspect drone and propellers for damage before each flight.
- Update firmware and app software as needed.
- Check for nearby wireless interference (cell towers, wifi networks).
- Announce your flight to people on-site and keep bystanders clear of the flight path.
- Know emergency procedures: Return-to-home, manual landing, and how to cut motors if needed.
Insurance Considerations
- Obtain drone liability insurance to cover potential damage or injury.
- Some homeowner or business policies exclude drone operations—check with your provider.
- On-demand insurance is available for one-off shoots (Verifly, SkyWatch).
Maximizing Impact: Best Practices for Listing Integration
Choosing the Right Shots
- Showcase front and back yards, property lines, and unique amenities.
- Include context shots highlighting nearby attractions (parks, lakes, city skyline).
- Consider twilight or golden hour flights for dramatic lighting.
MLS and Platform Guidelines
- Check your MLS for image/video upload limits and technical requirements.
- Some platforms restrict video length or file size—optimize accordingly.
- Avoid excessive branding or overlays that distract from the property.
Marketing Beyond the Listing
- Share drone shots on social media, agent websites, and email campaigns.
- Create short, engaging highlight reels for platforms like Instagram or YouTube.
- Use before-and-after aerials for renovation or landscaping projects.
DIY vs. Hiring a Professional: Cost, Quality, and Compliance
When to Go DIY
- You have multiple listings and want to amortize equipment costs.
- You’re willing to invest time in training and FAA certification.
- Consistent branding and creative control are priorities.
When to Hire a Pro
- One-time or infrequent needs.
- Complex airspace or legal requirements.
- Desire for cinematic video and advanced editing.
Professional drone photographers typically carry insurance, have high-end gear, and understand both aviation and real estate marketing. DIYers must weigh upfront costs, training time, and compliance responsibilities.
Common Pitfalls and How to Avoid Them
- Ignoring FAA rules—risking fines and grounding.
- Poor weather planning—leading to blurry images or accidents.
- Underestimating post-processing needs—raw drone images often require color correction and cropping.
- Failing to showcase context—focusing only on the house, not the surroundings.
- Neglecting privacy regulations—causing neighbor complaints or legal issues.
Conclusion: Elevate Your Listings with Smart, Compliant Drone Photography
Drone photography is no longer a luxury reserved for high-end real estate—it’s a powerful, accessible tool for any agent or investor looking to stand out in a crowded market. With the ability to capture unique perspectives, highlight property features, and provide essential context for buyers, aerial imagery can transform the impact of your listings and accelerate sales.
However, the benefits come with responsibilities. Adhering to FAA regulations, respecting privacy, and maintaining a strong safety culture are absolutely essential. Investing in the right equipment, developing a systematic workflow, and mastering both pre-flight planning and post-production will ensure your aerial shots deliver real value—not just pretty pictures. Whether you choose to take the DIY route or partner with a professional, understanding the full process (from compliance to editing to marketing integration) puts you ahead of the competition.
As the real estate market continues to evolve, properties marketed with drone imagery will increasingly become the standard. By following the step-by-step guidance in this article, you can harness the full potential of drone photography—boosting your ROI, dazzling your clients, and elevating your brand. Ready for takeoff? Your next standout listing could be just one flight away.
4 thoughts on “Real Estate Drone Photography: Step-by-Step Setup, Regulations, and ROI Analysis”
Leave a Reply
Related Posts
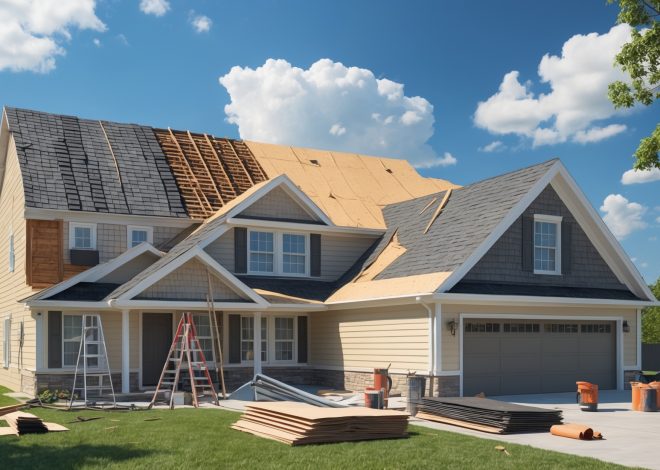
Understanding Real Estate Roof Replacement: Cost Planning, Permit Steps, and Maintenance Tips

Spring Exterior Maintenance Checklist for Real Estate Owners: Protecting Curb Appeal and Property Value
If a property is near parks or schools, are there any extra privacy or safety concerns to consider before flying a drone for marketing photos? I want to make sure I’m respecting any boundaries or rules.
Yes, flying near parks or schools does come with extra things to consider. You should check for local ordinances, as many areas restrict drone flights around schools for student safety and privacy. Parks sometimes have their own rules too. Always avoid capturing images of people, especially children, without consent, and keep a safe distance from both buildings and playgrounds. It’s wise to notify nearby property owners or school officials as a courtesy before flying.
I noticed you mention that drone photography can really help properties sell faster and for higher prices. Are there specific statistics or case studies that show the actual ROI difference for agents who use drone imagery versus those who don’t?
Yes, there are some compelling statistics highlighting the impact of drone photography in real estate. For example, a Multiple Listing Service (MLS) survey found that listings with aerial images sold about 68% faster than those with standard photos. Additionally, studies have shown that properties marketed with drone imagery can sell for 5-10% more on average. Agents using drones often report increased client interest and quicker sales cycles, supporting the ROI benefits mentioned.