
Real Estate Crawl Space Encapsulation: Cost, Compliance, and Long-Term Value
Introduction: Why Crawl Space Encapsulation Matters in Real Estate
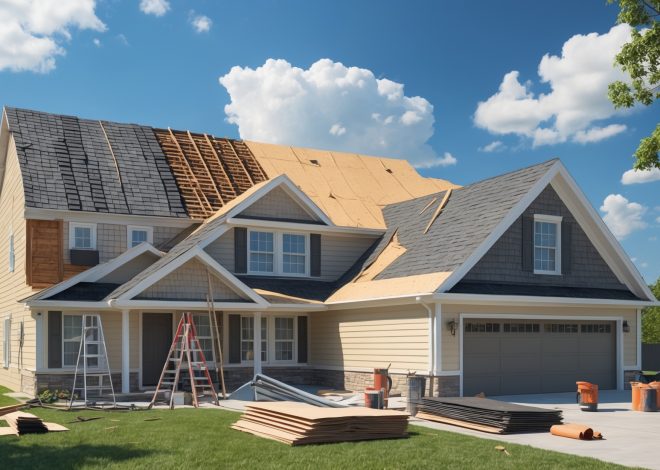
Among real estate maintenance and improvement projects, crawl space encapsulation is often overlooked—yet it can have a significant impact on property health, energy efficiency, and value. Moisture, mold, pests, and poor air quality can all stem from an untreated crawl space, leading to costly repairs, lost value, and even compliance issues for property owners and investors. Encapsulation is the process of sealing the crawl space with vapor barriers, insulation, and drainage solutions to create a controlled environment under the home. This guide dives deep into the practical details of crawl space encapsulation, including cost breakdowns, compliance requirements, essential tools and equipment, and the long-term benefits for real estate owners. Whether you’re considering encapsulation for a single-family rental, a multi-unit investment, or prepping a property for sale, understanding the process and its implications can help you avoid common pitfalls, maximize returns, and ensure lasting property health.
Understanding Crawl Space Encapsulation
What Is Crawl Space Encapsulation?
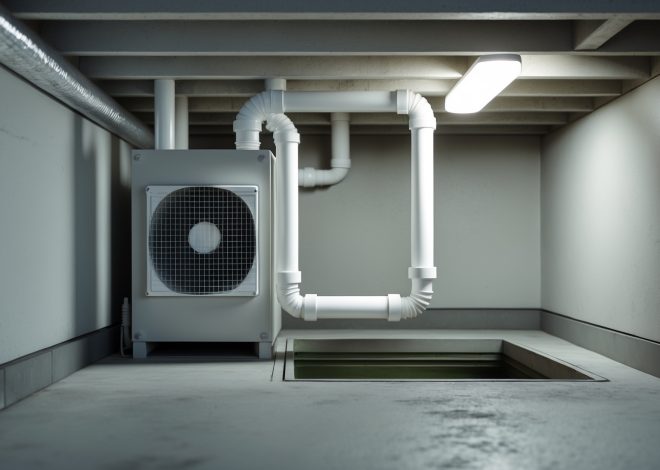
Crawl space encapsulation involves sealing the floor, walls, and vents of a crawl space with heavy-duty vapor barriers, installing insulation, and often adding dehumidifiers or drainage systems. The goal is to isolate the crawl space from ground moisture and outside air, thereby preventing mold, wood rot, pest intrusion, and air quality issues that can affect the living areas above.
Benefits for Real Estate Owners
- Moisture Control: Protects structural elements from rot and decay.
- Improved Air Quality: Reduces allergens and mold spores entering the home.
- Energy Efficiency: Lower heating/cooling costs by stabilizing underfloor temperatures.
- Pest Prevention: Blocks entry points for rodents and insects.
- Increased Property Value: Encapsulated crawl spaces are a selling point for buyers and inspectors.
Crawl Space Encapsulation Cost Breakdown
Main Cost Components
- Vapor Barrier Materials: 6-20 mil polyethylene sheets, seams tape, and anchors.
- Insulation: Rigid foam, spray foam, or batt insulation for walls and rim joists.
- Drainage and Sump Pumps: French drains, sump pump systems, and gravel if chronic water issues exist.
- Dehumidifiers: Crawl space-rated units for high humidity areas.
- Labor: Professional installation or contractor fees.
- Permits/Inspections: Local building permit fees, if required.
Typical Price Ranges
- DIY Encapsulation: $1,500 – $4,000 (materials only, 1,000-2,000 sq ft)
- Professional Encapsulation: $5,000 – $15,000+ (labor and materials, varies by region and scope)
- Optional Drainage/Sump Pump: $1,000 – $5,000 additional
- Dehumidifier System: $800 – $2,000
Factors influencing costs include crawl space size, height, accessibility, existing moisture problems, and local labor rates.
Budgeting Tips for Investors and Owners
- Get multiple quotes from licensed contractors.
- Request itemized bids for transparency.
- Ask about warranties on both materials and labor.
- Factor in ongoing maintenance (dehumidifier servicing, annual inspections).
- Consider the ROI: Encapsulation can reduce long-term repair costs and increase resale value.
Compliance and Permit Considerations
When Is a Permit Required?
Permit requirements for encapsulation projects vary by municipality. Generally, you may need a permit if:
- Installing new electrical circuits (for dehumidifiers, sump pumps).
- Making structural changes (joist repair, adding support posts).
- Major drainage work or tying into municipal systems.
Check with your city or county building department before starting any work. Unpermitted work can create headaches at sale or during inspections.
Building Code and Compliance Essentials
- Vapor Barrier Requirements: Minimum thickness (often 6 mil), properly sealed seams, and full coverage up walls to a specified height.
- Ventilation: Some codes require mechanical ventilation if vents are sealed.
- Insulation: Must meet local energy code R-values.
- Combustion Appliance Safety: Encapsulated areas with gas furnaces or water heaters may require additional venting or carbon monoxide detectors.
- Drainage: Outlets for sump pumps must comply with local discharge regulations.
Failure to comply can result in fines or the requirement to redo work to code.
Tools and Equipment Guide
Essential Tools for DIY or Inspection
- Utility knife or shears (for cutting vapor barrier)
- Measuring tape and chalk line
- Hammer drill (for wall anchors)
- Staple gun or mechanical fasteners
- Heavy-duty seam tape (specialized for vapor barriers)
- Work lights and protective gear (respirator, gloves, coveralls)
- Moisture meter (to assess baseline and post-encapsulation)
- Dehumidifier (if humidity is a concern)
Recommended Materials
- 6-20 mil polyethylene vapor barrier (white or clear for inspection ease)
- Rigid foam insulation for walls (closed-cell for moisture resistance)
- Poly-encapsulated fiberglass for band joists (if required by code)
- Sump pump with backup battery (for flood-prone areas)
- Mechanical ventilation fan (if required)
- Desiccant or electric dehumidifier (for ongoing moisture control)
Step-by-Step Crawl Space Encapsulation Process
1. Inspection and Preparation
- Check for existing mold, standing water, or pest infestations. Address these issues before encapsulation.
- Remove debris, old insulation, and any organic material.
- Ensure all plumbing and electrical lines are in good repair.
2. Address Drainage and Repairs
- Install French drains or a sump pump if water intrusion is present.
- Seal foundation cracks and repair damaged joists or supports.
3. Install Vapor Barrier
- Lay vapor barrier on the crawl space floor, overlapping seams by at least 12 inches.
- Seal seams with specialized tape.
- Extend vapor barrier up foundation walls (typically 6-12 inches or as code requires).
- Secure barrier with mechanical fasteners or adhesive anchors.
4. Insulate Walls and Rim Joists
- Install rigid foam or spray foam insulation on foundation walls.
- Seal rim/band joists with closed-cell foam or encapsulated fiberglass as required.
5. Seal Vents and Gaps
- Close off exterior vents with foam board and caulk or spray foam.
- Seal around pipes, wires, and other penetrations.
6. Install Dehumidifier or Ventilation
- Set up a crawl space-rated dehumidifier if humidity exceeds 60%.
- Install ventilation fans if required by code for combustion appliances.
7. Final Inspection and Maintenance Plan
- Check for gaps, loose seams, or missed areas.
- Document the encapsulation with photos for future reference or resale.
- Establish a maintenance schedule for dehumidifier and annual crawl space checks.
Long-Term Value: ROI and Resale Impact
Energy Savings and Health Benefits
Encapsulation can reduce energy costs by 10-20% for many properties. Improved indoor air quality is a major benefit, especially for families with allergies or asthma—selling points that can set a property apart.
Appraisal and Inspection Advantages
- Encapsulated crawl spaces are often viewed favorably by appraisers and inspectors.
- Reduces risk of negative findings during sale, such as mold, rot, or pest activity.
- May increase property value by $5,000-$10,000 or more depending on market and condition.
Insurance Implications
- Some insurers offer discounts for moisture mitigation measures.
- Reduced risk of claims for water damage, mold, and pest infestations.
Common Mistakes to Avoid
- Ignoring Existing Issues: Encapsulating over mold, rot, or water intrusion can accelerate damage.
- Improper Sealing: Gaps or poorly taped seams defeat the purpose of the vapor barrier.
- Skipping Drainage: Without drainage, standing water can build up under the barrier.
- Using Non-Rated Materials: Substandard vapor barrier or insulation will degrade, wasting your investment.
- Neglecting Maintenance: Forgetting to service dehumidifiers or inspect the crawl space can lead to new issues.
- Non-Compliance: Unpermitted or non-code work can cause trouble at resale or insurance claims.
Maintenance Best Practices
Annual Inspection Checklist
- Inspect vapor barrier for tears, loose seams, or punctures.
- Check insulation for sagging or moisture.
- Test dehumidifier function; clean and replace filters.
- Look for signs of pest intrusion (droppings, tunnels, chewed barriers).
- Monitor humidity with a digital hygrometer (keep below 60%).
- Check sump pump function and outlet if present.
Conclusion: Should You Encapsulate Your Crawl Space?
Crawl space encapsulation is a strategic investment for real estate owners and investors seeking to protect their properties, comply with local codes, and boost long-term value. While the upfront costs can be significant, the benefits—moisture control, energy savings, pest prevention, and health improvements—often far outweigh the initial expense. For property managers and investors, encapsulation can help prevent costly repairs, smooth the path to resale, and provide an attractive feature for potential buyers or tenants.
Successful encapsulation requires careful planning: assess existing conditions, budget accurately, ensure compliance, and use quality materials. Avoid shortcuts that could compromise the system’s effectiveness. Whether you choose to tackle the project yourself or hire a professional, maintain a regular inspection and maintenance schedule to preserve the benefits over time.
Ultimately, encapsulating your crawl space is about safeguarding your investment, providing healthier living environments, and enhancing your property’s marketability. By understanding the process and long-term value, you’ll be better equipped to make informed decisions and realize the full potential of your real estate assets.
44 thoughts on “Real Estate Crawl Space Encapsulation: Cost, Compliance, and Long-Term Value”
Leave a Reply
Related Posts
Understanding Real Estate Roof Replacement: Cost Planning, Permit Steps, and Maintenance Tips

Spring Exterior Maintenance Checklist for Real Estate Owners: Protecting Curb Appeal and Property Value
I’m interested in the long-term value aspect you mentioned—are there any studies or data that show how much crawl space encapsulation can actually increase resale value, or is it mostly a qualitative selling point?
Most evidence pointing to increased resale value from crawl space encapsulation is qualitative, focusing on how it improves home health, energy efficiency, and buyer appeal. There aren’t many large-scale studies with quantified resale value increases, but some realtors and home inspectors report that encapsulated crawl spaces make homes more attractive and can help justify higher asking prices, especially in humid areas. It’s generally seen as an investment in overall home quality rather than a guaranteed dollar-for-dollar return.
If a property has an existing moisture issue or some wood rot, would encapsulating the crawl space stop the problem from getting worse, or do you need to fully repair the damage first before encapsulation?
Encapsulating a crawl space can help prevent new moisture from entering, but it won’t fix existing damage like wood rot or ongoing moisture issues. It’s important to fully repair any damage and address the source of the moisture first. Otherwise, sealing in the problem can lead to further deterioration or even mold growth under the new barrier.
How much disruption should I expect to my tenants or business operations during the encapsulation process, and what’s a realistic timeframe for completing the work on a standard single-family home?
You can expect some disruption during crawl space encapsulation, but it’s usually manageable. Most work is done in the crawl space itself, so tenants or business activities inside the home are only minimally affected. Contractors may need access to utilities or certain entry points. For a standard single-family home, the process typically takes between 2 and 5 days, depending on the size and condition of the crawl space.
After encapsulating a crawl space, are there ongoing maintenance steps or inspections required to make sure the barriers, insulation, and dehumidifiers continue to perform effectively? What does routine upkeep look like for long-term value?
Yes, ongoing maintenance is important after crawl space encapsulation. You should inspect the vapor barriers and insulation at least once a year for any damage or moisture intrusion. Dehumidifiers need regular filter cleaning and occasional checks to ensure they’re draining properly. It’s also helpful to monitor humidity levels and look for signs of pests or mold. Keeping up with these tasks ensures your crawl space stays dry and protected over the long term.
Can you provide a rough estimate of how much crawl space encapsulation typically costs for a standard single-family rental? I’m trying to budget for this project and would appreciate a realistic ballpark, including if materials or labor are the bigger expense.
For a standard single-family rental, crawl space encapsulation usually ranges from $5,000 to $15,000. The final cost depends on the size of the crawl space, the extent of any repairs needed, and the materials chosen. Labor is typically the larger expense, often making up about 60 to 70% of the total cost, while materials account for the rest.
My main concern is moisture and possible mold under our rental property. Are there specific regulations or compliance requirements I need to be aware of in certain states, or is encapsulation generally accepted everywhere?
Encapsulation is broadly accepted across the US, but some states and localities have specific building codes regarding moisture barriers, ventilation, and materials used in crawl spaces. For example, states with higher humidity or flood risks may have stricter requirements. It’s a good idea to check with your local building department to ensure compliance, especially if you’re in a regulated area, and to use a licensed contractor familiar with local codes.
For real estate investors considering encapsulation before selling, how long does the process usually take from start to finish, and are there any common delays to watch out for?
Crawl space encapsulation typically takes between 3 to 5 days, depending on the size and condition of the space. Common delays can include unexpected moisture or mold issues that need to be addressed first, waiting for materials to arrive, or scheduling conflicts with contractors. It’s a good idea to have a professional inspection beforehand to anticipate any issues that might add time to the project.
You mentioned that encapsulation can help with energy efficiency by stabilizing underfloor temperatures. About how much can I realistically expect to save on my heating and cooling bills each year if I encapsulate a small single-family home?
Encapsulating the crawl space in a small single-family home can typically reduce your annual heating and cooling bills by about 10% to 20%. Actual savings depend on factors like your climate, existing insulation, and HVAC efficiency. For many homeowners, this can mean saving a few hundred dollars per year while also enjoying more consistent indoor temperatures and improved comfort.
Are there particular types of vapor barriers, insulation, or dehumidifiers that are recommended in areas with high humidity, or should the materials always be customized for each property?
In high humidity areas, it’s common to use reinforced polyethylene vapor barriers (at least 12-20 mil thick) and closed-cell spray foam insulation, as they both provide strong moisture resistance. Dehumidifiers should be rated for crawl spaces and sized based on square footage and moisture load. While these types are generally suitable, it’s best to customize materials and equipment based on a property’s specific conditions, like the amount of moisture present and the crawl space design.
For older homes with existing moisture or minor mold issues, is encapsulation enough to resolve those problems, or should remediation always come first before sealing everything up?
Encapsulation is an excellent way to prevent future moisture and mold issues, but if your crawl space already has moisture or even minor mold problems, it’s important to address those first. Remediation—removing mold and fixing sources of moisture—should come before encapsulation. Otherwise, sealing the space could trap existing problems and make them worse over time.
For a multi-unit building, is it more cost-effective to encapsulate all crawl spaces at once, or could it be done unit by unit as needed without risking future compliance or structural issues?
Encapsulating all crawl spaces in a multi-unit building at once is generally more cost-effective, as contractors often offer better rates for larger projects and you can streamline the permitting process. Doing it unit by unit could lead to uneven moisture protection and might complicate future compliance with building codes or HOA standards. Addressing all areas together helps ensure consistent air quality and structural protection throughout the building.
If a home has a history of moisture or pest issues, would encapsulation alone resolve these problems, or are there additional steps that should be taken first to ensure long-term effectiveness?
Encapsulation can help prevent future moisture and pest problems, but it’s important to first address any existing issues. Before encapsulation, you should repair any water leaks, fix drainage problems, and treat for pests if they’re present. Taking these steps beforehand ensures the encapsulation is effective and provides long-term protection.
Could you explain in more detail what kind of insulation and vapor barriers are typically used for encapsulation? Are there recommended brands or materials that hold up best in humid climates in the US?
For crawl space encapsulation, contractors often use rigid foam board or closed-cell spray foam insulation for the walls, since both resist moisture well. For vapor barriers, a 12-20 mil polyethylene sheet is standard, installed over the ground and sometimes up the walls. In humid US climates, products like Stego or Americover are popular for vapor barriers, and brands like Owens Corning or Dow are reliable for foam insulation. Always choose products specifically labeled for crawl spaces and with high moisture resistance.
For real estate investors, does encapsulation add enough long-term value to justify the upfront cost if you’re planning to sell the property soon, or is it better for those holding onto properties longer?
Encapsulation can make a property more appealing to buyers by addressing moisture issues and improving energy efficiency, but the full return on investment is most noticeable over the long term. If you’re planning to sell soon, it may help your property stand out and possibly command a higher price, but those holding onto properties longer generally see more direct financial benefits through reduced maintenance and utility costs.
Besides installing a vapor barrier and insulation, are there specific tools or techniques needed to make sure the encapsulation actually lasts long-term? Any maintenance steps owners should be aware of after the work is done?
To ensure crawl space encapsulation lasts, using a quality dehumidifier is important to control moisture. Sealing all vents, joints, and seams thoroughly with specialized tape or spray foam helps prevent air leaks. After installation, owners should periodically check for tears in the vapor barrier, inspect for water intrusion after heavy rain, and maintain the dehumidifier. Also, clear any debris that may accumulate to keep airflow unobstructed.
I’m considering encapsulation for a duplex rental property, but I’m concerned about compliance and local codes. Are there specific regulations or permits I should look out for, especially if I want to install a dehumidifier or add insulation?
When encapsulating a crawl space in a duplex rental, you’ll need to follow local building codes, which often require permits, especially for electrical work like dehumidifier installation. Insulation types and vapor barrier materials may also be regulated. Check with your local building department for specific requirements, and consider hiring a licensed contractor familiar with rental property compliance to ensure everything meets code.
The article mentions that encapsulation can help with energy efficiency by stabilizing underfloor temperatures. Do you have any data or examples on how much homeowners typically save on their heating and cooling bills after doing crawl space encapsulation?
Crawl space encapsulation often leads to noticeable energy savings by reducing drafts and keeping underfloor temperatures steady. While actual savings vary based on home size, climate, and insulation quality, homeowners commonly report reductions in heating and cooling costs of 10% to 20% after encapsulation. Some studies and utility audits have documented annual savings ranging from $200 to $500, depending on these factors.
How long does it usually take for the energy efficiency improvements and potential increase in property value to become noticeable after encapsulating a crawl space? I’m weighing whether it’s worth doing before putting my home on the market.
You can typically notice improvements in energy efficiency within the first month after encapsulating your crawl space, as your home will retain heat or cool air better. As for property value, the impact is immediate from a buyer’s perspective—encapsulation is seen as an attractive, value-adding feature right away, especially if you’re preparing to sell soon.
The article mentions adding drainage systems along with vapor barriers. Is this always necessary, or can I skip drainage if my crawl space doesn’t get much water? Trying to figure out what’s really needed for long-term value.
You don’t always need a drainage system if your crawl space stays dry throughout the year and shows no signs of standing water or moisture intrusion. However, if there’s even occasional water buildup or high humidity, adding drainage with your vapor barrier helps prevent future issues. For long-term value, it’s best to evaluate your specific conditions—sometimes a vapor barrier alone is enough, but drainage provides extra peace of mind if there are any moisture risks.
The article mentions energy efficiency improvements after encapsulation. Do you have any data or examples on how much property owners typically save on heating and cooling costs once a crawl space is sealed?
Property owners often see a reduction of around 15% to 25% in their heating and cooling bills after encapsulating a crawl space, though actual savings depend on factors like home size, insulation, and local climate. For example, if your monthly energy bill is $200, you might save $30 to $50 per month. Many users report their HVAC systems run less frequently and indoor temperatures stay more consistent after encapsulation.
If my crawl space already has insulation but no vapor barrier or drainage solution, would I need to remove the insulation first, or can it be integrated with the new encapsulation system?
If your crawl space insulation is in good condition and not damp or moldy, it can often be left in place and integrated with a new vapor barrier and drainage solution. However, if the insulation has been compromised by moisture, it’s best to remove and replace it after addressing moisture issues and installing proper encapsulation components for lasting effectiveness.
You mention that encapsulation can improve air quality and energy efficiency, but how quickly do homeowners typically notice these benefits after the work is completed?
Homeowners often notice improved air quality within a few days to a couple of weeks after crawl space encapsulation, as humidity levels drop and musty odors diminish. Energy efficiency benefits, such as lower heating and cooling bills, can typically be observed in the next utility cycle or two, so within one to three months after the work is completed.