
How to Audit and Upgrade Real Estate Insulation: Cost, Compliance, and Performance Guide
Introduction: Why Insulation Matters in Real Estate
Insulation is one of the most overlooked yet vital aspects of real estate ownership, whether you’re managing a single-family rental, a multifamily complex, or preparing a property for sale. Effective insulation delivers benefits that ripple across energy efficiency, indoor comfort, regulatory compliance, and long-term property value. However, many property owners underestimate the complexity of auditing existing insulation, navigating local codes, and budgeting for meaningful upgrades. In real estate, improper or outdated insulation can lead to higher utility costs, moisture issues, and even failed inspections. This comprehensive guide walks through the process of auditing and upgrading insulation in residential and small commercial properties, with a focus on cost breakdowns, compliance, recommended materials, and actionable steps. Whether you’re a first-time investor or a seasoned landlord, you’ll find practical strategies to optimize insulation performance and protect your investment.
Understanding Insulation Types and Their Roles
Common Insulation Materials
- Fiberglass Batts: Widely used, cost-effective, and easy to install. Suitable for attics, walls, and floors.
- Blown-In Cellulose: Made from recycled paper; excellent for filling irregular spaces and attic retrofits.
- Spray Foam: Offers high R-value per inch and air-sealing properties. Ideal for tight spaces, rim joists, and basements.
- Rigid Foam Boards: Used for exterior walls, basements, and crawlspaces where moisture resistance is critical.
- Mineral Wool: Fire-resistant and good for soundproofing. Used in walls, attics, and between floors.
Where Insulation Matters Most
- Attics: Up to 25% of heat loss can occur here. Prioritize for energy savings.
- Exterior Walls: Key to maintaining consistent indoor temperatures.
- Basements and Crawlspaces: Crucial for moisture control and preventing heat transfer from the ground.
- Floors Above Unheated Spaces: Essential in multi-unit or split-level buildings.
Step 1: Auditing Existing Insulation
DIY Audit vs. Professional Energy Assessment
Property owners can perform a basic DIY audit or hire a professional energy assessor. A DIY audit involves visually inspecting insulation levels and quality in accessible areas, while a professional uses thermal imaging, blower door tests, and moisture meters for a comprehensive analysis.
DIY Insulation Audit Checklist
- Inspect attic for bare spots, compressed or moldy batts, and air leaks around penetrations.
- Check wall insulation by removing outlet covers and peering into wall cavities.
- Look for signs of moisture, pest intrusion, or settling in basement and crawlspace insulation.
- Verify that insulation is not blocking ventilation (e.g., soffit vents in attics).
- Measure insulation depth; compare to local code requirements (typically R-38 to R-60 for attics).
Red Flags That Warrant a Professional Audit
- Persistent drafts or uneven temperatures between rooms.
- High utility bills with unexplained spikes.
- Visible mold, pest droppings, or moisture stains near insulation.
- Uncertain insulation type or age in older properties.
- Preparing for a major renovation or sale (disclosure requirements).
Step 2: Evaluating Compliance and Permit Requirements
Understanding Local Codes and Standards
Building codes dictate minimum insulation requirements (R-values) for different climate zones and areas of a property. Codes may be enforced at the city, county, or state level. Failing to meet these standards can lead to failed inspections, fines, or complications during sale or refinance.
- Consult your local building department or state energy office for current R-value requirements.
- Check if your property is in a historic or special zoning district with additional restrictions.
- Review any recent code updates around air sealing, vapor barriers, and fire safety (e.g., fire-blocking insulation in multifamily buildings).
When Permits Are Required
- Attic or wall insulation upgrades generally require a building permit if drywall, siding, or other finishes are disturbed.
- Spray foam installation may require fire barrier coatings or additional inspection.
- Exterior insulation retrofits (e.g., rigid foam boards under new siding) typically need permits and may trigger energy code upgrades.
- DIY upgrades in accessible attics or crawlspaces may be exempt but always confirm with your municipality.
Documentation and Inspections
- Retain all product receipts, manufacturer’s specifications, and contractor invoices.
- Take before-and-after photos for compliance records and future disclosures.
- Schedule required inspections before closing up walls or attics.
Step 3: Budgeting for Insulation Upgrades
Cost Breakdown by Insulation Type
- Fiberglass Batts: $0.50–$1.50 per sq ft installed
- Blown-In Cellulose: $1.00–$2.00 per sq ft installed
- Spray Foam (Open Cell): $1.00–$1.50 per board foot (1 sq ft at 1″ thick)
- Spray Foam (Closed Cell): $2.00–$3.00 per board foot
- Rigid Foam Board: $1.50–$3.00 per sq ft
- Mineral Wool: $1.00–$2.50 per sq ft
Prices vary by region, project scale, and accessibility (e.g., finished walls cost more to retrofit than open attics).
Typical Project Costs
- Attic Upgrade (1,000 sq ft): $1,000–$3,000 (fiberglass or blown-in)
- Exterior Wall Retrofit (1,500 sq ft): $2,000–$6,000 (blown-in cellulose)
- Basement or Crawlspace (500 sq ft): $800–$2,500 (rigid foam or spray foam)
Additional Costs to Consider
- Permits and inspection fees: $100–$500
- Disposal of old insulation: $0.30–$1.00 per sq ft
- Air sealing materials (caulk, spray foam, weatherstripping): $100–$400 per property
- Moisture remediation (if needed): $500–$2,000
Financing and Incentives
- Check for local utility rebates for insulation and air sealing.
- Consider energy improvement loans or green financing options.
- Some federal and state programs offer tax credits for qualifying upgrades (e.g., the Inflation Reduction Act in the U.S.).
Step 4: Choosing the Right Tools and Materials
Essential Tools for DIY Insulation Projects
- Protective gear: gloves, goggles, dust mask or respirator
- Utility knife and straightedge (for batts and foam boards)
- Staple gun and staples (for securing batts or vapor barriers)
- Blower machine rental (for blown-in cellulose or fiberglass)
- Measuring tape and ruler
- Caulking gun and spray foam cans (for air sealing)
- Ladder and crawlspace lighting
Material Selection Tips
- Use insulation with the correct R-value for your climate zone and area of application.
- Choose moisture-resistant products for basements and crawlspaces.
- Consider fire-rated or sound-attenuating batts for multifamily or mixed-use properties.
- Purchase 10–15% extra material to account for waste and odd spaces.
Step 5: Upgrading Insulation – Area by Area
Attic Insulation Upgrade
- Seal all air leaks around plumbing, wiring, and light fixtures before adding insulation.
- Install baffles to maintain airflow at soffit vents.
- Lay batts or blow in cellulose/fiberglass to achieve recommended depth (usually 12–18″).
- Ensure insulation does not block ventilation or come into contact with heat-producing elements.
Wall Insulation Retrofit
- For finished walls, drill access holes between studs and use a blower to inject cellulose or fiberglass.
- Patch and finish holes after installation.
- For open framing (during renovations), install batts or spray foam before closing up walls.
Basement and Crawlspace Insulation
- Apply rigid foam boards against concrete walls, sealing seams with tape or spray foam.
- For crawlspaces, insulate the perimeter walls and seal the floor with a vapor barrier.
- Never use fiberglass batts in damp or unventilated spaces, as they absorb moisture.
Floors Over Unconditioned Spaces
- Install batts or spray foam between floor joists, ensuring full coverage without compressing the material.
- Use mesh or netting to hold insulation in place if needed.
Step 6: Post-Upgrade Performance and Maintenance
Testing and Verifying Results
- Schedule a blower door test or use an infrared camera to check for remaining leaks and cold spots.
- Compare pre- and post-upgrade utility bills to measure energy savings.
- Monitor for condensation, musty odors, or pests—signs of improper installation or hidden moisture.
Ongoing Maintenance Tips
- Inspect attics and crawlspaces annually for disturbed, wet, or compressed insulation.
- Check around penetrations (vents, chimneys, pipes) after storms or renovations.
- Keep vents clear and replace any insulation that’s become contaminated by pests or moisture.
- Document all maintenance for future owners, tenants, or insurance claims.
Common Insulation Upgrade Mistakes to Avoid
- Ignoring air sealing: Adding insulation without sealing leaks leads to minimal energy savings.
- Using the wrong material: Fiberglass batts in damp basements can promote mold growth.
- Over-compressing insulation: Reduces R-value and effectiveness.
- Blocking ventilation: Can cause roof rot and ice dams in cold climates.
- Neglecting compliance: Upgrades that don’t meet code may require costly rework before a sale.
- Forgetting safety: Failing to use protective gear or check for asbestos in older homes.
Maximizing Return on Investment
Studies show that upgraded insulation can provide a return on investment (ROI) of 70%–120% at resale, in addition to annual utility savings. Market your property’s energy efficiency features to attract quality tenants or buyers. Document all upgrades and make them part of your property’s marketing package, especially in regions with high energy costs or strict disclosure requirements.
Conclusion: Insulation Upgrades—A Smart Real Estate Move
Investing in insulation is more than just an energy-saving tactic—it’s a strategic move for real estate owners seeking to enhance comfort, comply with building codes, and increase long-term property value. Whether you own a single rental or manage a portfolio, starting with a thorough insulation audit sets the stage for targeted improvements and cost-effective upgrades. By understanding local compliance requirements, budgeting wisely, and selecting the right materials for each area of your property, you can prevent common pitfalls and maximize your ROI. Remember, insulation upgrades often pay for themselves through lower energy bills, improved tenant satisfaction, and smoother property sales. Don’t overlook the value of meticulous documentation and ongoing maintenance, which safeguard your investment for years to come. With the guidance in this detailed performance, cost, and compliance guide, you’re equipped to make informed decisions and transform your property into a more resilient and efficient asset. Take the next step now—your future self (and your bottom line) will thank you.
20 thoughts on “How to Audit and Upgrade Real Estate Insulation: Cost, Compliance, and Performance Guide”
Leave a Reply
Related Posts
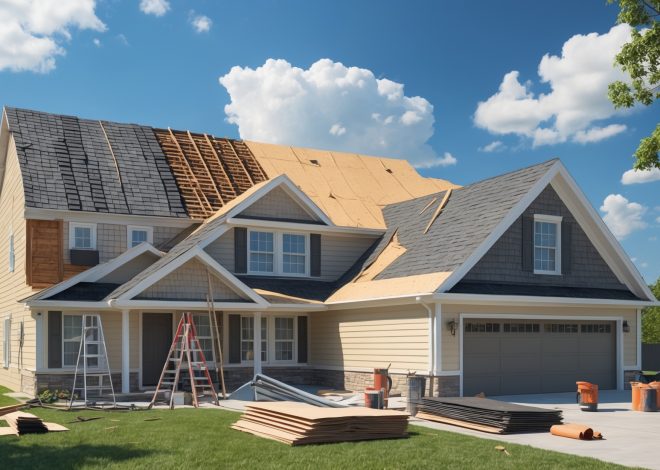
Understanding Real Estate Roof Replacement: Cost Planning, Permit Steps, and Maintenance Tips

Spring Exterior Maintenance Checklist for Real Estate Owners: Protecting Curb Appeal and Property Value
When considering upgrading insulation in a multifamily complex, how do you balance the cost differences between spray foam and blown-in cellulose, especially when prioritizing attics versus exterior walls? Any tips from your experience on where the ROI is best?
When upgrading insulation in multifamily complexes, attics typically offer a better ROI because heat loss through the roof is significant and upgrades are less labor-intensive compared to walls. Blown-in cellulose is often more cost-effective for attics. Spray foam, though pricier, is ideal for exterior walls where air sealing is essential or space is tight. Prioritizing attics first usually maximizes energy savings for the investment.
When budgeting for a full insulation upgrade, what are some hidden costs property owners should anticipate beyond just material and labor expenses?
Beyond material and labor, property owners should plan for costs like removing old insulation, repairing any damage found behind walls (such as mold or rot), potential upgrades to ventilation systems, disposal fees for old materials, and permit costs if required by local regulations. There can also be expenses for temporary relocation or protective coverings during installation, especially in occupied homes.
For someone preparing a property for sale, what insulation upgrades offer the highest return on investment, and are there particular materials or areas of focus that appeal to buyers in today’s market?
Upgrading attic insulation tends to deliver the highest return on investment, as heat loss is most significant there and buyers value energy efficiency. Focus on adding or improving insulation in attics and exterior walls using materials like fiberglass batts or blown-in cellulose, both of which are popular and cost-effective. Sealing gaps and insulating around windows, doors, and basements also makes a noticeable difference and appeals to buyers looking for lower energy bills.
Could you elaborate on what typical local code requirements property owners should check before starting an insulation upgrade, especially for small commercial properties?
Before upgrading insulation in small commercial properties, check local building codes for requirements on minimum R-values for walls, roofs, and floors. Confirm if vapor barriers are needed and whether there are guidelines for fire resistance or insulation materials. Some areas also require permits or energy compliance documentation. Contact your local building department to get the exact standards and documentation needed for your property type.
If I already have fiberglass batts in my attic but still notice higher utility bills and drafts, what should my next steps be? Is it worth adding another insulation type on top, or do I need a full removal and replacement?
If your attic already has fiberglass batts but you’re still experiencing drafts and high utility bills, it’s a good idea to first check for gaps, compression, or areas where the insulation may have shifted. Air leaks are a common culprit, so sealing attic penetrations and adding weatherstripping can help. You don’t always need a full removal—adding blown-in cellulose or spray foam on top can increase effectiveness. However, if the existing insulation is wet, moldy, or heavily damaged, replacement may be necessary.
I have a property with an unfinished basement that sometimes gets damp. Based on your guide, would rigid foam boards be the best option for moisture control, or should I consider something else?
Rigid foam boards are a strong choice for unfinished basements, as they resist moisture and help insulate below-grade walls. It’s important to install them directly against the foundation and seal all seams to prevent air leaks. You might also want to address any existing dampness by improving drainage or using a vapor barrier before insulating. If moisture is severe, consider consulting a professional to check for water entry points.
Could you clarify any rough cost ranges for upgrading crawlspace insulation specifically? I have a small multifamily property and I’m trying to ballpark expenses for rigid foam versus mineral wool in this area.
For crawlspace insulation in a small multifamily property, rigid foam board typically costs around $2 to $4 per square foot installed, depending on thickness and local labor rates. Mineral wool insulation tends to be slightly less expensive, roughly $1.50 to $3 per square foot installed. These prices can vary based on accessibility, local codes, and whether you need a vapor barrier or extra sealing. Always factor in prep work and possible moisture control upgrades.
If moisture issues are already present in a basement, would you recommend addressing those before upgrading insulation, or can installing rigid foam boards help resolve minor moisture problems at the same time?
It’s best to address any existing basement moisture issues before upgrading insulation. Installing rigid foam boards is excellent for moisture resistance, but if water problems aren’t fixed first, insulation could trap moisture and cause mold or structural damage. Fix leaks or dampness, ensure proper drainage, and then consider rigid foam boards for added protection and performance.
Can you explain how to estimate the cost of an insulation audit before actually hiring a professional? Are there any DIY steps to assess whether a full audit is necessary or not?
To estimate the cost of an insulation audit, check average local rates—most range from $200 to $600 depending on home size and audit complexity. For a DIY assessment, look for drafts, uneven temperatures, or visible gaps in insulation, especially in attics and around windows. If you notice significant issues, a professional audit is likely worthwhile. Otherwise, smaller improvements may be managed on your own.
The article mentions that spray foam has a high R-value but is ideal for specific spaces like rim joists and basements. How does the installation process and cost for spray foam compare to blown-in cellulose or fiberglass batts for a typical rental property?
Spray foam requires professional installation, which makes it more expensive than blown-in cellulose or fiberglass batts. While spray foam offers a higher R-value and air sealing benefits, especially useful in hard-to-reach areas like rim joists and basements, its upfront cost can be two to three times more. Blown-in cellulose and fiberglass batts are more budget-friendly and suitable for larger, open spaces such as attics and walls, and can sometimes be installed by the property owner.